Measure Settings
- Tap Measure
 and then tap Settings. The layout settings icon is highlighted.
 -
Tap the H. (Horizontal) Tolerance arrow to select from 1”, ½”, ¼”, 1/8” or 1/16”, or 25, 12, 6, 3, 1.5mm. Alternatively, you can choose the Custom Tolerance option and enter the desired measurement.
Points measured in the field that are outside this tolerance setting have a red lay out flag on the screen indicating the point was out of tolerance.
-
Tap the V. (Vertical) Tolerance arrow to select from 1”, ½”, ¼”, 1/8”, 1/16”, or Ignore, or 25, 12, 6, 3, 1.5mm. Alternatively you can choose the Custom Tolerance option and enter in your desired measurement.
Points measured in the field that are outside this tolerance setting have a red lay out flag on the screen indicating the point was out of tolerance. If you select Ignore, vertical elevation measurements are used for tolerance flags.
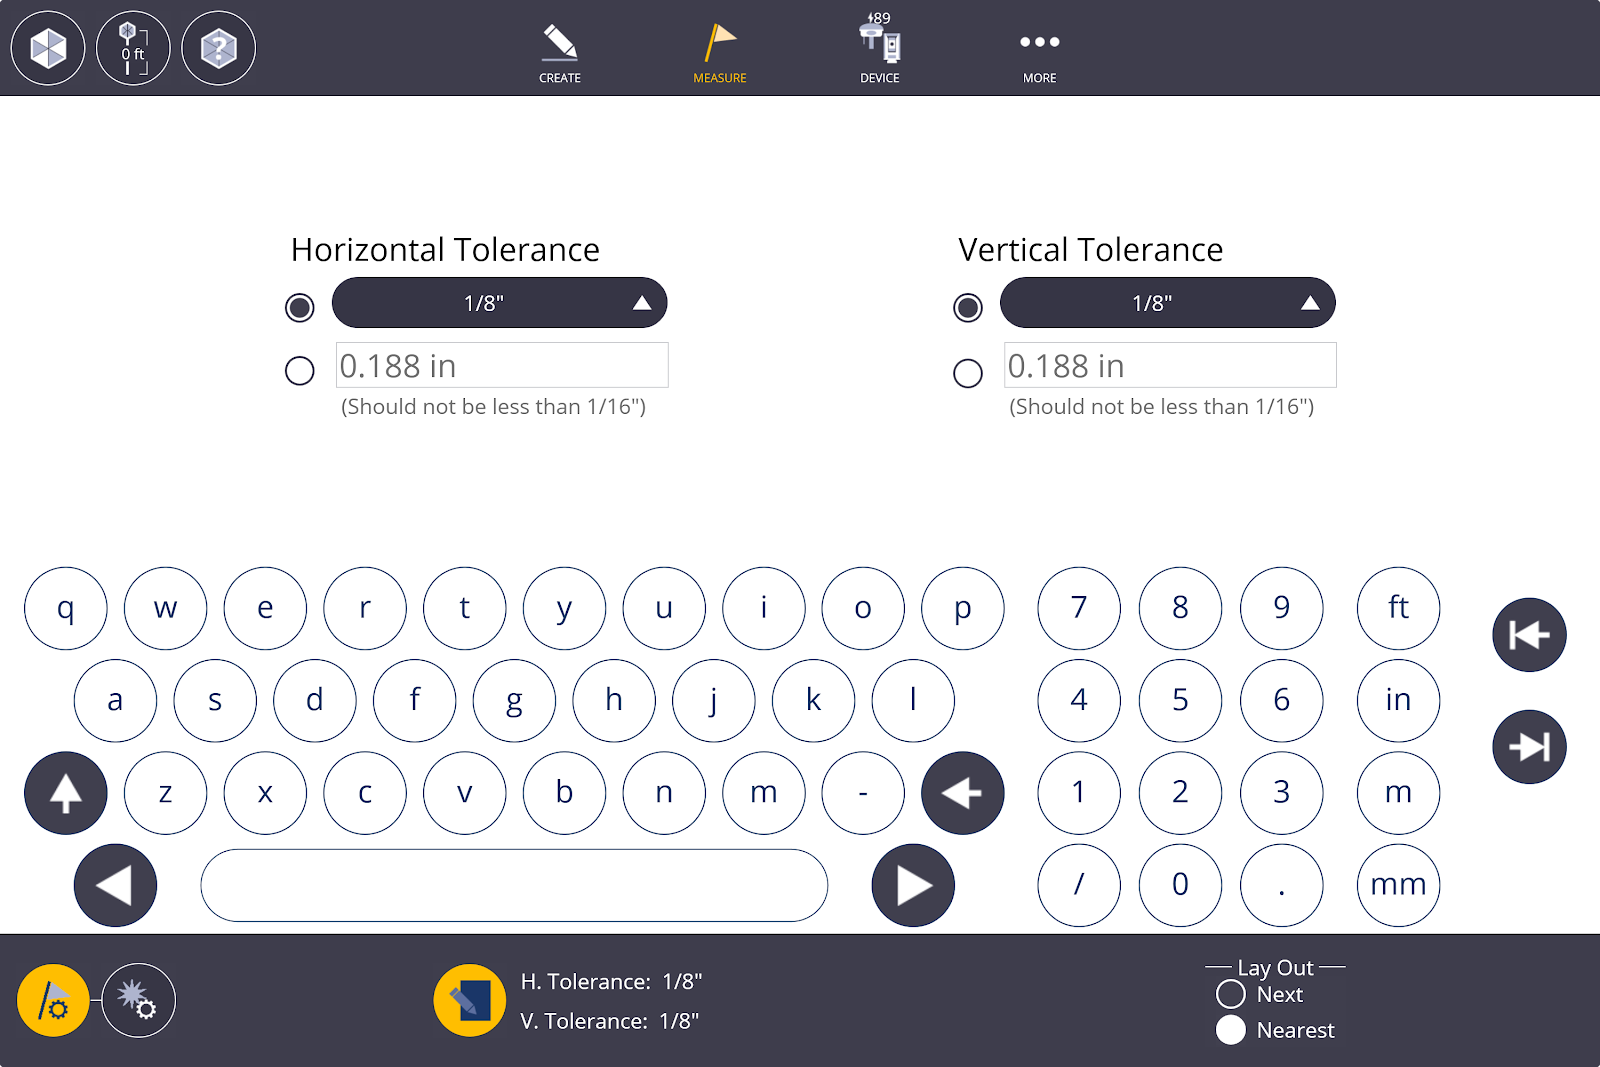
- Select on the Next or Nearest layout selection box to automatically select the next sequential point (ex. 100, 101, 102, 103) or the Nearest point to the prism or LASER measurement. The Nearest setting is usually the most efficient.
- Tap the Measure Settings button.
Select Standard or Visual Layout for Laser Aiming.
Standard mode aims the laser beam at the X, Y, Z location and gives correction distances. Visual Layout mode moves the laser beam to the correct X, Y location based upon the adjusted elevation.
Select High Precision or Fast Precision Measure Mode.
High Precision takes an average of the measurements over the selected amount of time from the list. The last selected measurement time will be remembered the next time a user measures using High Precision mode. Fast Precision takes an instant measurement.

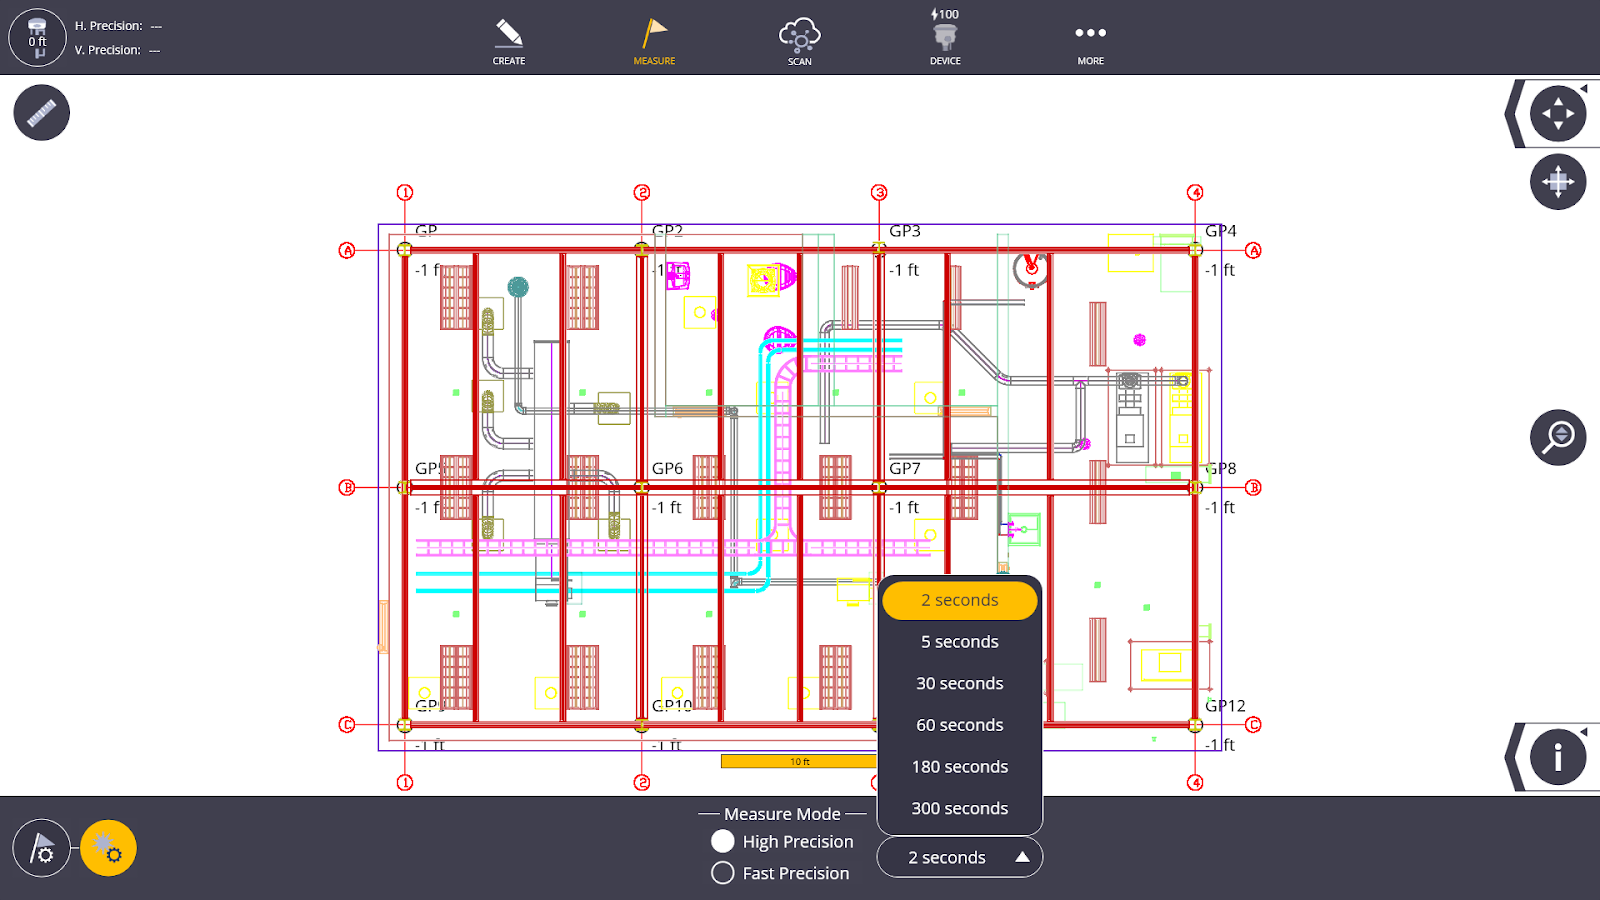
NOTE – When Tilt Compensation is enabled, the list of measurement times for High Precision mode will be disabled.
