X7/X9 Scan Registration
If the scanner has at least two scans loaded in the active project, you can manually move and register the scans directly in FieldLink if they do not automatically register. There are two options to register scans manually. You can rotate the scan to a different orientation to better match the orientation of the reference scan or move it to an area where more overlap occurs with the reference scan. An alternative is to use Split View to select two visible surface planes that are shared between the two stations.
- Tap the Scan
 icon and then tap Register.
 -
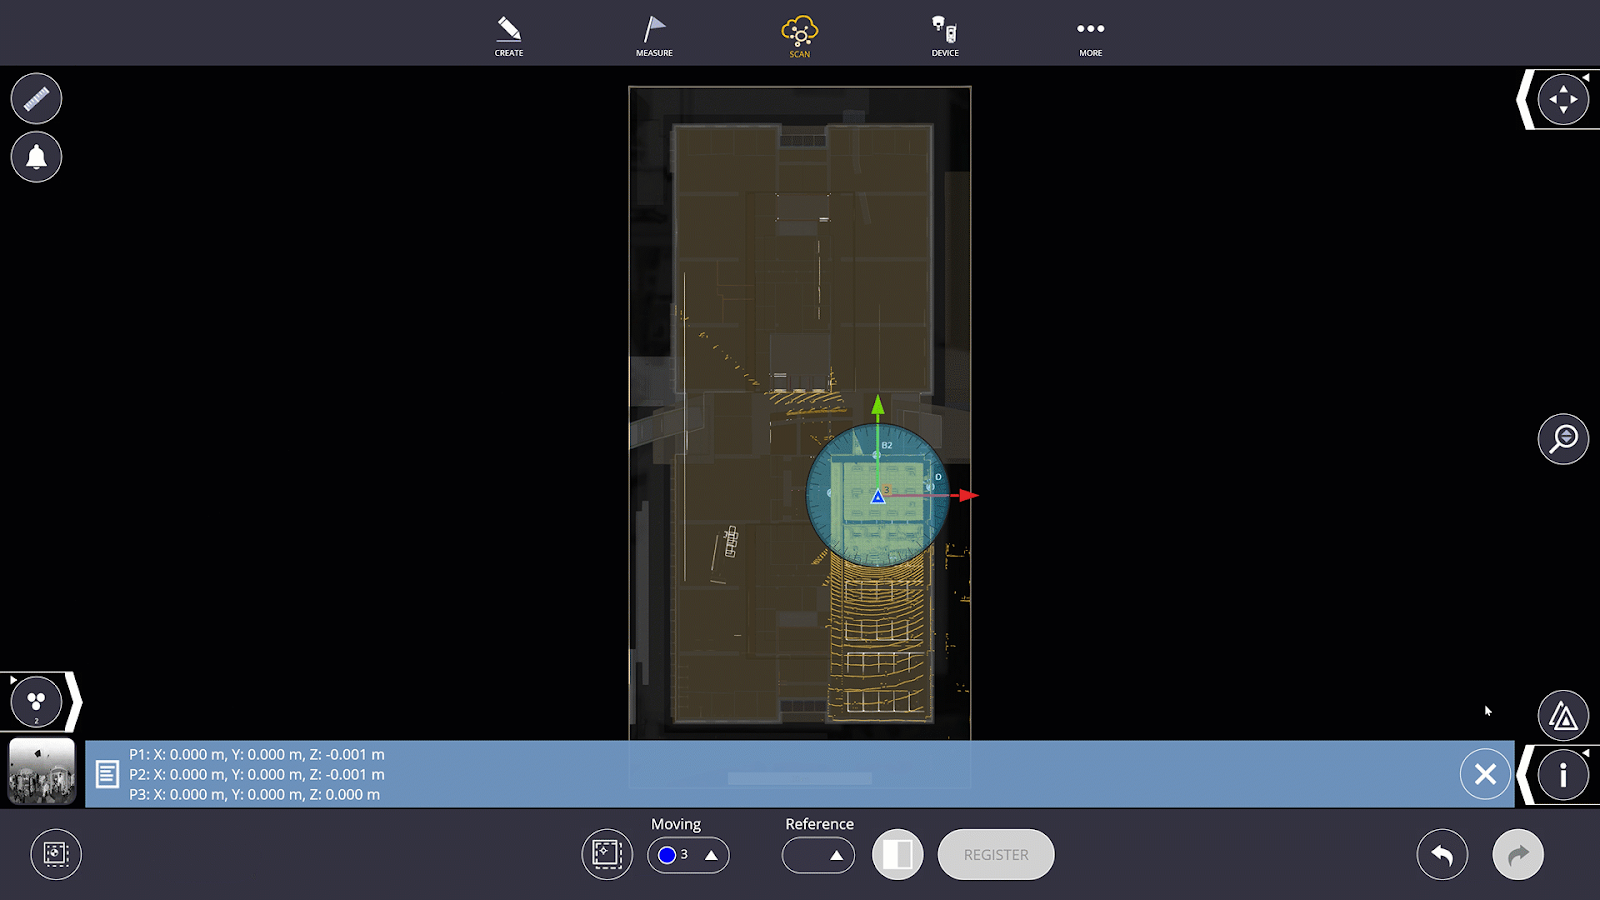
In the dropdown menu on the bottom bar of the screen, select which station you want to move under the Moving dropdown. A blue circle with red and green arrows
 appears around the station icon that you are now moving.
-
Select which station you would like this station to register to by selecting it under the Reference dropdown.
-
Using the blue circle and red and green arrows, move and rotate the scan data to match the orientation of the scan you are referencing in both plan and elevation views.
-
When the scan is in the same orientation as the reference scan, tap the Register button to register the scans together.
-
The two scans are now linked together. To unlink these scans and move them separately, tap the X between the two station numbers in the bottom menu.
-
If the registration refinement fails, you are prompted with the red pop-up below. If this continues, try the Split View option.

To use Split View:
-
Tap the Split View icon
 .
. -
Once Split View opens, select which station you are moving and which station you are referencing in the dropdown menus on the bottom of the screen (moving station view is on the left side of the screen and the reference station view is on the right side of the screen).
-
Tap a surface that is visible from both stations. Once you select a surface, a white circle appears. On the other screen, select the same surface. A white dot appears.
-
Tap a different surface visible from both stations on both screens. These points should be blue. See the example below:
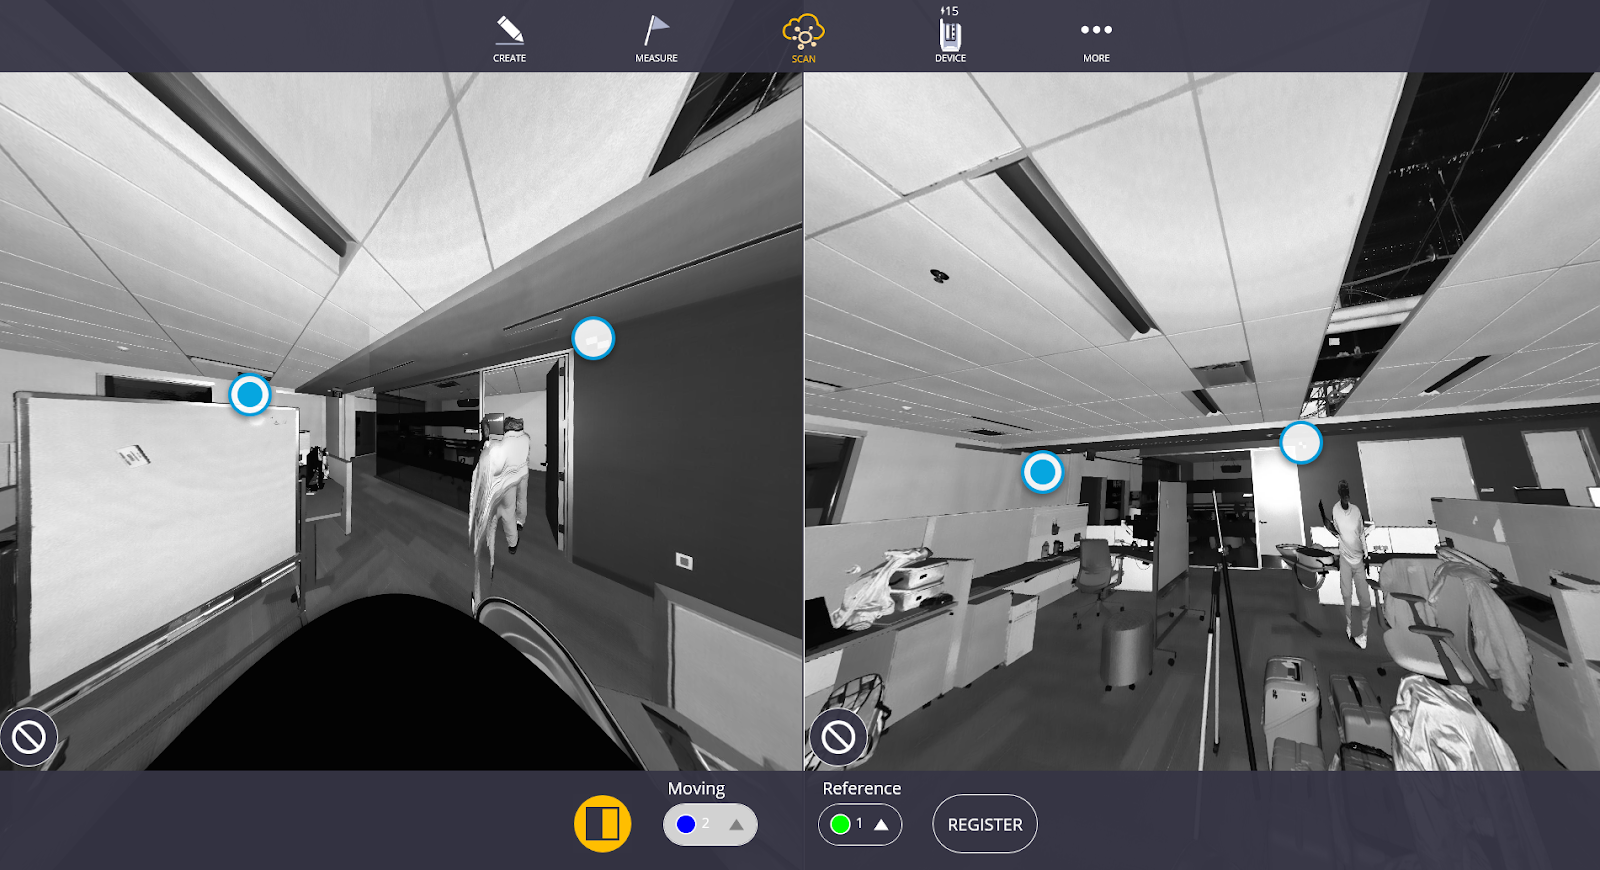
TIP – Choosing flat, bright-colored, non-reflective surfaces produces the best results when using Split View as these areas have more accurate scan data.
-
Once both points have been selected on both screens, tap Register.
-
Repeat these steps if the scan fails to register again. If the scans still do not register successfully, you may want to scan the area in between these two stations to better stitch together the data.
-
To have the most accurate scans and registration, Trimble recommends that you refine the scans once you have finalized the registration process.
Scan Alignment With Checkerboard Targets
The Scan Alignment with Checkerboard Targets feature enables you to align an individual scan to a model by selecting checkerboard targets that are visible within the panoramic image and matching them with model points. To align a scan model to a model with checkerboard targets:
-
Tap the Scan icon
 and then tap Register.
 -
At the bottom of the screen, tap the Scan Target Alignment icon
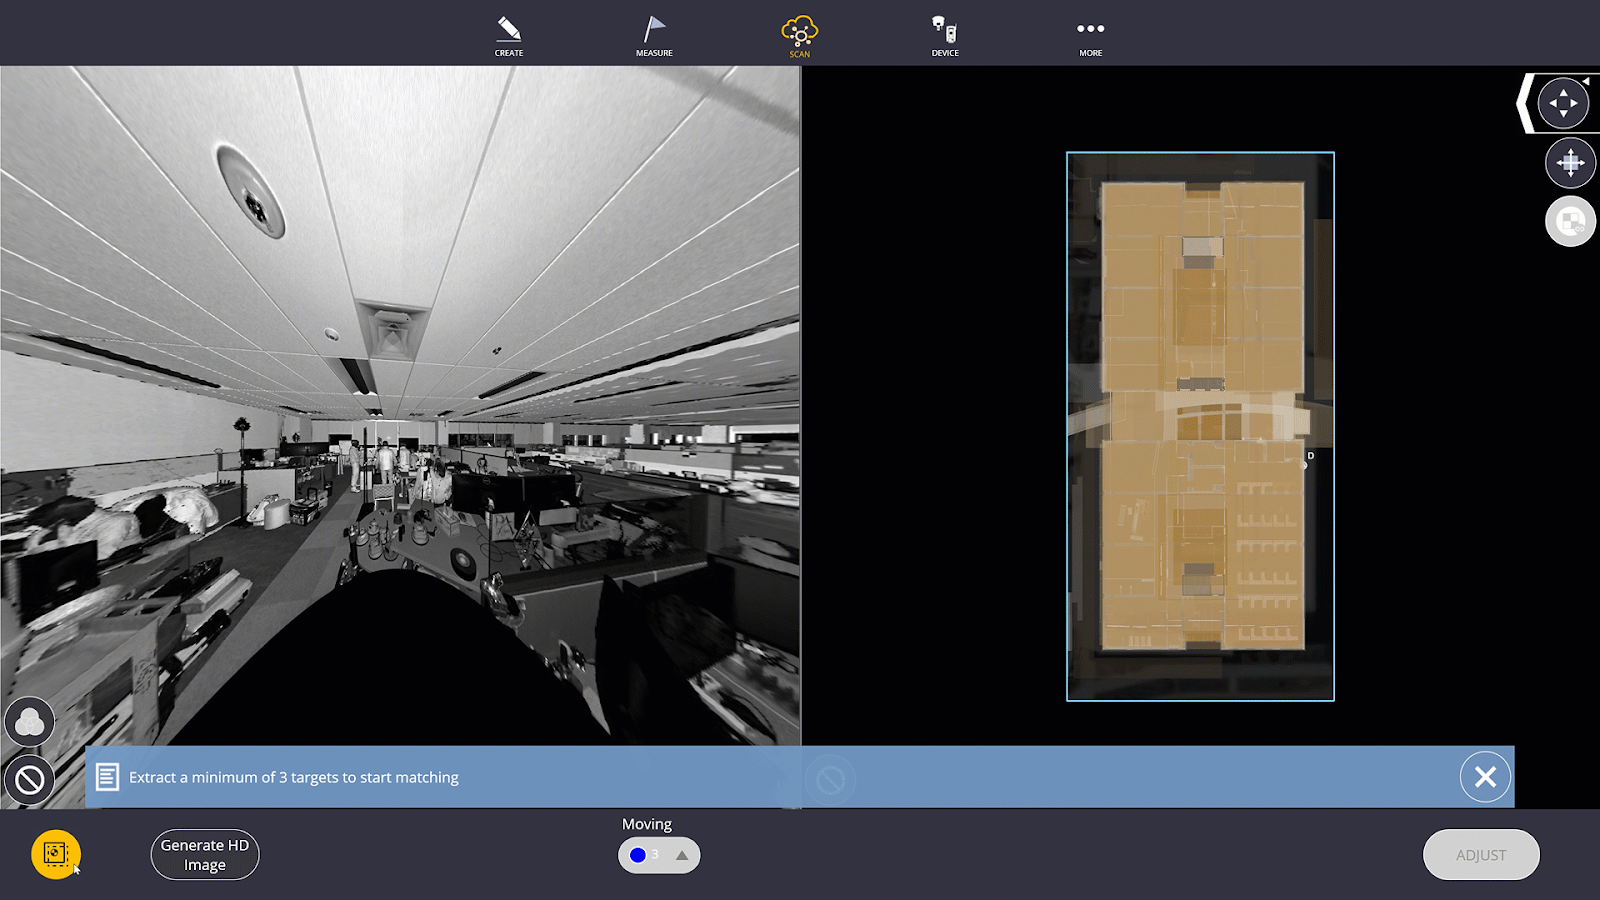
 to open the Split View. the panoramic image from the scanner will be displayed on the left side and the model will be on the right.
 -
Tap a minimum of 3 checkerboard targets in the panorama.
-
Tap the Auto Match Points
 icon, or tap corresponding points in the model.
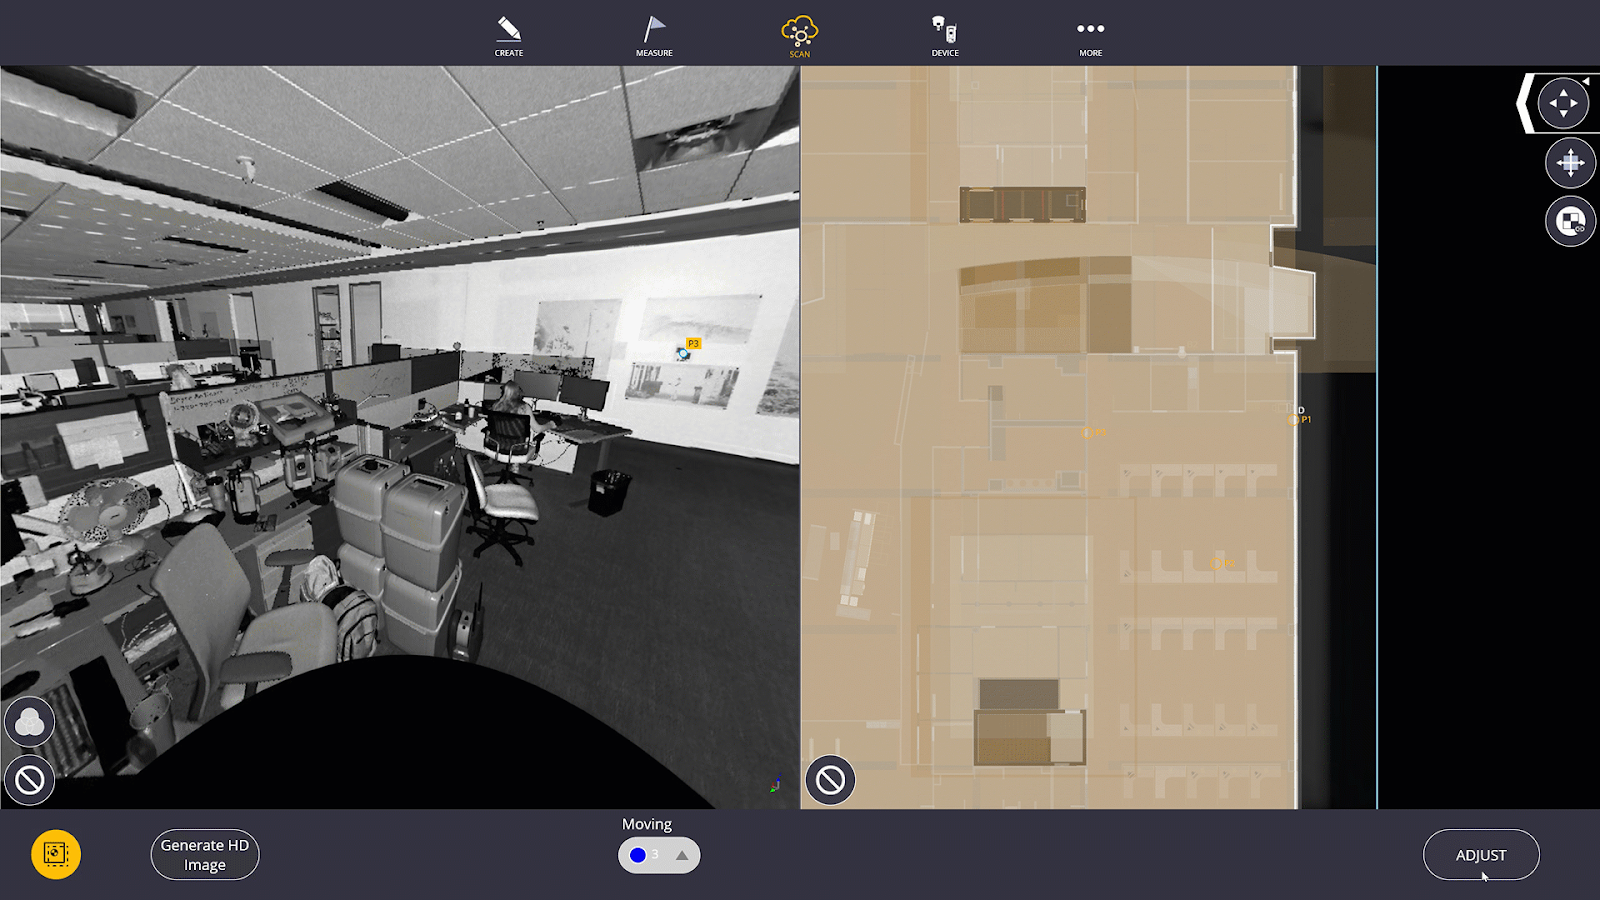
-
Once the points in the model are highlighted, tap the Adjust button. The Split View will close automatically and the map view will display the scan aligned to the model, along with the residuals.