Tools
The Tools function has been added to quickly access measurement options using the instrument. These tools can be used without completing an instrument set up or having any project information. Simply connect to the instrument and then begin taking measurements.
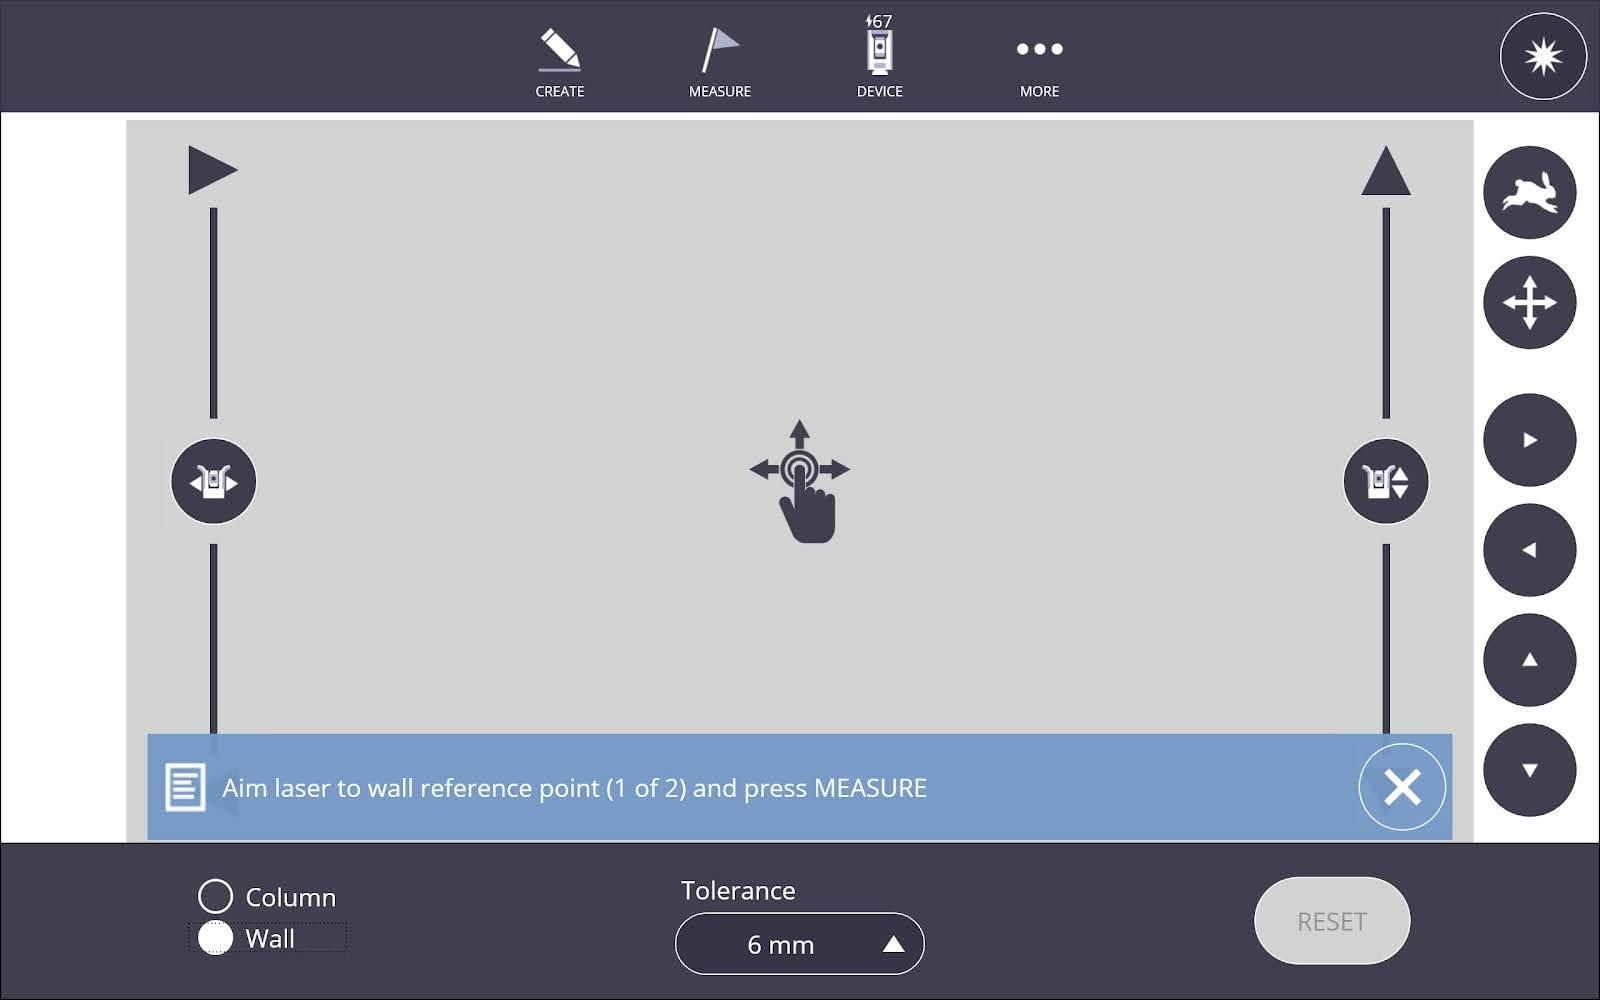
Quick Vertical Alignment Check Tool
- Tap the Device icon
 and then Tools menu.
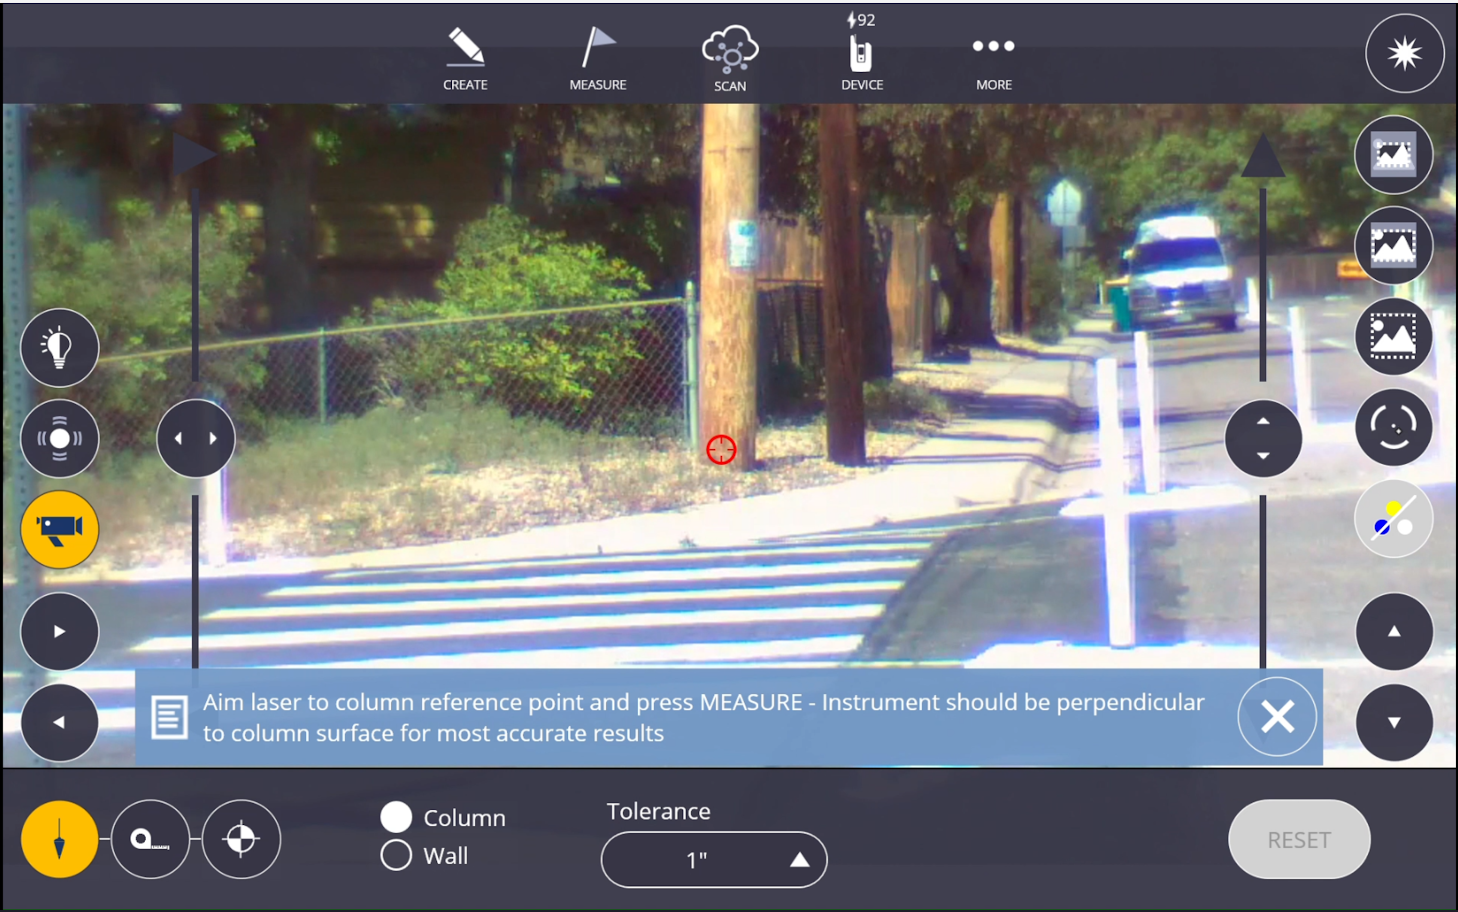
 - Select if you are working on a Column or Wall. You will see a message below giving instructions on how to aim the instrument. Columns require one single point shot at the base, and you should be perpendicular to the column. Walls require two points shot along the base to give an angle of reference.
- Use the Horizontal/Vertical Tools and the Bump Tools along the right hand side of the screen to get the laser exactly pointed to the correct location(s), or tap the center of the screen to move the laser directly.
- Tap the Measure icon in the upper right corner, one location at the base of the column, or two locations along the base of a wall.
- Set the Tolerance distance at the base of the screen to the desired accuracy.
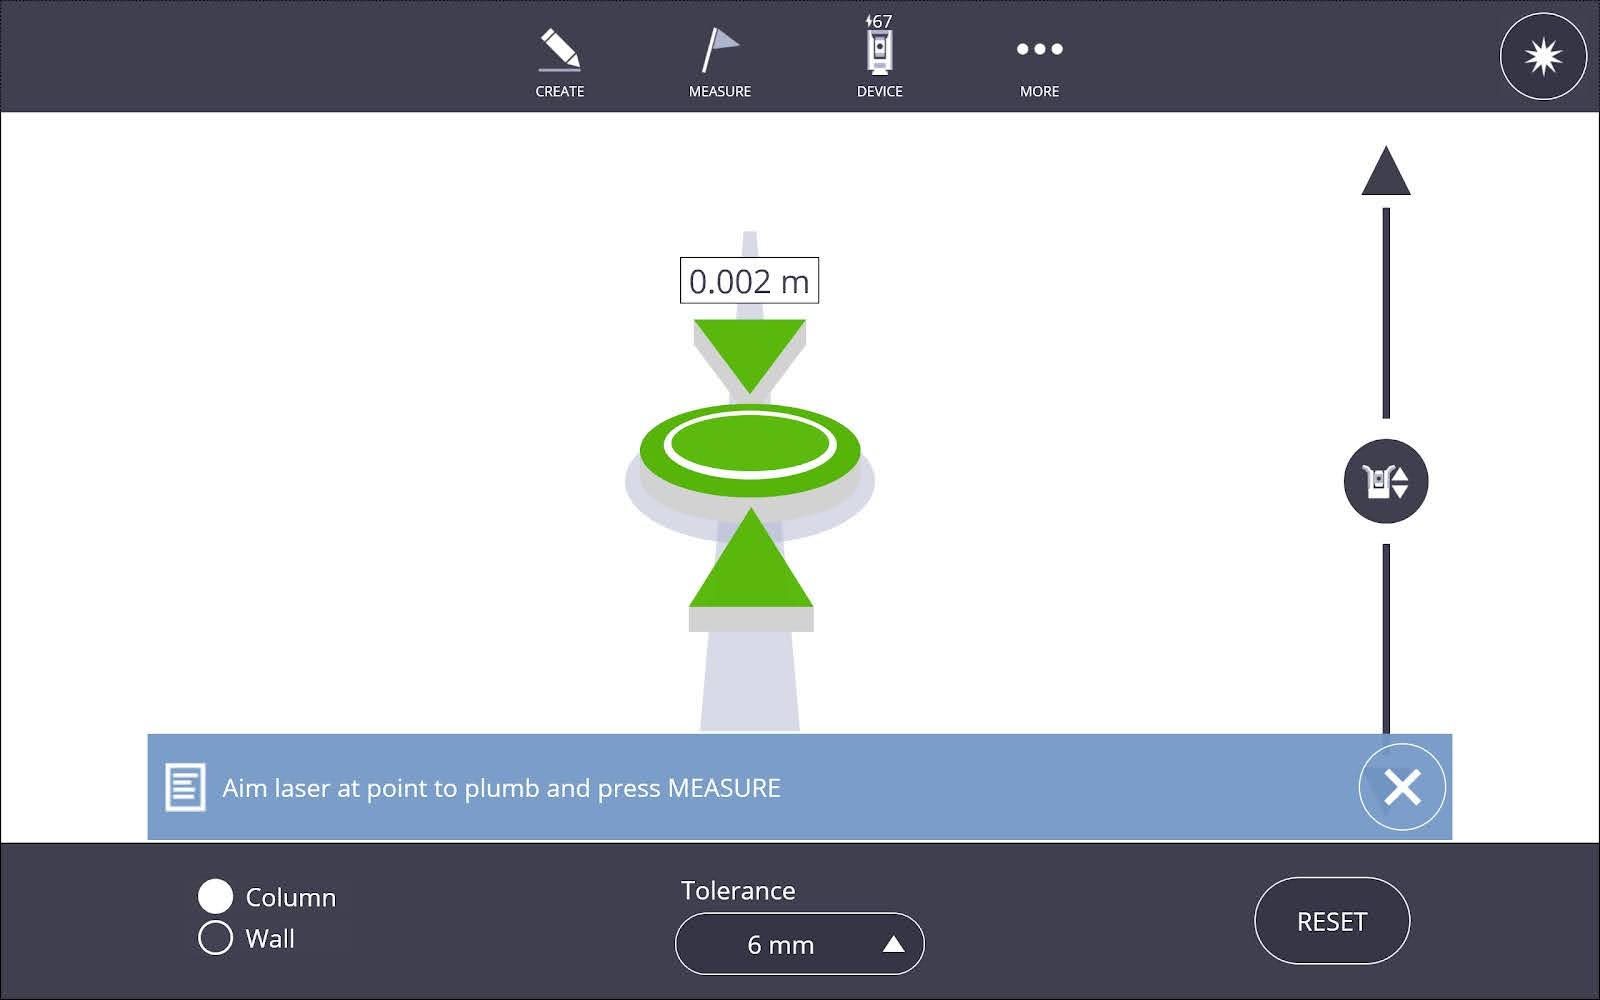
- Aim the instrument at the top of the column or wall.
- The screen will show the direction the column or wall should be placed for plumb and will go green once the item is within tolerance.
TIP – The plumb tool within FieldLink offers you the ability to use the Vision tool. This uses the devices camera to ensure this tool can be used in environments where the laser may be difficult to see.
Tape Measure Tool
- Tap the Device icon and then tap the Tools menu.
- Tap the Tape Measure icon.
- Tap the Measure icon at the upper right corner when the prism is over the first point or aiming with the laser.
- Tap the Measure icon at the upper right corner when the prism is over the second point or aiming with the laser.
- The Horizontal Distance, Vertical Distance and Slope Distance will automatically be displayed after the second shot.
- If you have a station set up, the distances will also be given in an XYZ or NEZ format.

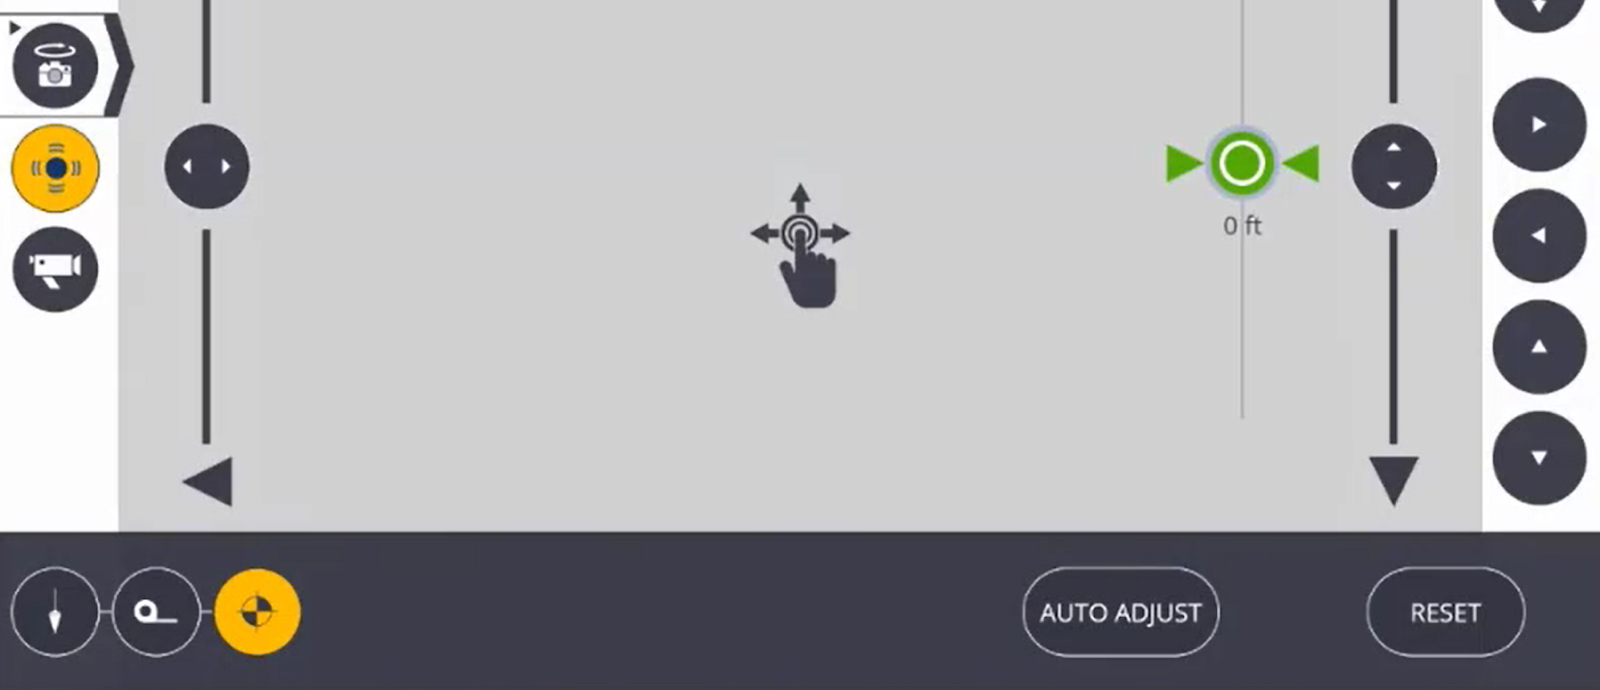
Benchmark Transfer Tool
- Tap the Device icon and then tap the Tools menu.
- Tap the Bullseye icon.
- Tap the Measure icon at the upper right corner when the prism is over the benchmark point or aiming with the laser.
- This position will be represented by a vertical tolerance bar displaying the collected benchmark position at 0’ elevation.
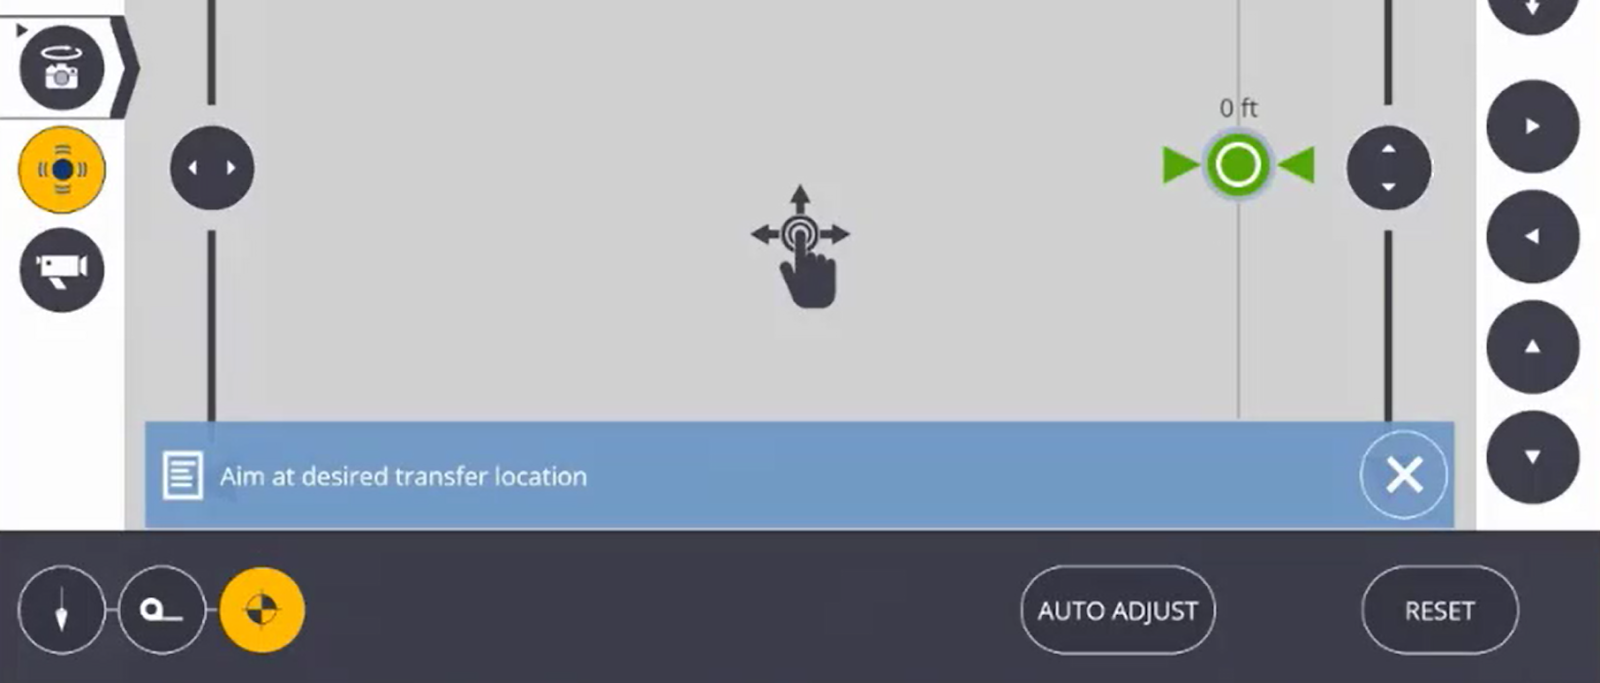
-
With the prism over the new elevation point to check for cut or fill. When aiming with the laser, move the laser to the correct vertical position and click Auto Adjust to move the laser to the correct elevation.