Work Modes
The FieldLink home screen opens with the Work Mode icons across the top of the screen.
The Work Modes are a logical division of work features within the software. Tap the required work mode icon at any time to enter that work mode.

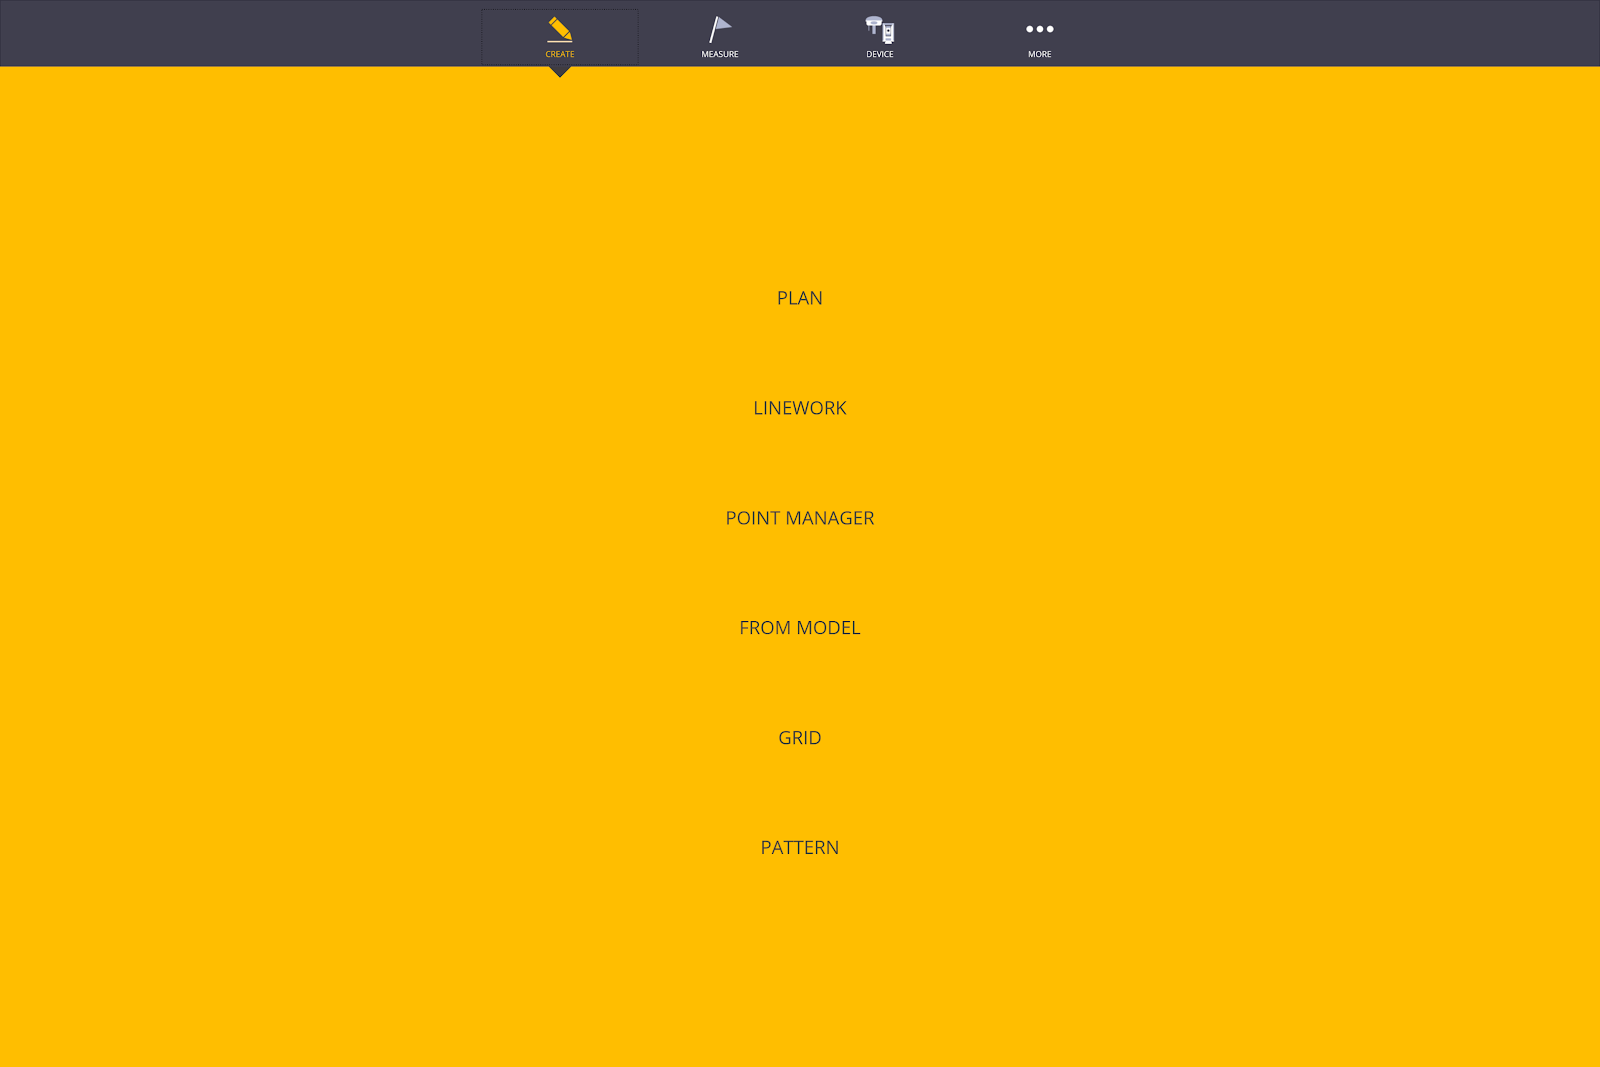
Create
Tap Create ![]() to create, modify or delete project data including a plan view of a project, linework, points, points from a model, grid points or point patterns.
to create, modify or delete project data including a plan view of a project, linework, points, points from a model, grid points or point patterns.
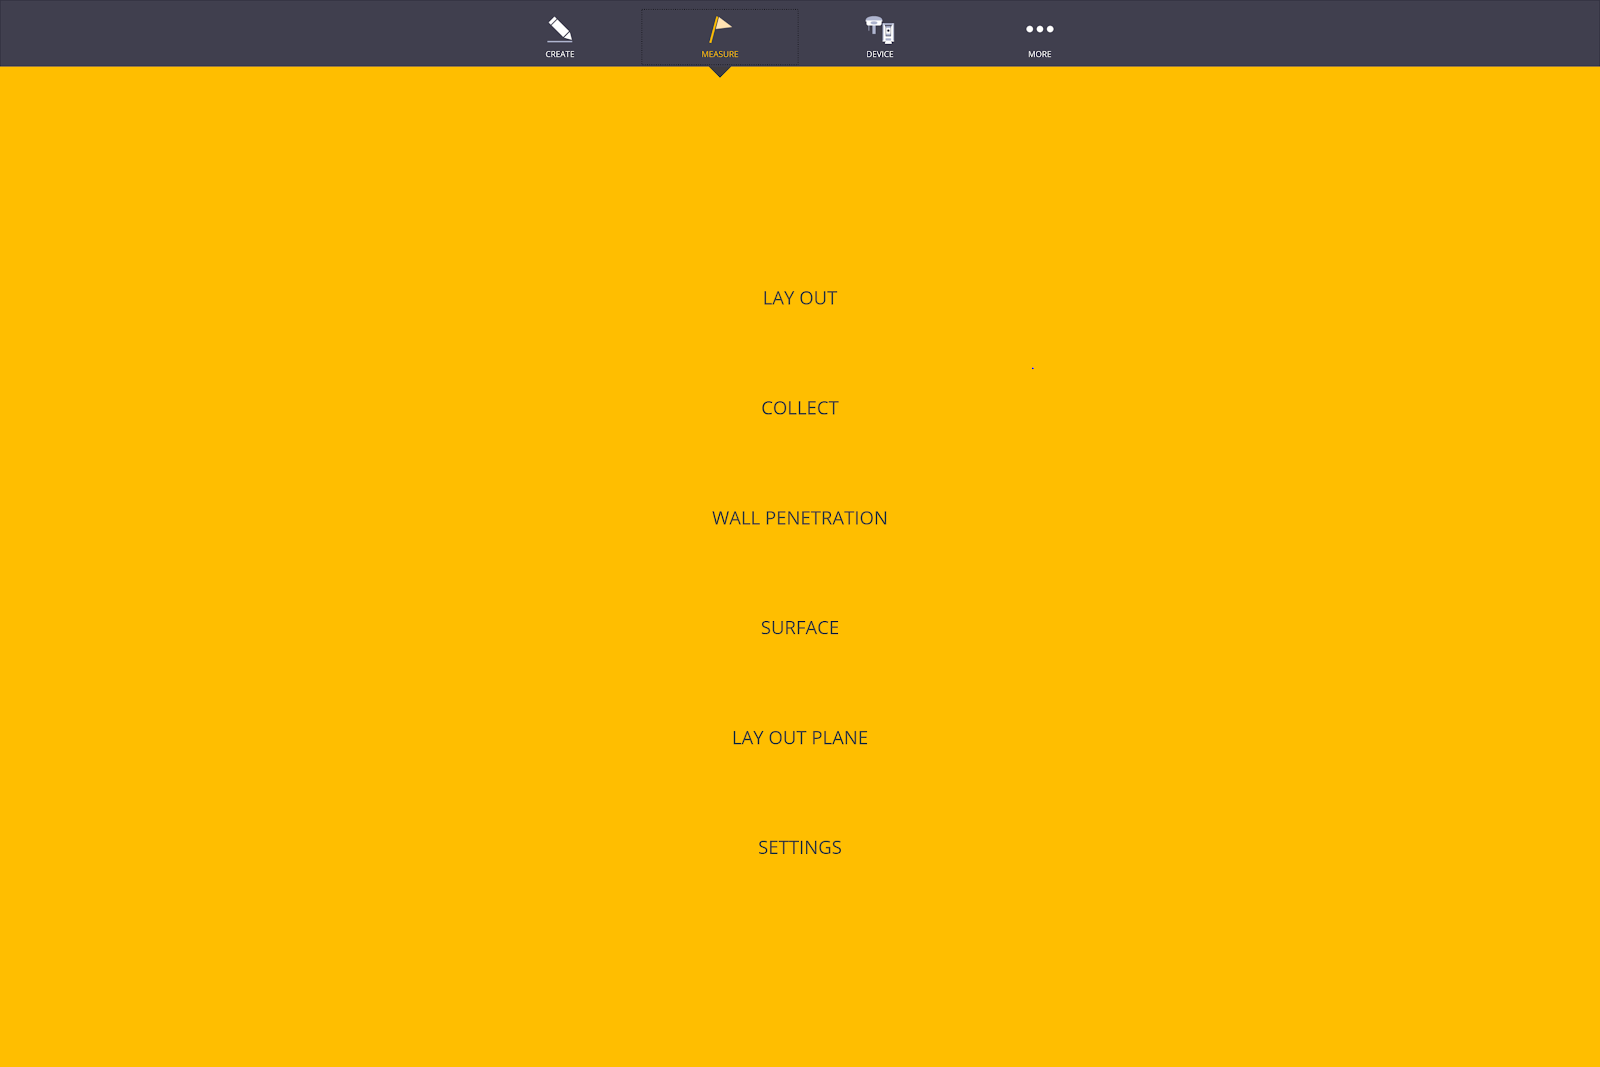
Measure
Tap Measure ![]() to:
to:
-
Lay out points, lines, offsets, arcs
-
Collect points, lines, arcs or to auto collect square cateye control points
-
Lay out wall penetrations
-
Lay out planes
-
Collect and lay out surfaces
-
Change measurement settings such as tolerances, next or nearest points, Visual Layout or Standard Laser mode, and High Precision or Fast Precision.
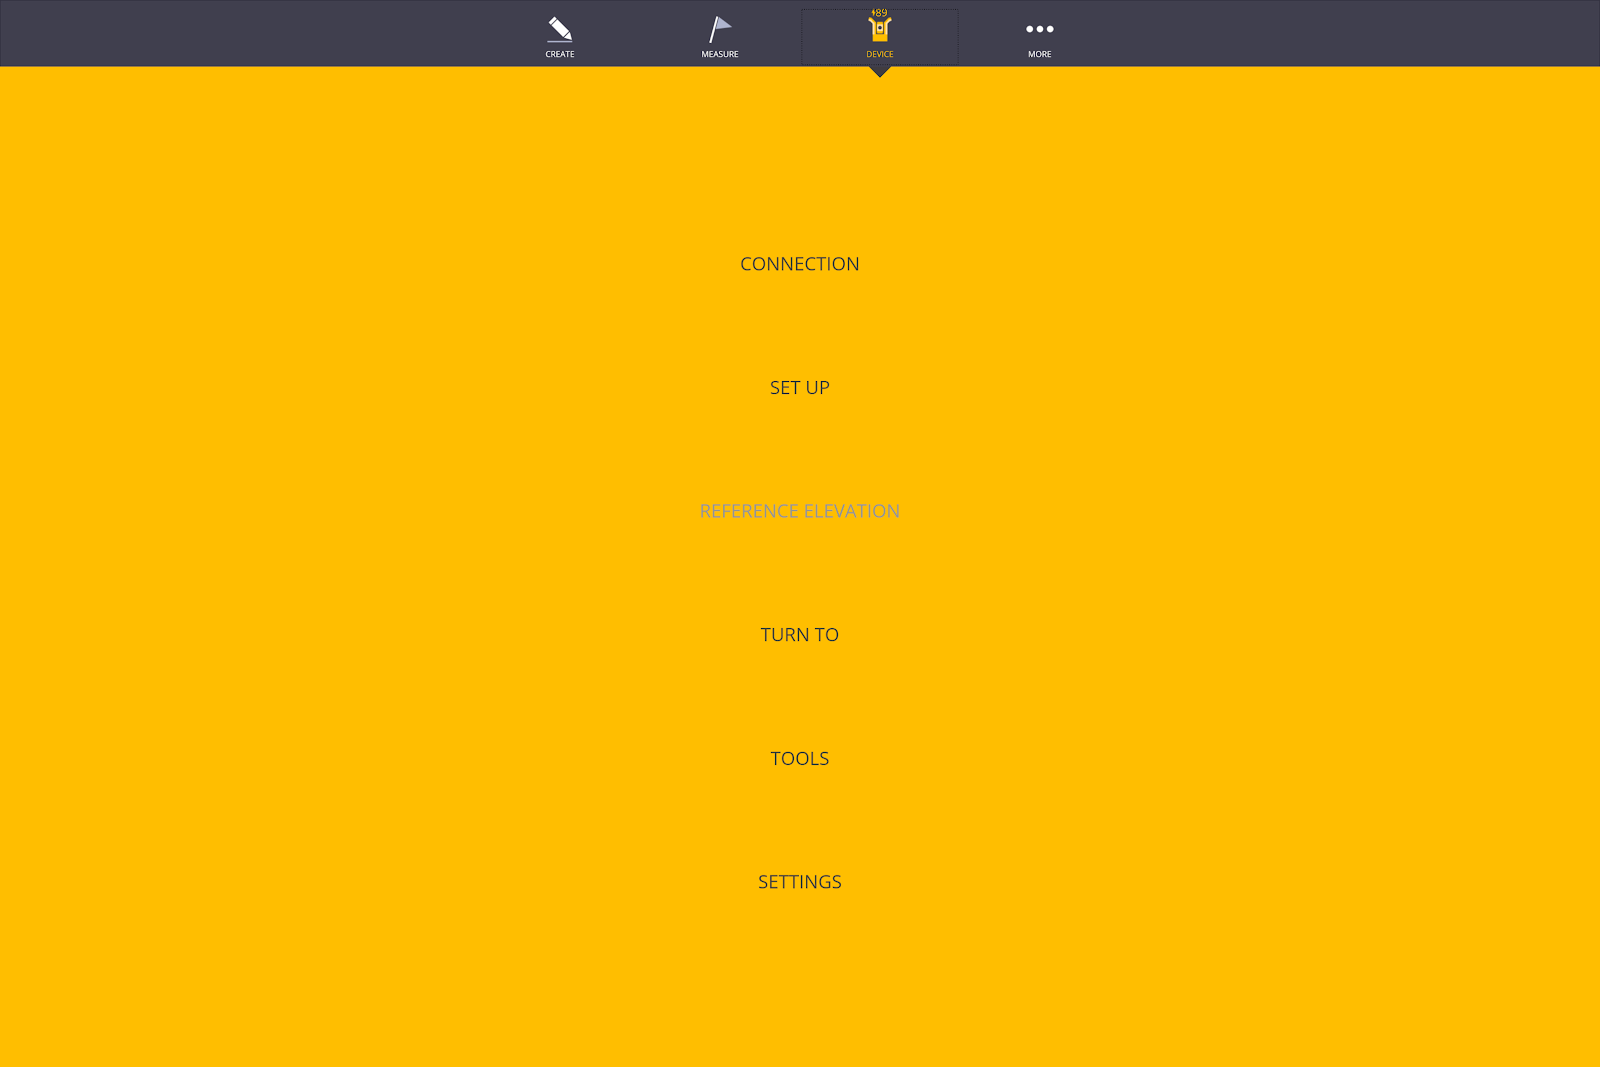
Device
Tap Device ![]() to connect to GNSS, total station, or scanning equipment, set up the instrument location, and change instrument and target settings.
to connect to GNSS, total station, or scanning equipment, set up the instrument location, and change instrument and target settings.
If you have purchased GNSS equipment, you can connect to Trimble R8s GNSS receivers and VRS or RTX networks depending on your license type.
If you have a Trimble Tablet with a built-in radio or optional external radio, you can connect to various Trimble Robotic Total Stations and the Trimble X7 or X9 3D Laser Scanner.
Map
Tap More ![]() and then tap Map to go to the map view of your model.
and then tap Map to go to the map view of your model.
You can also move, scale, or rotate models and background files in FieldLink Office under Map.
Projects
Tap More ![]() and then tap Projects to open or create job files, import and export data, and to change job settings such as displayed units, coordinate type, language & clearing layout flags for previously laid out points.
and then tap Projects to open or create job files, import and export data, and to change job settings such as displayed units, coordinate type, language & clearing layout flags for previously laid out points.
You can also download projects from Trimble Connect and send the projects back to Trimble Connect in the Projects screen.
Trimble Connect allows the project team to view, transform drawings and BIM data in your web browser without running design software. Upload and share 3D and 2D documentation with the entire team including SKP, DWG, DXF, PDF, Word, Excel, pictures, and videos with auto-archiving of all previous versions. You can measure, create model clash reports, save markups and screenshots, and assign tasks to collaborators.
Reports
Tap More ![]() and then tap Reports to create and view a daily layout summary, layout deviation, field report or report on surfaces collected.
and then tap Reports to create and view a daily layout summary, layout deviation, field report or report on surfaces collected.
System Information
In the FieldLink home screen, tap More ![]() to access system information including software license information and software version.
to access system information including software license information and software version.
Account Details
Tap More ![]() and then tap Account Details to:
and then tap Account Details to:
- see the licenses that are assigned to you
- see how long until you must sign into the application again
- see when the licenses expire
- sign out from the application
About
Tap More ![]() and then tap About to access software information such as FieldLink Versions and Modules installed, Device Firmware Version (when connected), Legal Notices, Tablet Serial Number, and Software Support Expiration.
and then tap About to access software information such as FieldLink Versions and Modules installed, Device Firmware Version (when connected), Legal Notices, Tablet Serial Number, and Software Support Expiration.
Minimize
Tap More ![]() and then tap Minimize to minimize the software to the taskbar.
and then tap Minimize to minimize the software to the taskbar.
Exit
Tap More ![]() and then tap Exit to close the FieldLink software.
and then tap Exit to close the FieldLink software.
