Add Labels
You can create (or select) and assign a label to a station, delete one, sort the stations to only display those having the same label. A label once created is added to those related to the scanner status: "Leveled", or "Not Leveled", "Imported", etc.
- Tap
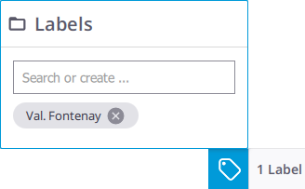
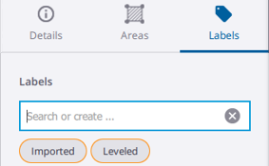
 Labels. The Labels panel pops up.
 - Tap in the Labels field.
- If there is no label, enter a name in the Labels field, and tap Enter.
- If required, repeat the previous step to add another label. All created labels display below the Labels field.
- If there are some labels, a list pops up.
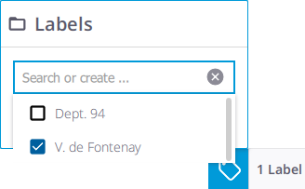
- Choose a label from the list. The checkbox when is:
- Checked means "Assigned", tap to unassign.
- Unchecked means "Not Assigned", tap to assign.
- Tap
 inside the Labels field to close the list.
- Tap
 Stations List to open the panel.
 - Tap
 Add Label from a station card.
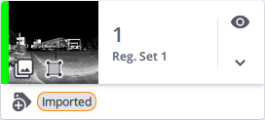
- Enter a name in the Labels field, and tap Enter to create a new label.
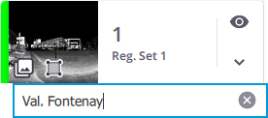
- If required, repeat the previous step to add another label.
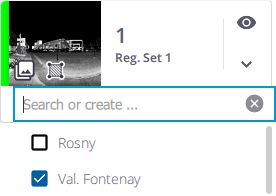
- Or choose a label from the drop-down list (if there are some). A checkbox when is:
- Checked means "Assigned", tap to unassign.
- Unchecked means "Not Assigned", tap to assign.
- Or tap Details > Labels and create a new label or select one from the list.
Tap inside the Labels field to close the list.
Tap Station List to open the panel. Do one of the following:
- Unassign a label until it is no longer assigned to any station.
- Tap Details > Labels and beside a label (single deletion).
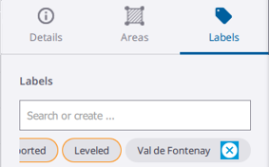
- Tap Details > Labels, and in the Labels field. Select labels to multi-delete.
- Tap Station List to open the panel.
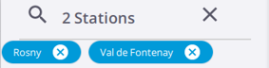
- Tap a label name (or a set of label names) in a station card. Stations out of the filtering range are hidden in the Stations List panel and in the Map View.
- To reload the hidden stations, tap the X icon beside the name of the label to remove from the filtering.