SurePoint (advanced sensors)
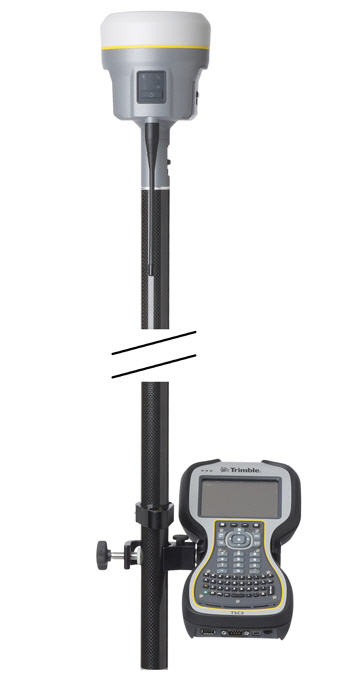
The receiver comes with the SurePoint™ technology, which allows the use of full tilt compensation and an eBubble (electronic bubble). SurePoint’s full tilt compensation allows the collection of points even when the receiver is tilted up to 15 degrees off plumb. When the terrain or obstacles around the point do not allow full plumbing of the receiver, the integrated tilt sensor will compensate for the tilt of the range pole. The point is collected using a point type of compensated point to initiate the tilt compensation. The eBubble is displayed within the Trimble Access software. The eBubble is displayed in a separate window for use during any aspect of your survey. To use the full tilt compensation and the eBubble correctly, the
Calibrating the integrated tilt sensor and magnetometer
It is very important to ensure the integrated tilt sensor is correctly calibrated in the same way that mechanical bubbles are calibrated on your range poles and tribrachs. When calibrating the integrated tilt sensor you must use a range pole with bipod or a tripod with tribrach that have been well calibrated. The quality of the integrated tilt sensor calibration is directly related to the quality of the mechanic bubble and its calibration.
The integrated tilt sensor calibration is performed within the Trimble Access software. To calibrate the integrated tilt sensor, place the receiver on a stable range pole or tripod with tribrach. Level the receiver using the mechanical bubble on the range pole or tribrach. Turn on the receiver and
R10
-
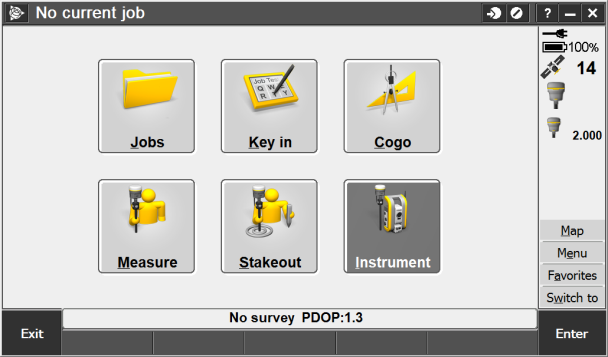
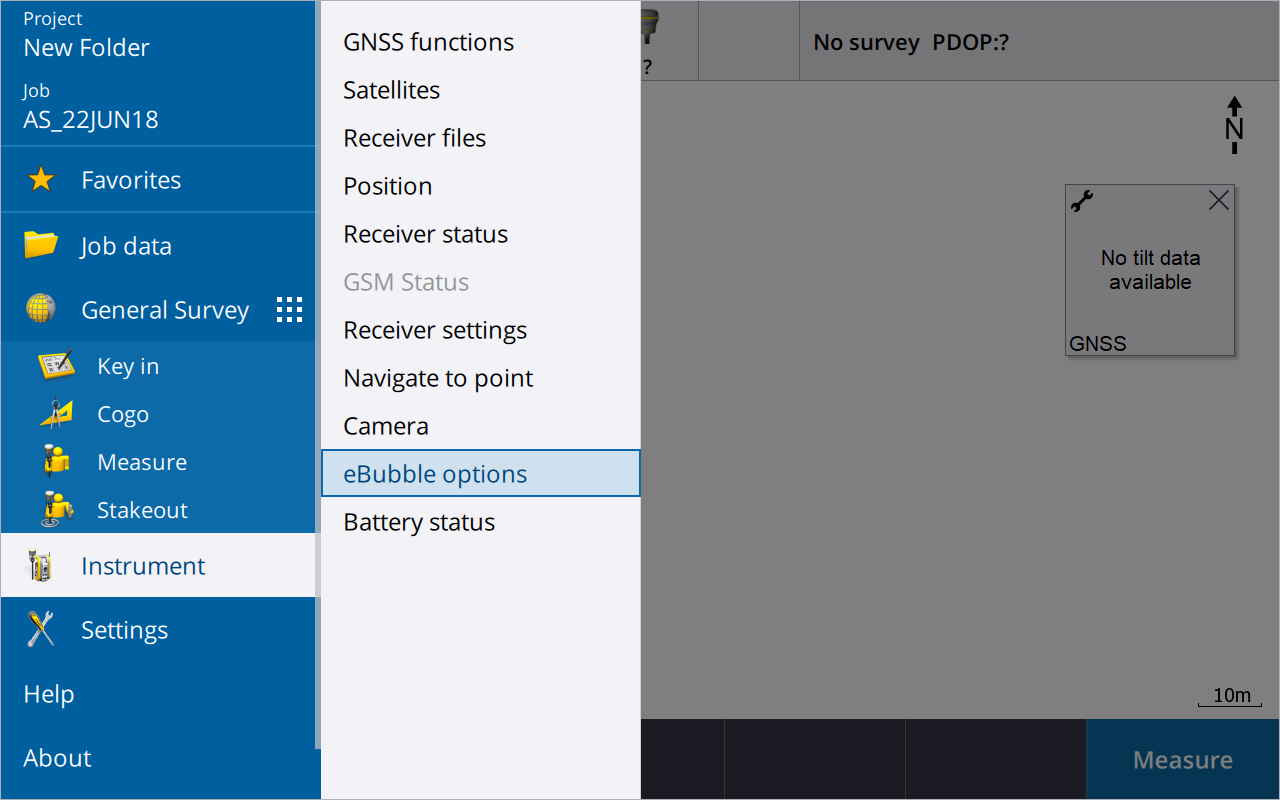
xtIn the General Survey menu, tap Instrument.
-
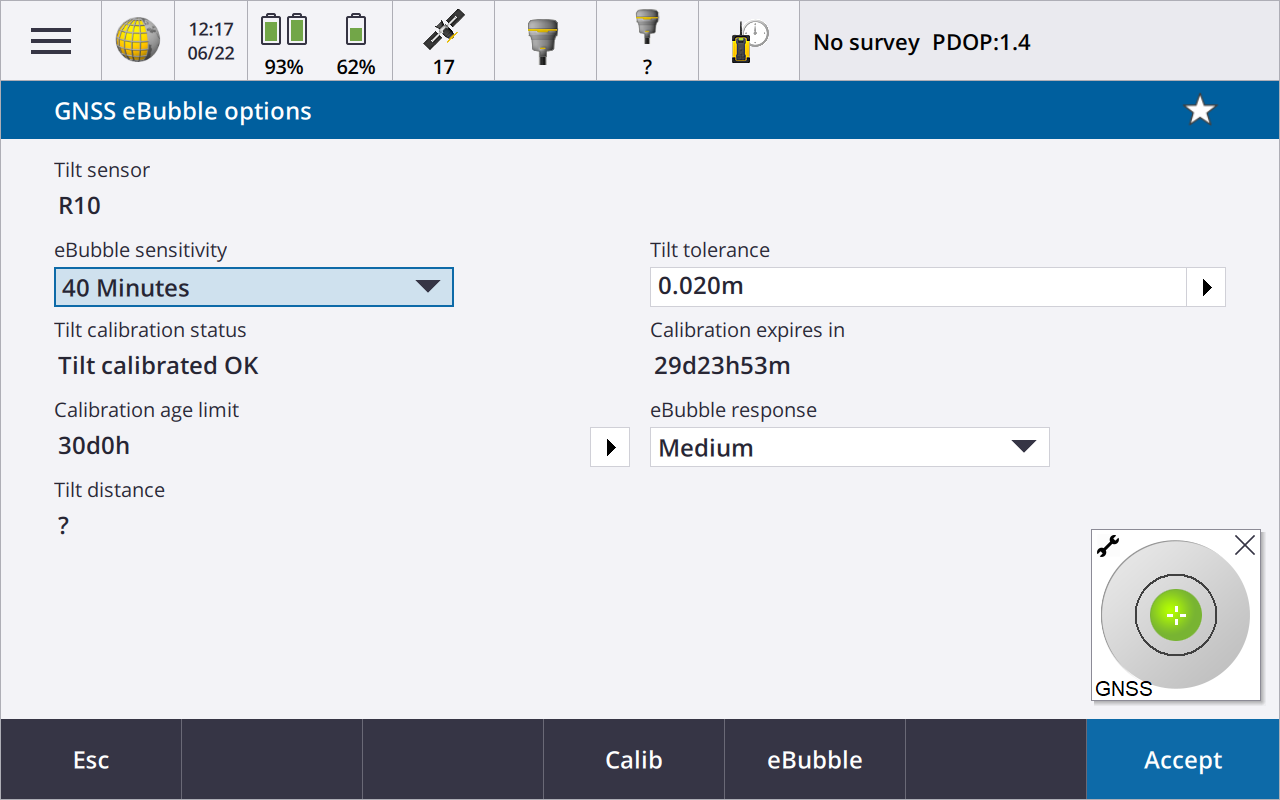
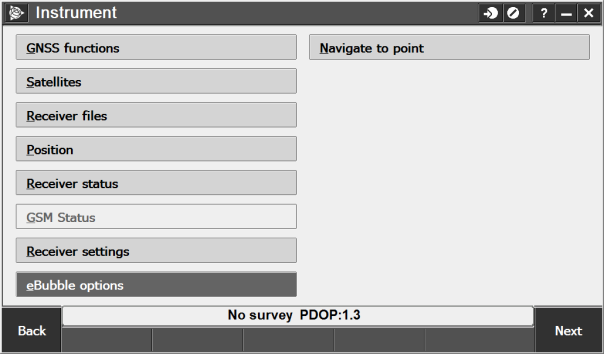
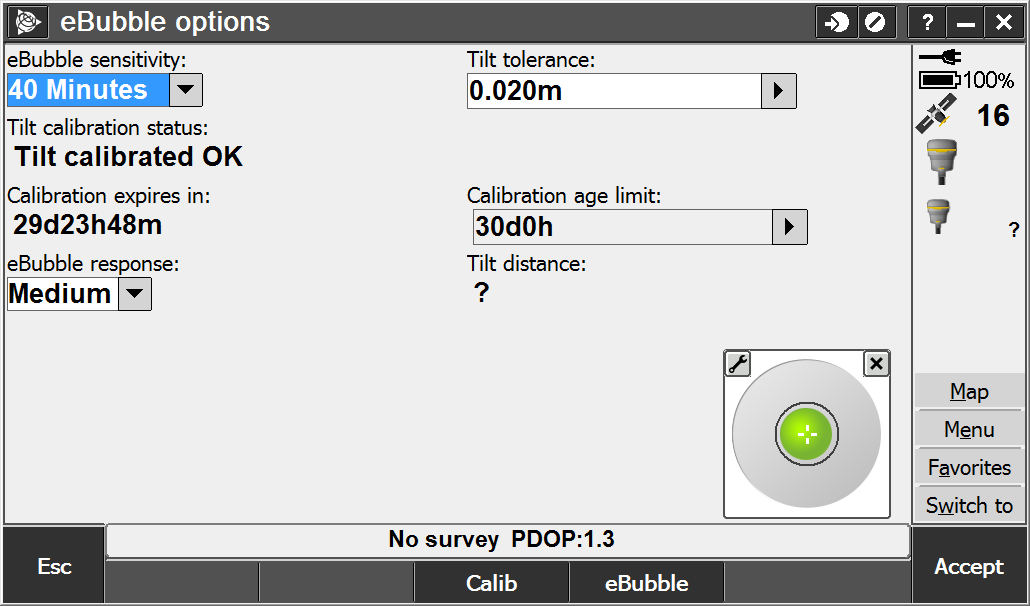
In the Instrument screen, tap eBubble options.
-
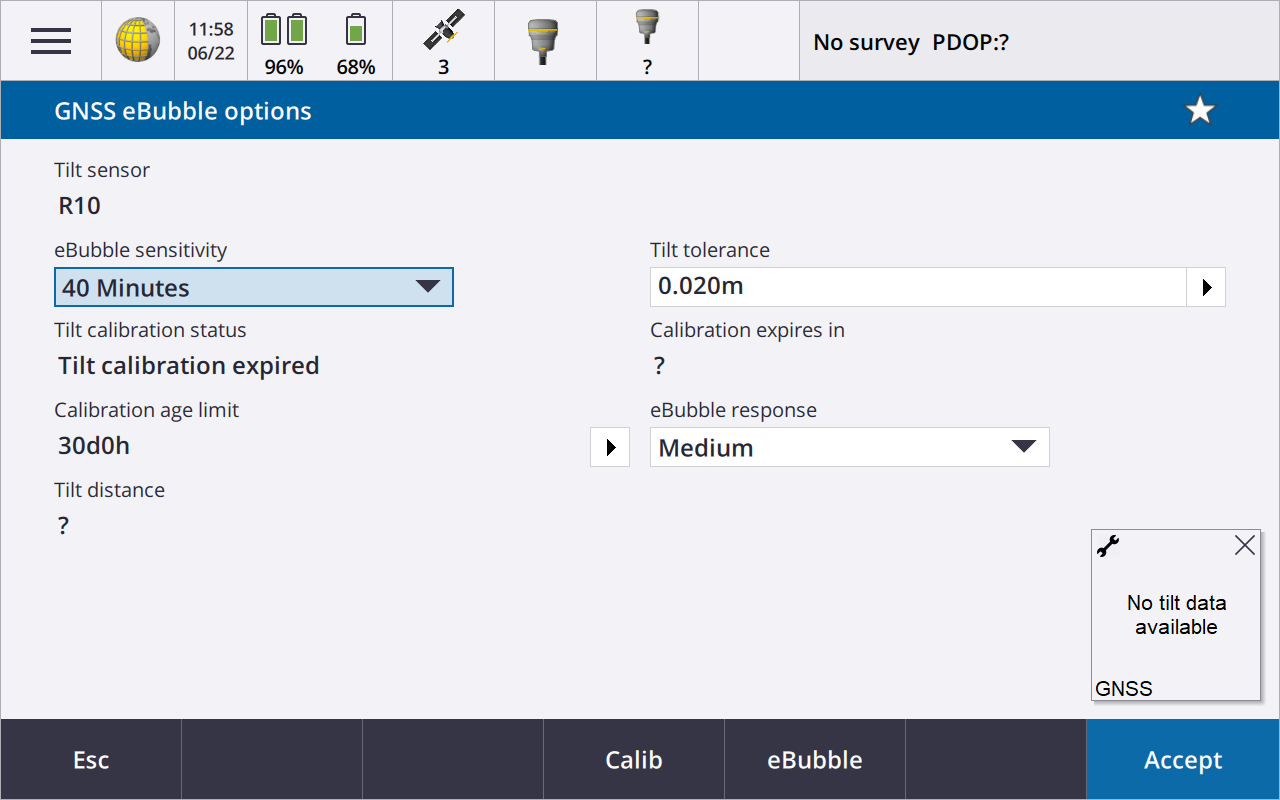
The eBubble options screen appears. You are now ready to perform the calibration. Tap Calib. An electronic bubble is displayed to indicate if you are holding the instrument level.
-
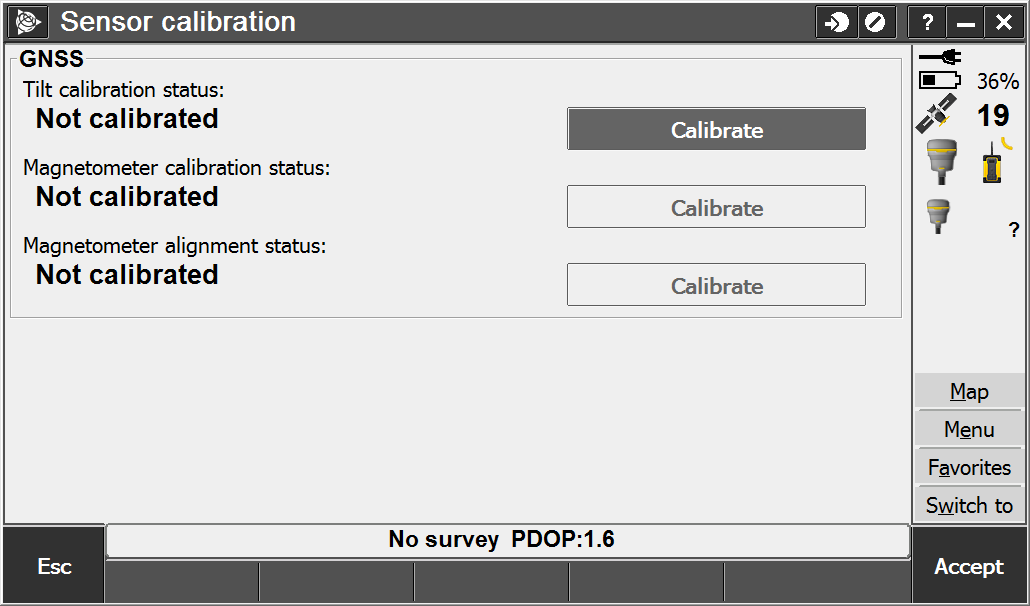
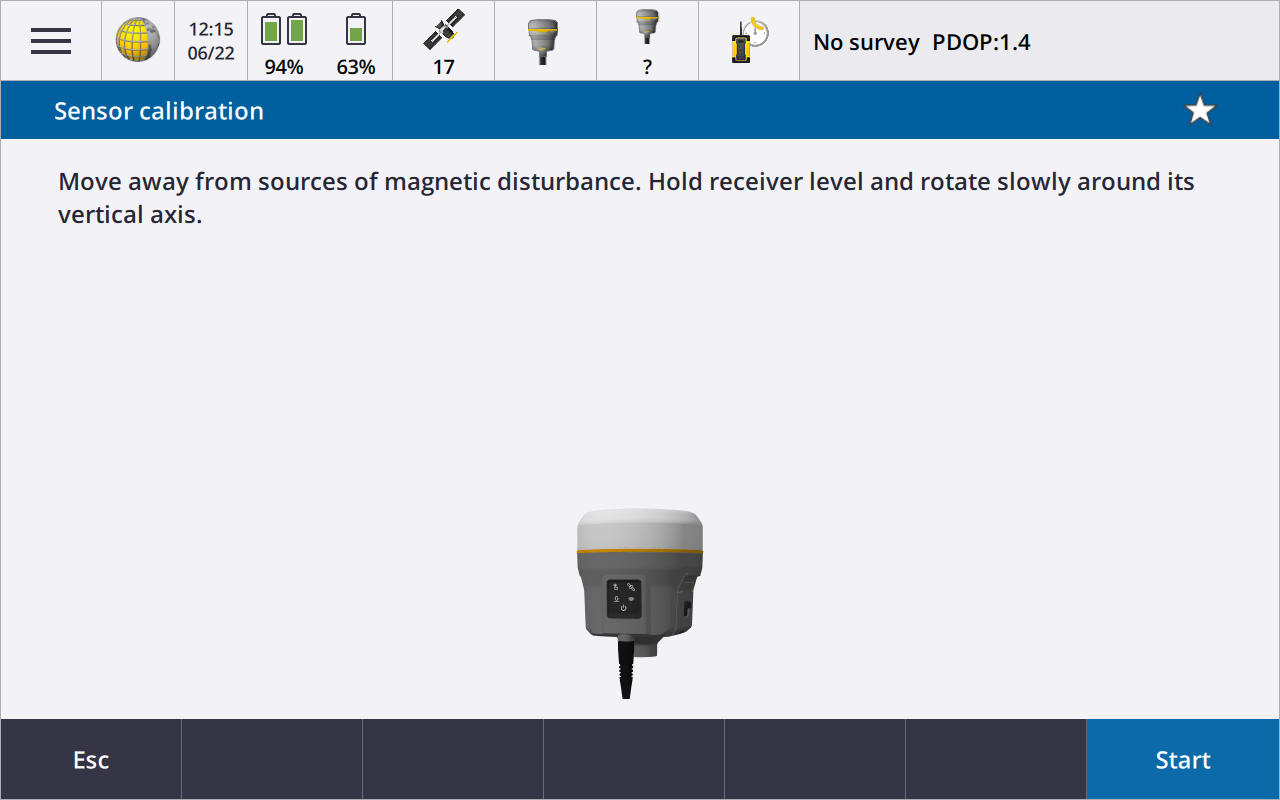
The Sensor calibration screen appears. First the tilt calibration is performed. Tap the Calibrate button next to the Tilt calibration status field.
-
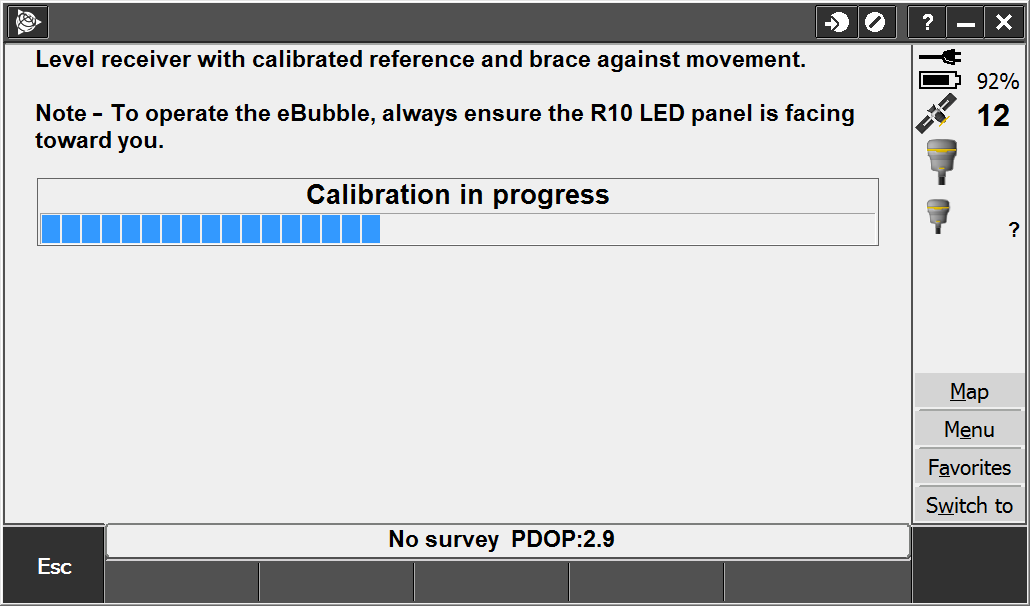
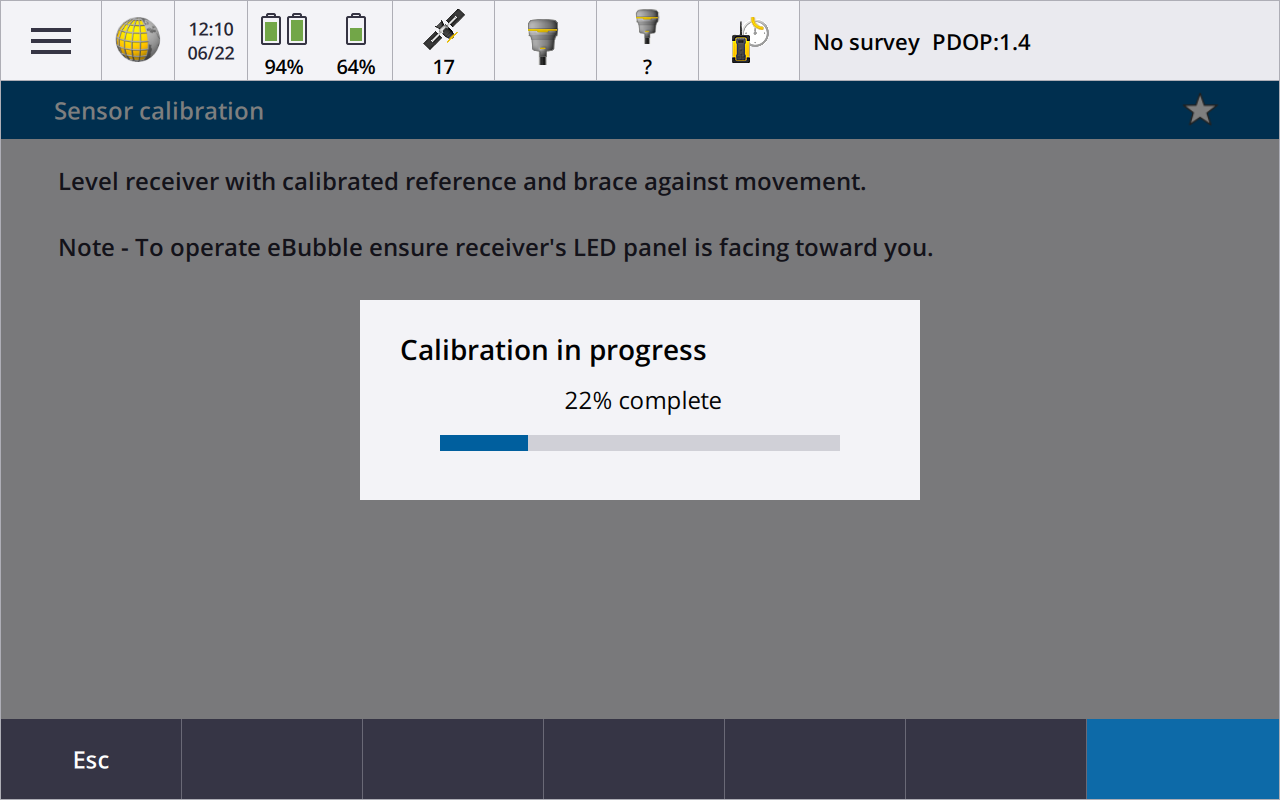
A message asks you to confirm that the instrument is level and braced against any movement. Tap Start.

-
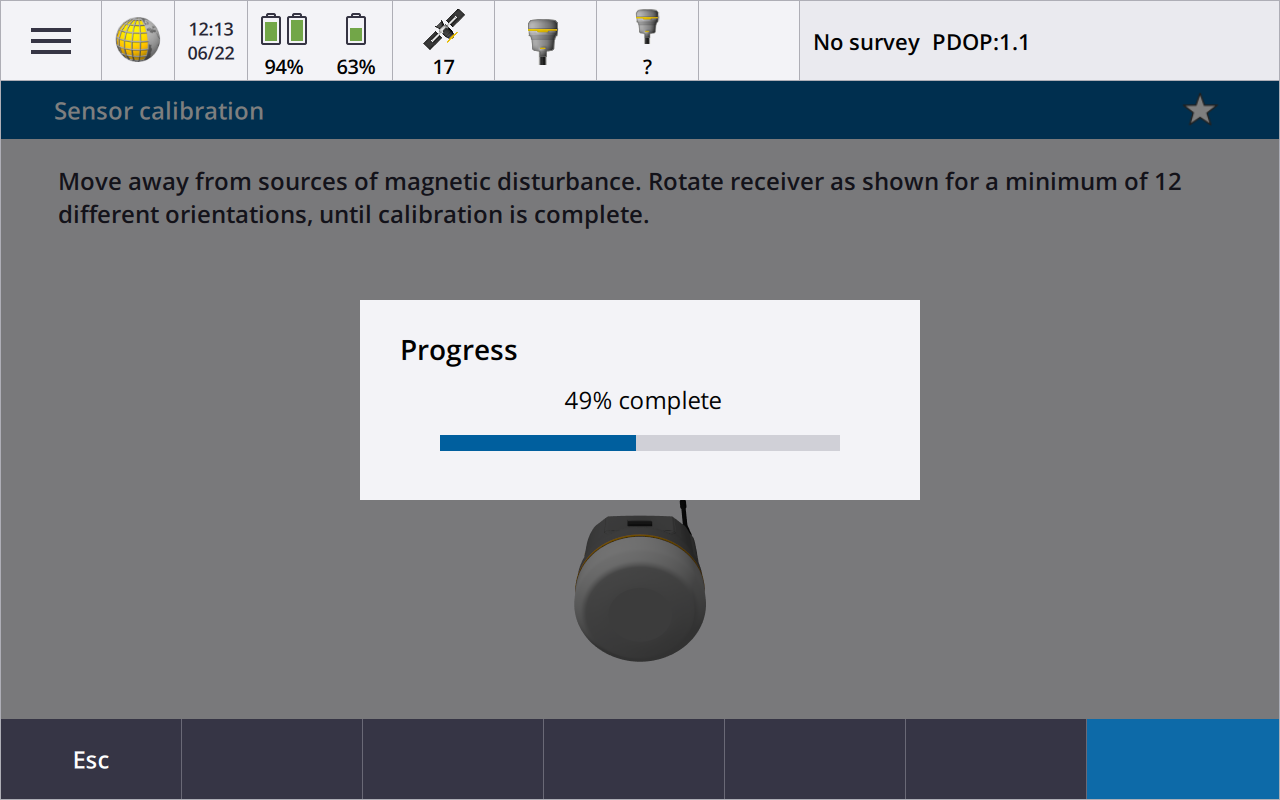
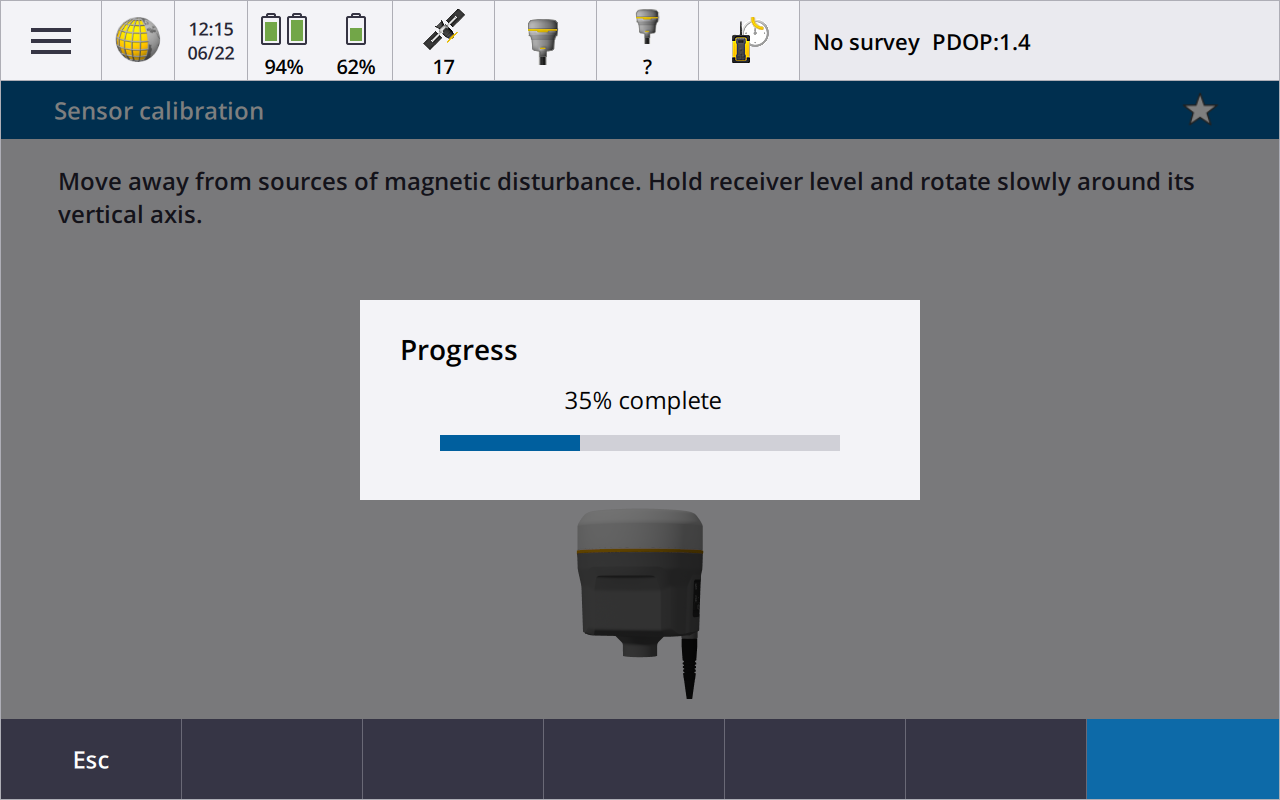
A progress bar indicates that calibration is in progress.
-
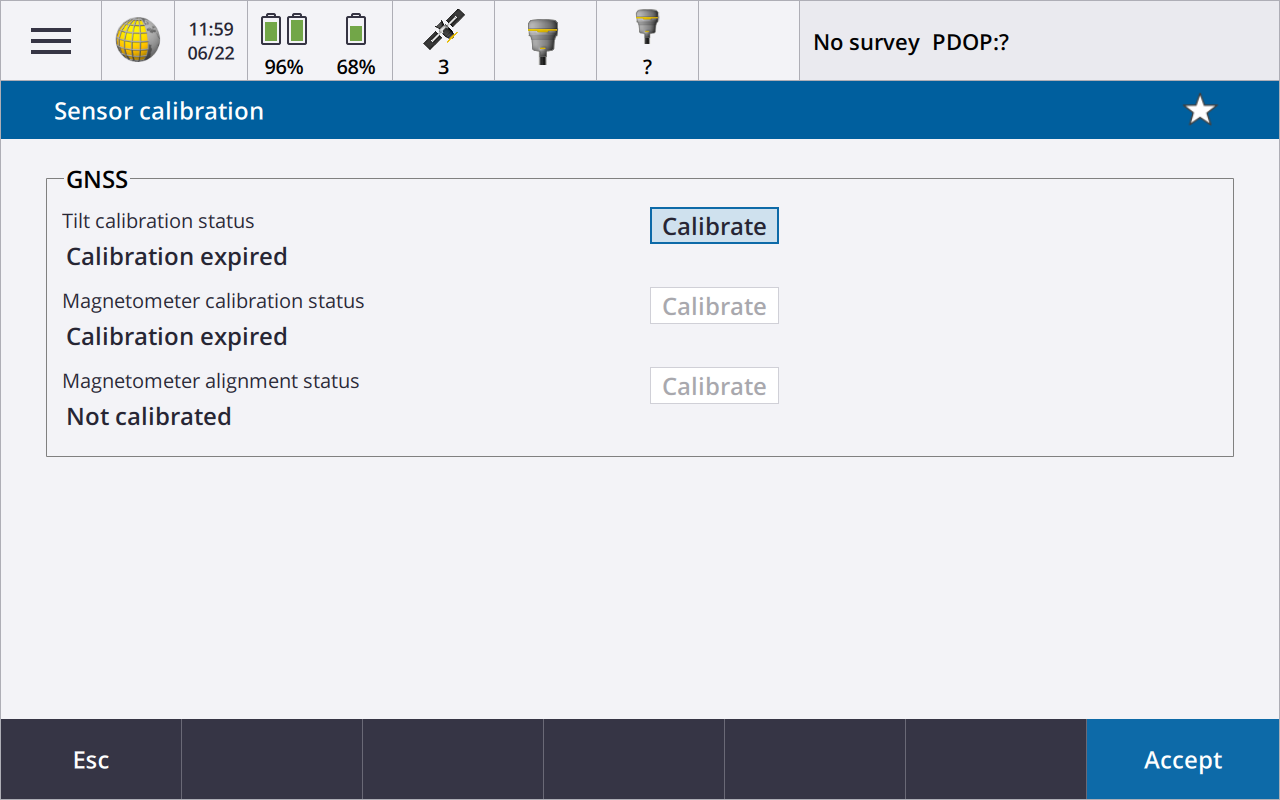
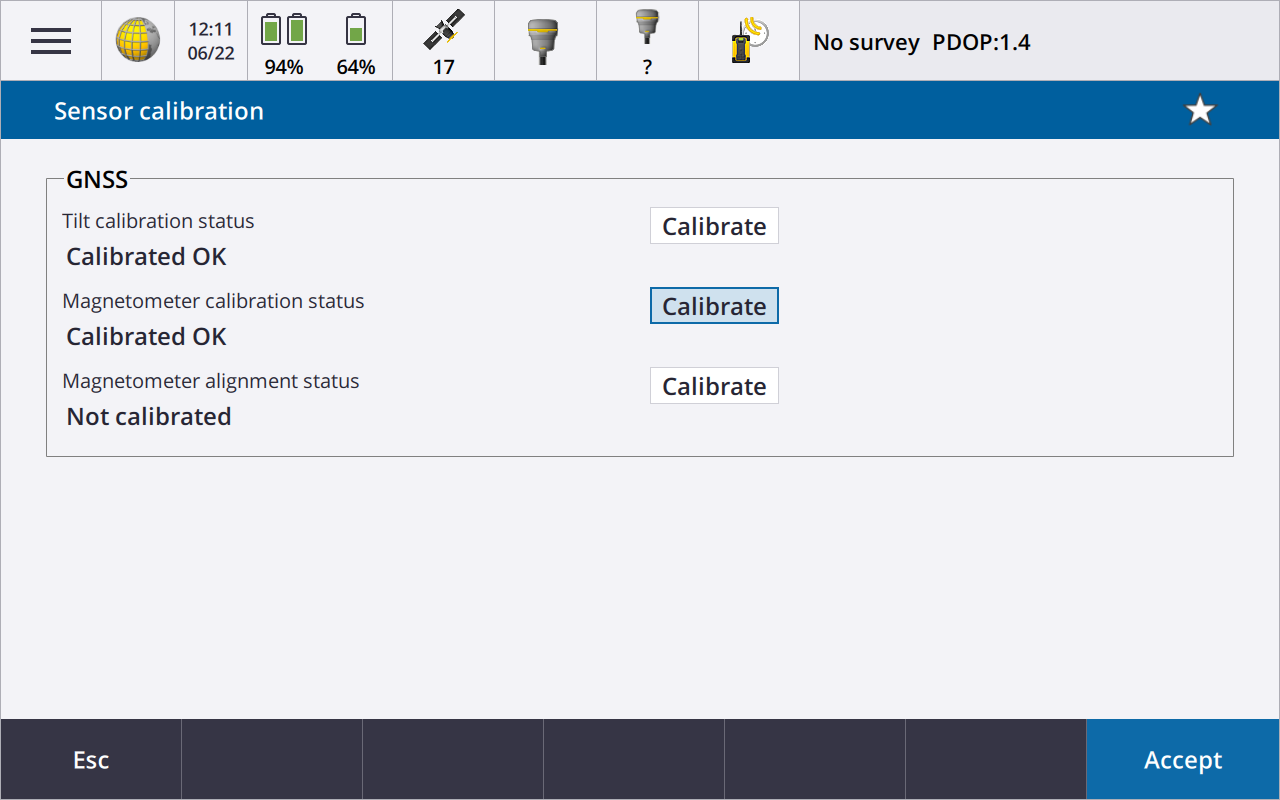
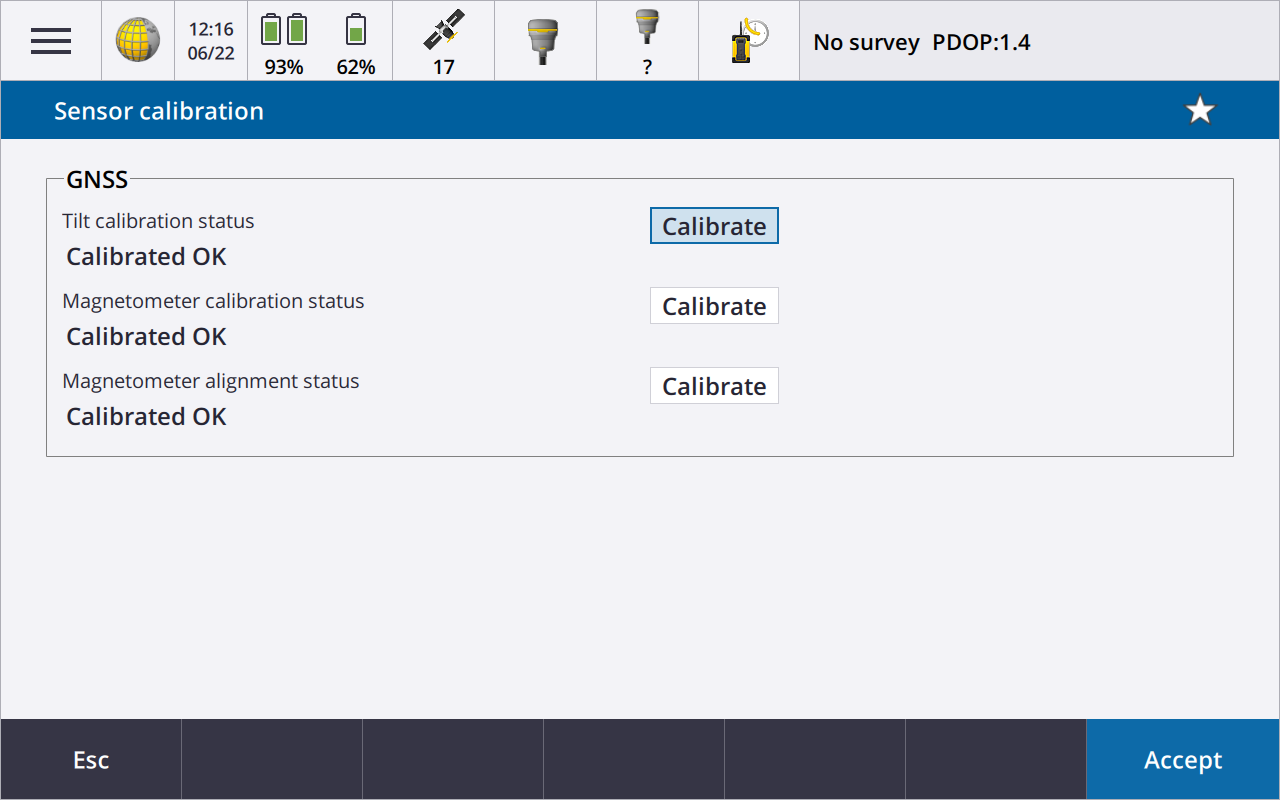
Once calibration is complete, the Sensor calibration screen reappears. Next you will perform the magnetometer calibration. Tap the Calibrate button next to the Magnetometer calibration status field.
-
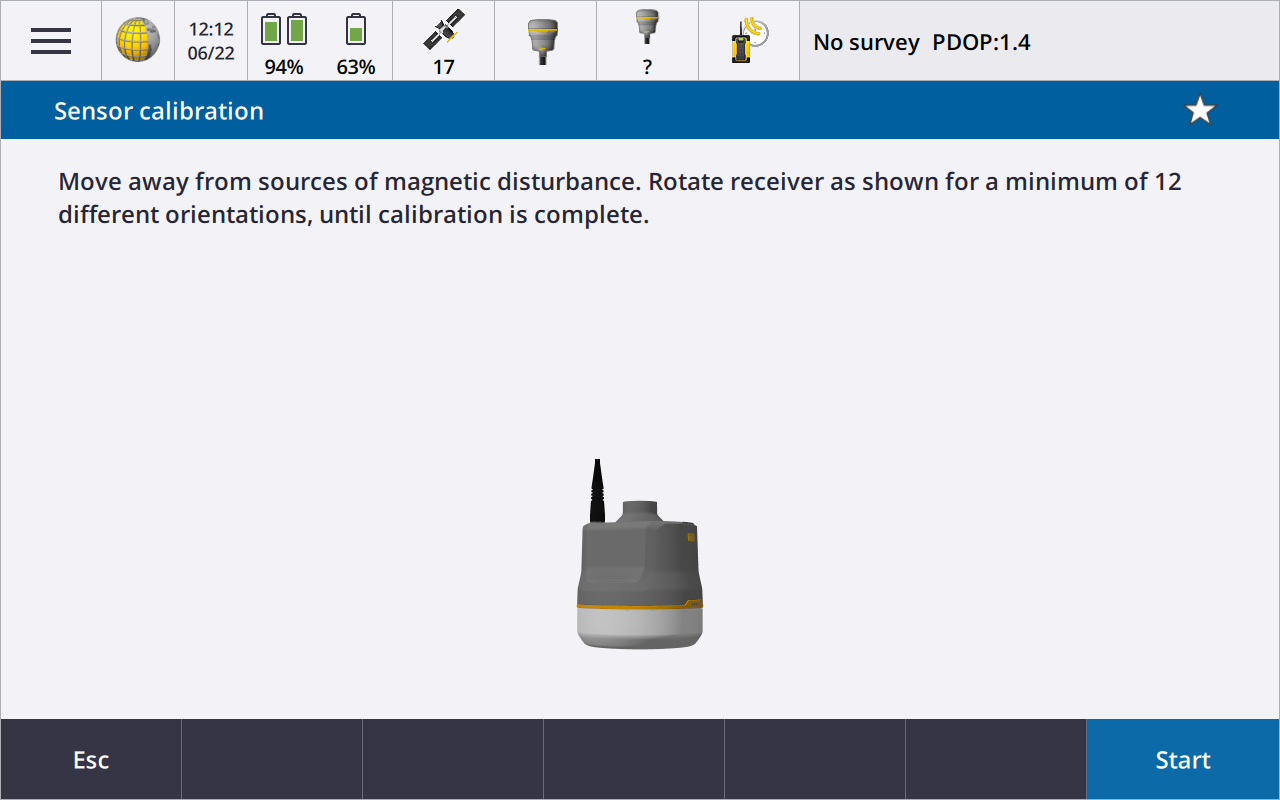
A message and graphic is displayed describing the magnetometer calibration procedure. Observe the visual graphic of the receiver, and then perform the calibration as shown. Tap Start.
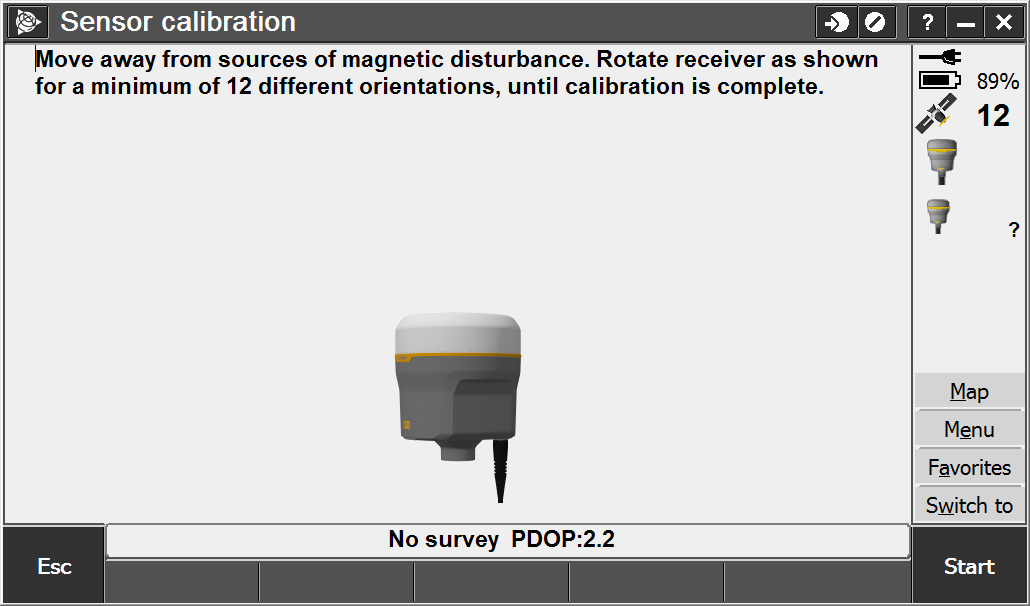
-
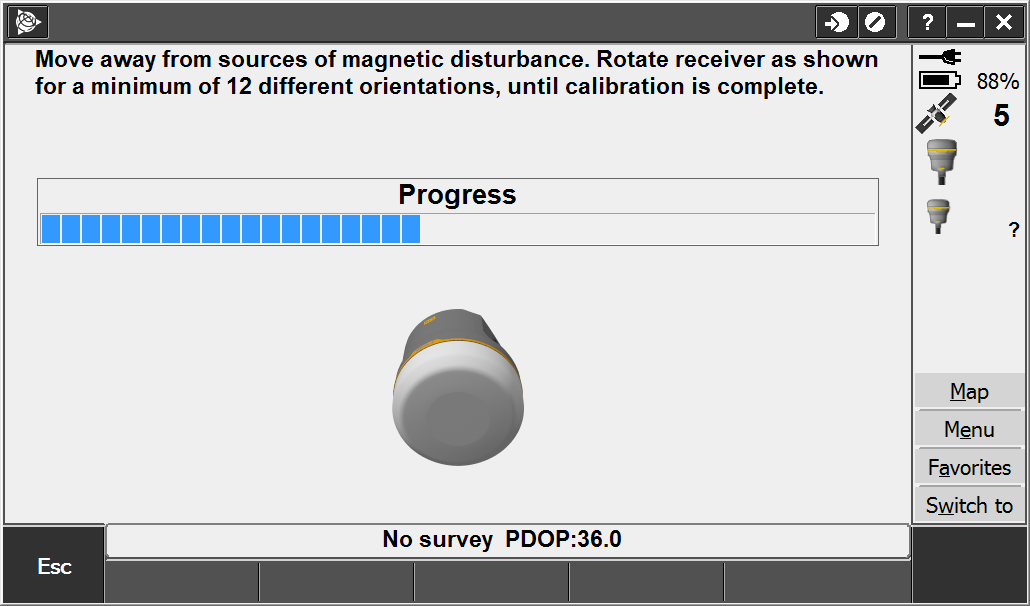
As you rotate the receiver through the 12 orientations, the progress bar will progress. If the bar is not progressing or progressing slowly, you may not be rotating the receiver correctly. Rotate the receiver in the vertical one complete rotation, then rotate the receiver in the horizontal a few degrees. Repeat.
-
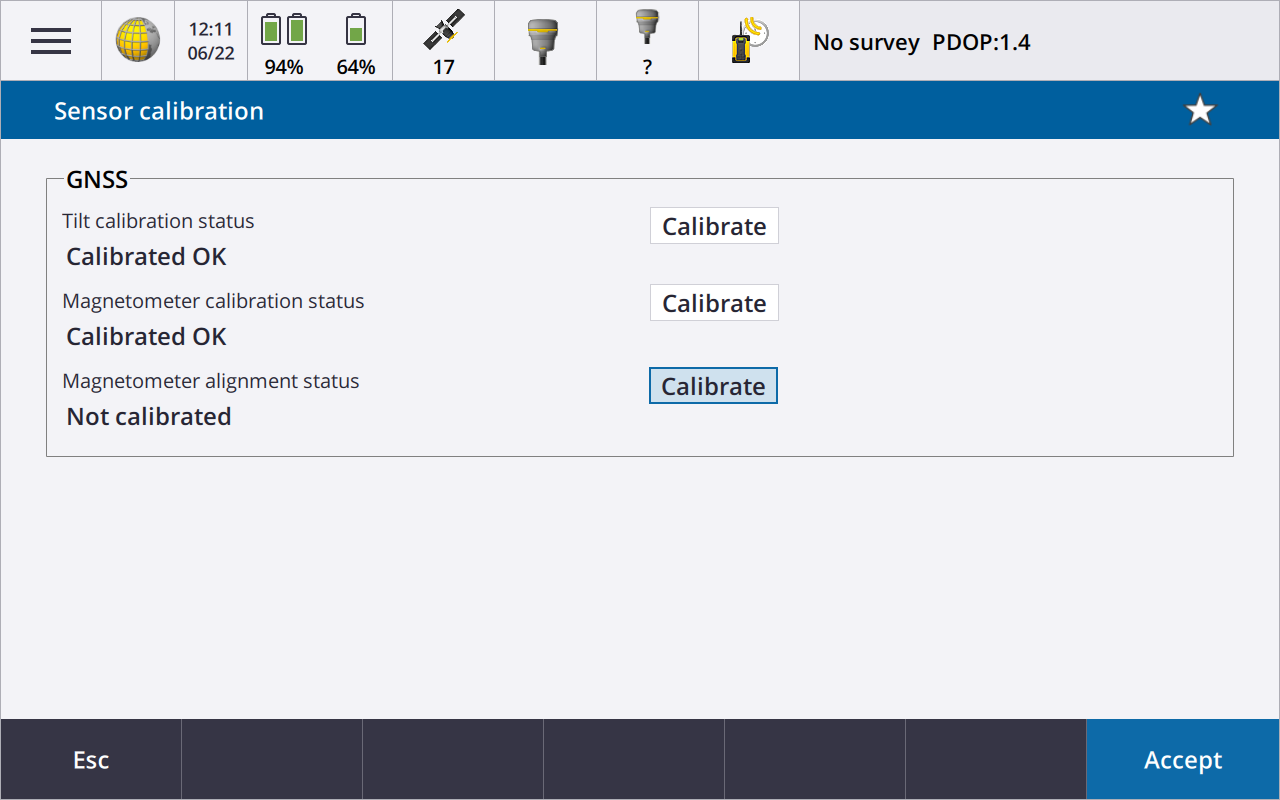
Once calibration is complete, the Sensor calibration screen reappears. Next you will perform the magnetometer alignment. Tap the Calibrate button next to the Magnetometer alignment status field.

-
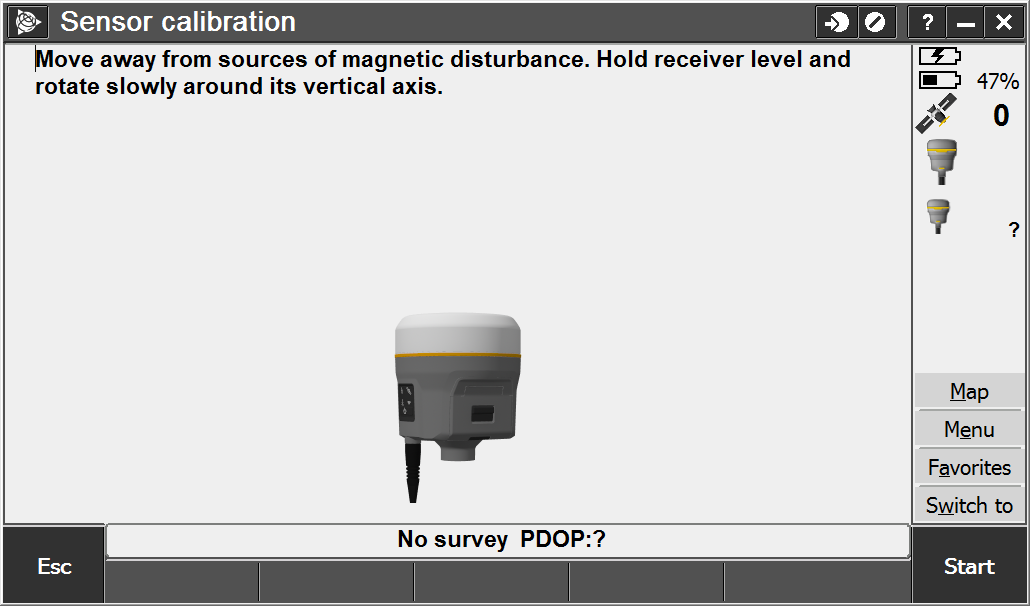
A message and graphic is displayed describing the magnetometer alignment procedure. Observe the visual graphic of the receiver, and then perform the alignment as shown. Tap Start.
-
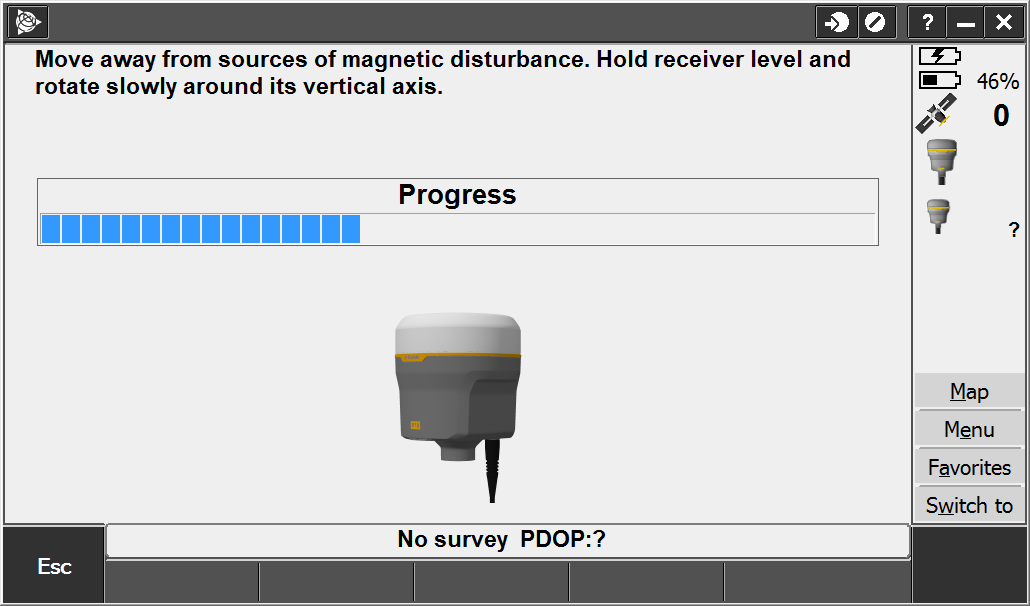
As you rotate the receiver 360 degrees in the horizontal, the progress bar will progress. If the bar is not progressing or progressing slowly, you may be rotating the receiver too quickly. Rotate the receiver at the same speed as the graphic shows.
-
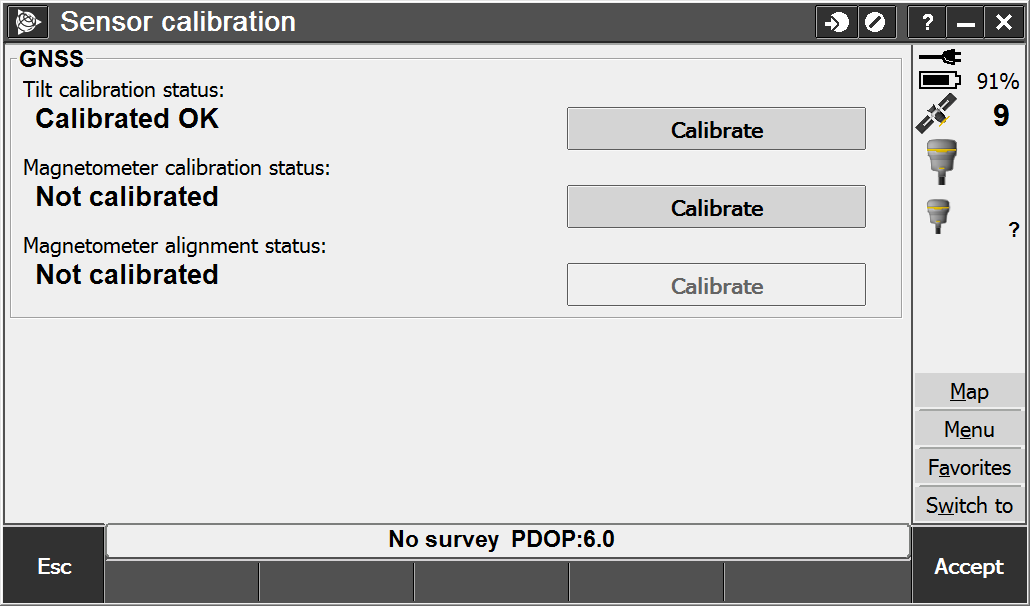
Once calibration is complete, the Sensor calibration screen reappears. The full tilt calibration is complete. Tap Accept to return to the eBubble options screen.

R10-2
-
ConteIn the General Survey menu, select Instrument, then eBubble options.
-
The eBubble options screen appears. You are now ready to perform the calibration. Tap Calib. An electronic bubble is displayed to indicate if you are holding the instrument level.
-
The Sensor calibration screen appears. First the tilt calibration is performed. Tap the Calibrate button next to the Tilt calibration status field.
-
A message asks you to confirm that the instrument is level and braced against any movement. Tap Start.
-
A progress bar indicates that calibration is in progress.
-
Once calibration is complete, the Sensor calibration screen reappears. Next you will perform the magnetometer calibration. Tap the Calibrate button next to the Magnetometer calibration status field.
-
A message and graphic is displayed describing the magnetometer calibration procedure. Observe the visual graphic of the receiver, and then perform the calibration as shown. Tap Start.
-
As you rotate the receiver through the 12 orientations, the progress bar will progress. If the bar is not progressing or progressing slowly, you may not be rotating the receiver correctly. Rotate the receiver in the vertical one complete rotation, then rotate the receiver in the horizontal a few degrees. Repeat.
-
Once calibration is complete, the Sensor calibration screen reappears. Next you will perform the magnetometer alignment. Tap the Calibrate button next to the Magnetometer alignment status field.
-
A message and graphic is displayed describing the magnetometer alignment procedure. Observe the visual graphic of the receiver, and then perform the alignment as shown. Tap Start.
-
As you rotate the receiver 360 degrees in the horizontal, the progress bar will progress. If the bar is not progressing or progressing slowly, you may be rotating the receiver too quickly. Rotate the receiver at the same speed as the graphic shows.
-
Once calibration is complete, the Sensor calibration screen reappears. The full tilt calibration is complete. Tap Accept to return to the eBubble options screen.
-