RVT (Revit)
To publish native Revit RVT model files to Trimble Connect, you must use either the Trimble Connect Desktop application, or the Trimble Connect Revit Add-in (recommended).
The Revit Add-In is used within the native Revit program. The Revit Add-In allows for the uploading of .RVT files directly from the Revit program to the Trimble Connect platform and features useful content filtering and coordinate management options.
 Download the Trimble Connect for Revit Add-In
The Revit Add-In for Trimble Connect must first be installed. Log in into Trimble Connect Web and click the Applications button (top right of the screen).
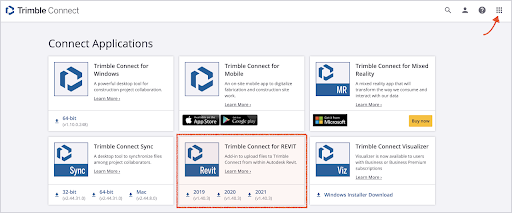
Install the Trimble Connect for Revit Add-In
-
Launch the setup.exe file in the folder where you saved the Revit Add-In.
-
Once setup is launched, proceed with the installation process.
-
Once you have finished installing the Revit Add-In, you'll be able to log in using a username and password.
-
When installed, the Add-In can be found in the Add-Ins ribbon within Revit.

Upload from Revit to Trimble Connect
-
Create a Project in Trimble Connect Browser or Windows.
-
Start Revit.
-
Open the model.
-
Start the File Uploader Add-In.
-
Sign in with your Trimble Connect account. Select Stay signed in to automatically log in the next time you use the Add-In.
The Revit Add-In will then load the Trimble Connect project directory listing.

-
Double-click the project and double-click the folder that you want to upload the Revit file to.

-
Select Upload once the folder has been selected and the uploading process will begin.
-
A message appears about the used Coordinate System. Click OK to continue.
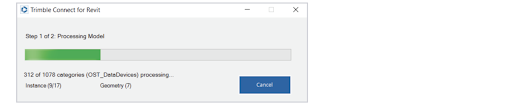
Trimble Connect automatically uploads the Revit model, and makes a viewable model by also creating an IFC model in the background, while maintaining the original filename for reference purposes.
-
Click Close when the process has been completed. You can now go back to the Trimble Connect platform and view the .RVT file.
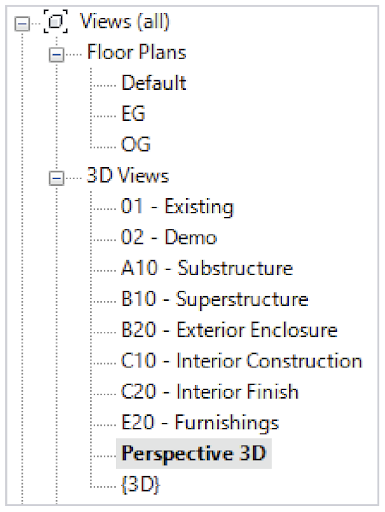
Default 3D View
By default the Add-In will search for a 3D-view called Trimble Connect. This view is used to determine the visibility of the Viewable Model within Trimble Connect.
This behavior can be overridden by selecting Upload model in current 3D view before uploading:

Exporting a Custom View
A custom view can also be created and uploaded to Trimble Connect. To do this, simply create / select a custom view in Revit from the Project Browser palette and select the Upload model in current 3D view option.
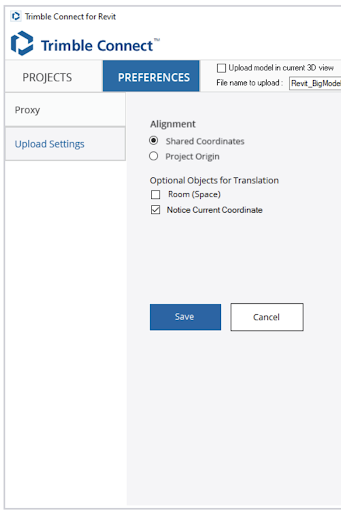
Upload Settings - Shared Coordinates
The Revit Add-In supports shared coordinates, which is enabled by default. You can change this setting from within the Revit Add-In.
-
Click the Preferences link (bottom left) in the Revit Add-In.
You can also access Preferences after you have logged in to the Add-In.
-
On the Preferences screen, click Upload Settings.
-
Make the necessary changes.
-
Click Save.
Upload Revit Files with Trimble Connect for Windows
To upload a Revit file:
-
Download the latest version of Trimble Connect for Windows from the Trimble Connect App Store and install it on your computer.
NOTE –If you already have Trimble Connect for Windows on your computer, verify you are using the latest version. Update if necessary. Version 1.9 or later is required.
-
Sign in to Trimble Connect.
-
Open your project.
-
Click Add file (or drag-drop) an .RVT file from Windows Explorer.

The Revit file is added and begins assimilation in the Windows application.
Once your file has finished processing, you can then upload it to the server where it can be viewed in the Browser application.
Default 3D View
A Revit file can have multiple views in it. Trimble Connect for Windows uses the following rules to determine which view gets selected for rendering.
-
The rules are evaluated in numerical order:
-
If a 3D View called Publish is found, it is selected;
-
If the current Starting View is 3D view, it is selected;
-
If there is a 3D view matching for name {3D}, it is selected;
-
The first 3D view found is selected;
-
The Starting View is selected (not 3D, the same that is shown when the model is loaded to the Revit application).
