Setting up the Trimble HPS2 handle
When you purchase the Trimble HPS2 handle you should find the following items in the case:
-
Trimble HPS2 handle
-
Pole mounting bracket
-
Sunshade attachment
-
Batteries (x 2)
-
Battery charger
-
Steel mounting plates (x2)
-
Wrist strap
-
QR code card
A mobile phone / tablet is not provided. Refer to SiteVision system requirements.
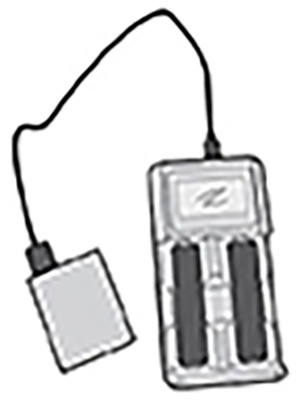
Before turning on and using SiteVision on the HPS2 handle, charge the batteries fully with the provided charger. Plug the charger into your PC or an existing USB wall adaptor.

The battery charger will charge two batteries simultaneously and provides information on the level of charge.
Depending on the level of battery charge, charging the batteries fully may take over 6 hours.
Do not charge the battery in temperatures below 0 °C (32 °F) or above 40 °C (104 °F).
-
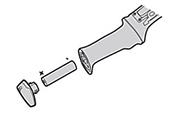
Twist open the bottom of the handle.
-
Insert a fully charged battery, positive down as shown.
-
Push and twist the bottom cap of the handle to close it and secure the battery. Note that the cap must be fully closed to ensure a good seal.

Use only the supplied battery.
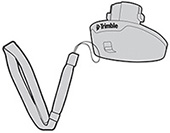
Attach the wrist strap to the base of the system as shown.
-
Thread the fine chord loop through the attachment guide.
-
Feed the main wrist strap through the fine chord loop.
-
Pull on the wrist strap to tighten and ensure that it is secure.

Trimble recommends using a rugged hard plastic case with your mobile device, for example an OtterBox® Symmetry Series®.
DO NOT use a soft plastic or rubberized case.
-
The adhesive on the mount used to attach the device to the HPS2 handle may not bond securely to the case material.
-
Some movement will occur between the case and the HPS2 handle, reducing the accuracy of the system.
Trimble recommends that you attach the adhesive mount to the rugged case. This allows you to use the device independently of the adhesive mount if required.
The mount's adhesive is very strong, so in the event that you have attached it directly to your device, you must exercise extreme caution if you try to remove the mount.
If available, use isopropyl alcohol to clean the back of the device or device case where the adhesive mount will be attached.
-
With the adhesive covering on the mounting plate facing upward, attach a mounting plate to the magnets on the HPS2 handle.
-
Before you remove the adhesive covering on the mounting plate, place your device on top of the mounting plate and check that the mounting plate will be attached to your device in the correct place. Make sure the device will sit flat on the HPS2 handle, you can see the screen clearly, and the device's camera is visible and not obstructed by the DA2 receiver or the handle.
-
Remove your device, then remove the adhesive covering on the mounting plate.
-
Reposition your device over the mounting plate on the HPS2 handle and press down for a few seconds so the contact adhesive on the mounting plate can bond with the device.
IMPORTANT: Allow a minimum of one hour to ensure proper adhesion.
Position the device over the magnets on the HPS2 handle. The mounting plate on the back of the device will connect with the magnets with an audible click.
Push the power button on the HPS2 handle (under the receiver) to turn it on. The power button lights up when the system is switched on.
The illuminated button color indicates the charge level of the battery as follows:
-
No light = off
-
Green = Good battery charge
-
Blue - Electronic Distance Measure (EDM) connected
-
Flashing red = Low battery charge
-
Solid red = Battery flat, EDM disconnected