Stakeout settings
To access these settings, from the main screen, select the menu and then tap Settings / Stakeout. The software supports three elevation reference methods used to mark cut depths or fill heights on a grade stake or location/grade stake:
-
Measuring the cut/fill reference mark from the ground surface
-
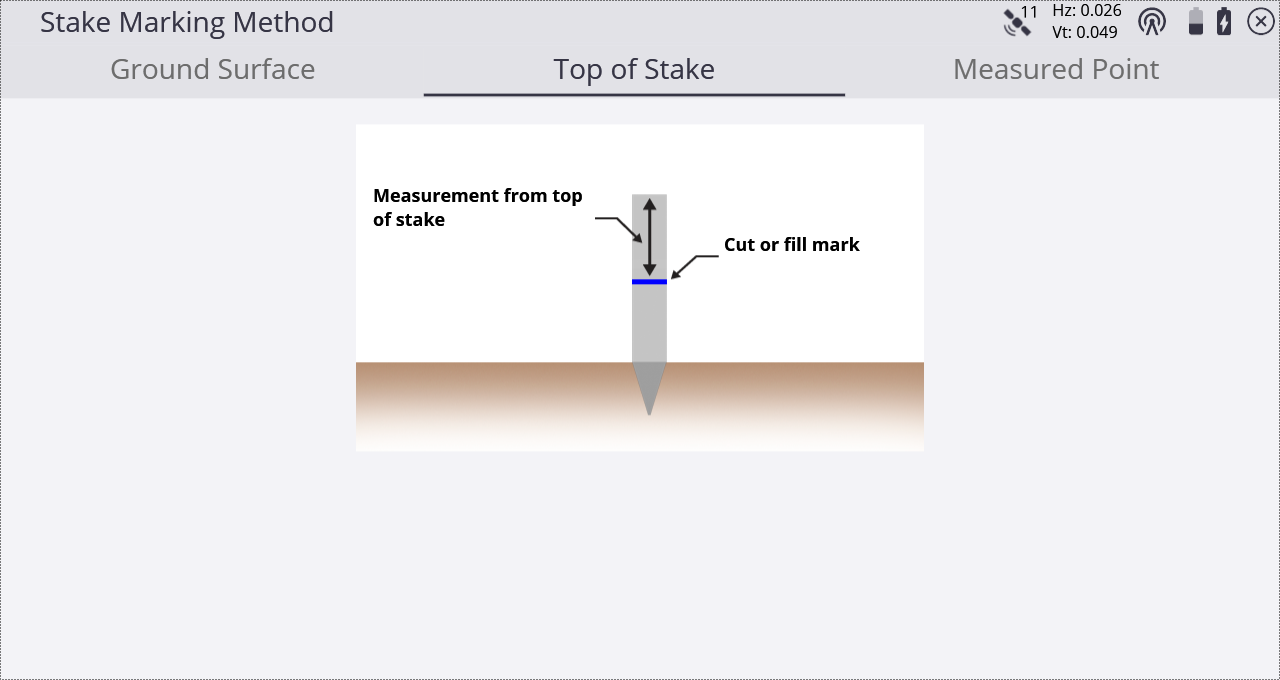
Measuring the cut/fill reference mark from the top of the stake
-
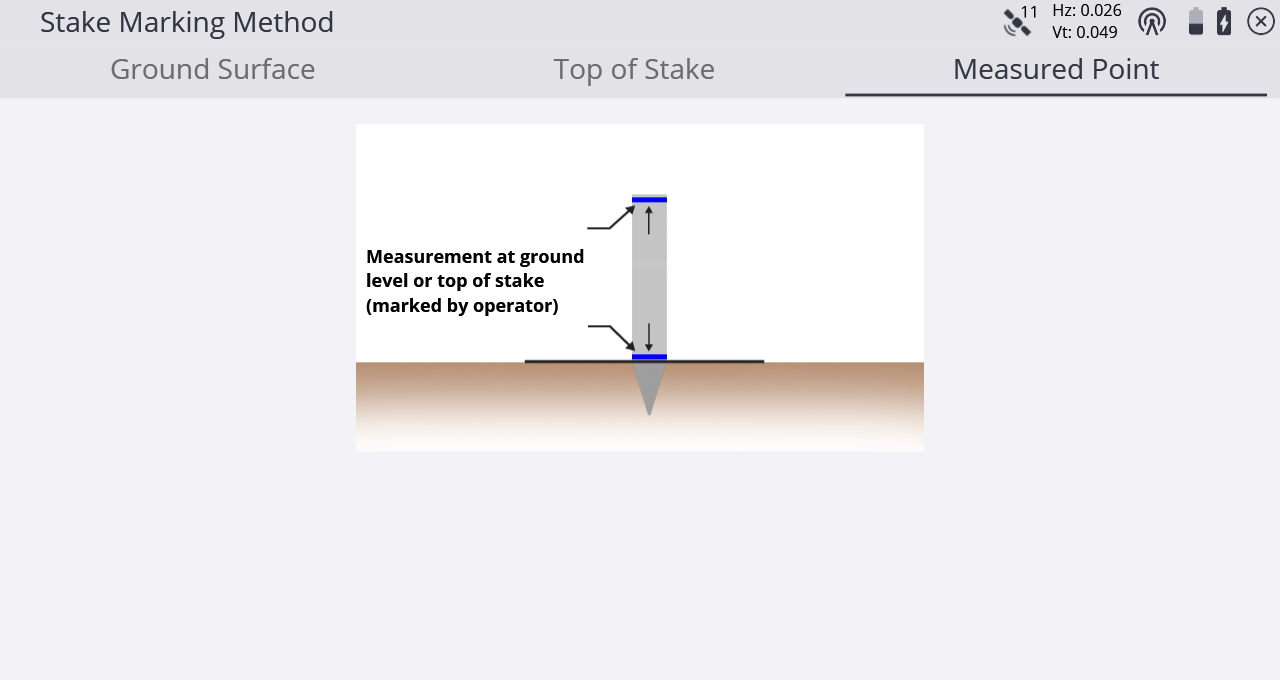
Cut/fill reference from the measured point
These methods help you to establish a cut/fill reference mark on the stake at a specified cut/fill measurement interval, such as at one-foot increments. If you choose to place a cut/fill reference mark on the grade stake, a Stake Marking report helps you establish the position of the reference mark on the stake and helps you correctly label it.
Typically, you will use one of the above methods consistently. When you first receive the software, switch to the desired setting. The software then uses that setting for all stakeout operations. When you tap Measure during a stakeout operation, the software converts the measured elevation, design elevation, and computed cut depth or fill height into information that you can then write on the stake. It also informs you where to mark the stake based on the settings that you enter in this screen:
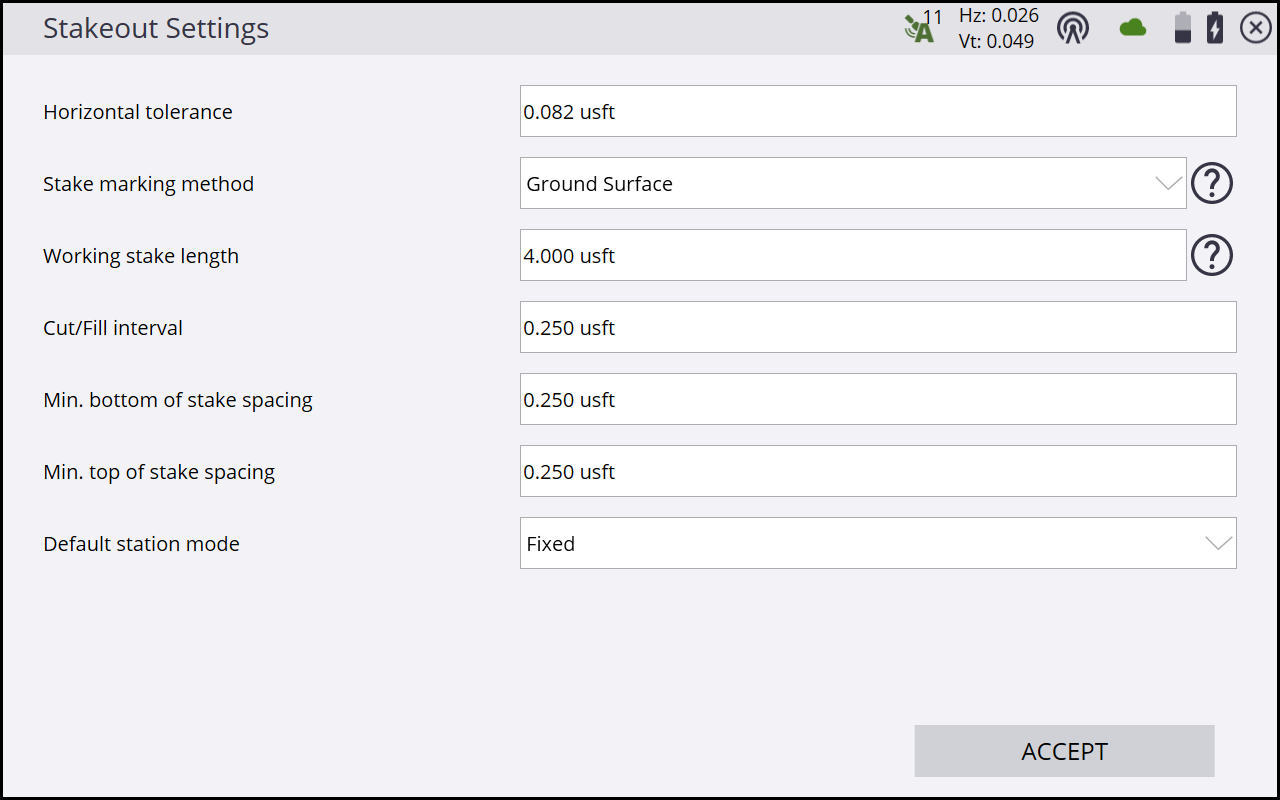
The stakeout tolerance is also entered in this screen and dictates if the stakeout point is within tolerance, marked by a green flag on the map screen and recorded in the tasklog and stakeout report.
Additionally, the default station method for staking lines is also selected on this screen, whether to enter the line-staking command in random or fixed mode.
The software supports three elevation reference methods used to mark cut depths or fill heights on a grade stake or location/grade stake. Tap ![]() next to Stake marking method to see a graphical representation of each method.
next to Stake marking method to see a graphical representation of each method.
-
Measuring the cut/fill reference mark from the ground surface
-
Measuring the cut/fill reference mark from the top of the stake
-
Cut/fill reference from the measured point
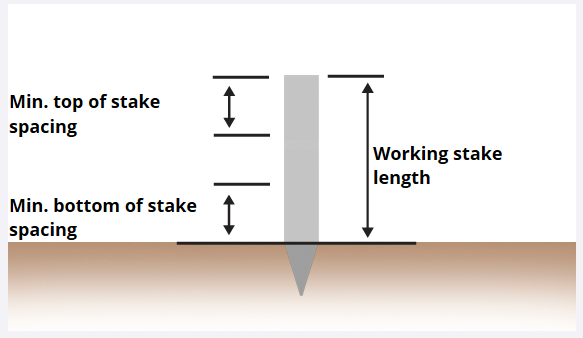
These methods and the working stake length, cut/fill interval, and minimum bottom and top of stake staking, help you to establish a cut/fill reference mark on the stake at a specified cut/fill measurement interval, such as at one-foot increments. If you choose to place a cut/fill reference mark on the grade stake, a Stake Marking report helps you establish the position of the reference mark on the stake and helps you correctly label it. Tap ![]() next to the Working Stake Length to see what each value represents on the Stake Marking Parameters.
next to the Working Stake Length to see what each value represents on the Stake Marking Parameters.
Measured Point
This method enables you to label a grade stake with the required cut depth or fill height as measured from the measured point, which can be either the top of stake or the current ground surface. If you choose to mark the stake with the cut depth or fill height as referenced to the measured point, the software simply informs you of the direct cut or fill measurement from that point. In this case, you can mark that measurement on the stake, using your normal convention to indicate from where the measurement is referenced.
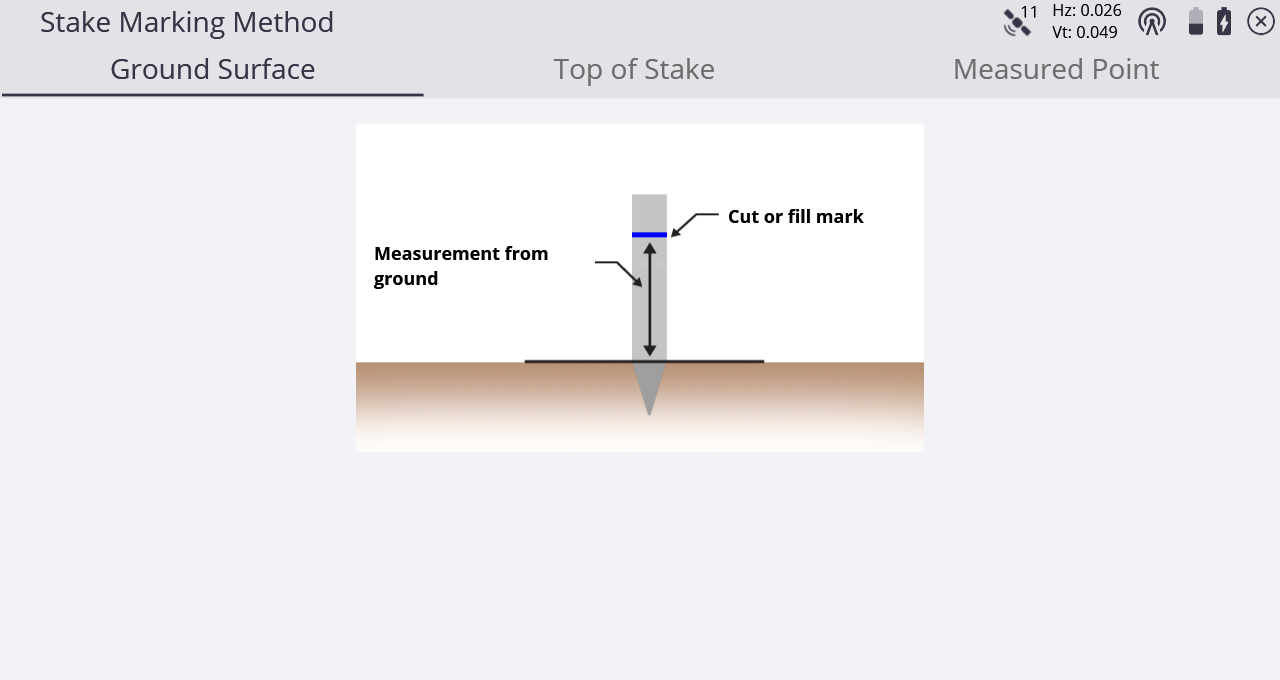
Ground Surface
With this method, the software guides you to the horizontal location of the stakeout point. The software generates a Stake Marking report that shows the distance from the ground up to where you must mark the stake. It also shows the value of cut or fill to mark on the stake.
Top of Stake
With this method, the software guides you to the horizontal location of the stakeout point. You then hammer the stake into the ground and measure the top of the stake. You can change the antenna height for this measurement in case you want to take the receiver off the pole and place it directly on the stake. The software shows the distance from the top of the stake down to where you must mark the stake. It also shows the value of cut or fill to mark on the stake.