The Plumb Pole routine
The Plumb Pole routine can be used to obtain increased horizontal accuracy when Tilt Compensation is active. The routine corrects for a pole that may have become bent and is no longer completely plumb or straight, or if the physical spirit level bubble vial is not correctly calibrated on the pole. This means that no matter what state the pole or physical vial bubble is in, Tilt Compensation can give accurate horizontal results.
Trimble recommends that you run the routine the first time an SPS986 or R780 receiver is used for Tilt Compensation, if the receiver is dropped, or in any situation where greater horizontal accuracy is needed when using Tilt Compensation. This routine only affects Tilt Compensation measurements. For GNSS-only measurements without Tilt Compensation, ensure that the survey rod is straight and has a calibrated physical spirit level, and an accurately calibrated eBubble (if eBubble use is needed).
Before running the Plumb Pole routine
-
The Plumb Pole routine is designed for use with the pole that is used with the receiver. The routine corrects for a pole that is no longer completely plumb or straight. It can be used with or without bipod legs. If the SPS986 or R780 receiver is used with a different pole, Trimble recommends that you re-run the routine on the new pole. Trimble also recommends that you remove the quick release from the pole and mount the receiver directly to the pole (without the quick release), to eliminate any play between the pole and the receiver.
-
Start this routine when you are on a control point. The pole tip should not move during the routine so it is best to place it on the control or other stable and indented point, where the tip of the rod can positively rest throughout the routine and you can make sure that the rod tip did not move during the procedure.
-
The routine can only be performed in standing or walking mode. Before running the routine, turn on Tilt Compensation and align the receiver. The more movement or distance walked during the alignment process, the better the quality of the alignment.
-
Determine if you need to run the routine by checking the horizontal accuracy of the receiver and survey rod pair as described below.
Check the horizontal accuracy of Tilt Compensation
-
Ensure the receiver is aligned and the pole tip is on a control point.
-
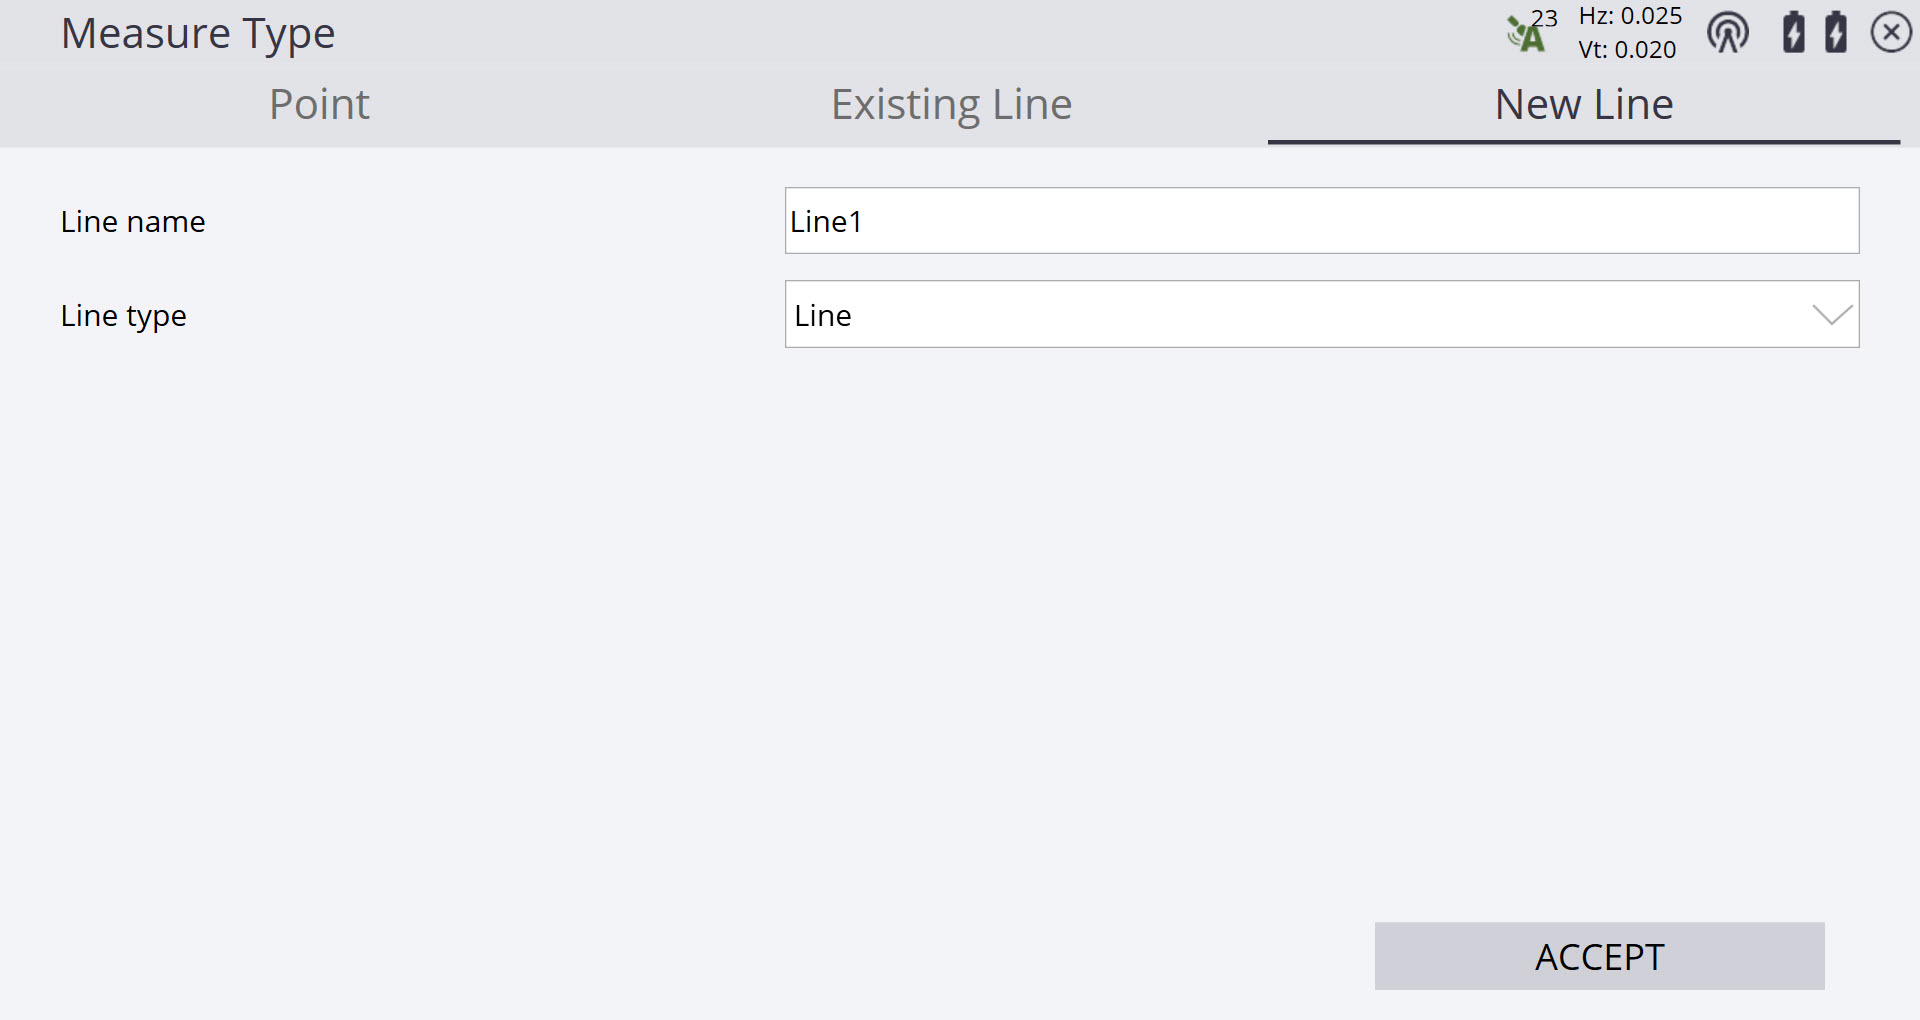
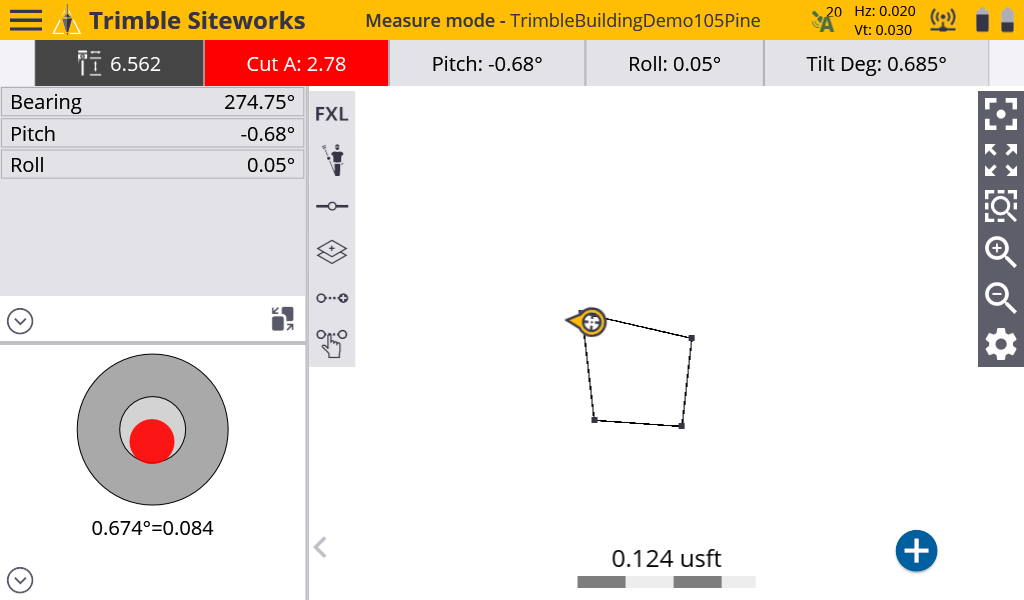
Holding the receiver approximately level, take four single standing measurements facing approximately north, east, south, and west. Before starting the measurements, set the measure type to New Line (not a Breakline) for easier interpretation and visualization.
-
Measure the distance between the opposite points (for example, North and South) to get an estimate of the horizontal accuracy of the receiver (if needed, use the COGO menu to create a line between) or tap and hold on a measured line. In the case below the distance is 0.014 m (0.047 U.S. survey feet). If the distance between the two points is outside of the horizontal tolerance needed for the task, Trimble recommends that you run the Plumb Pole routine.

Plumb Pole routine workflow
-
In an area of good open sky coverage for satellites, ensure that the receiver is aligned and the pole tip is on a control point. The more movement or distance walked during the alignment process, before placing the receiver on the control point, the better the quality of the alignment. The Plumb Pole routine takes one set of measurements while facing one direction, and then a second set of measurements after rotating the receiver 180 degrees and keeping the pole tip in the same location. Based on these measurements, it then corrects the receiver for any bends in the survey rod.
-
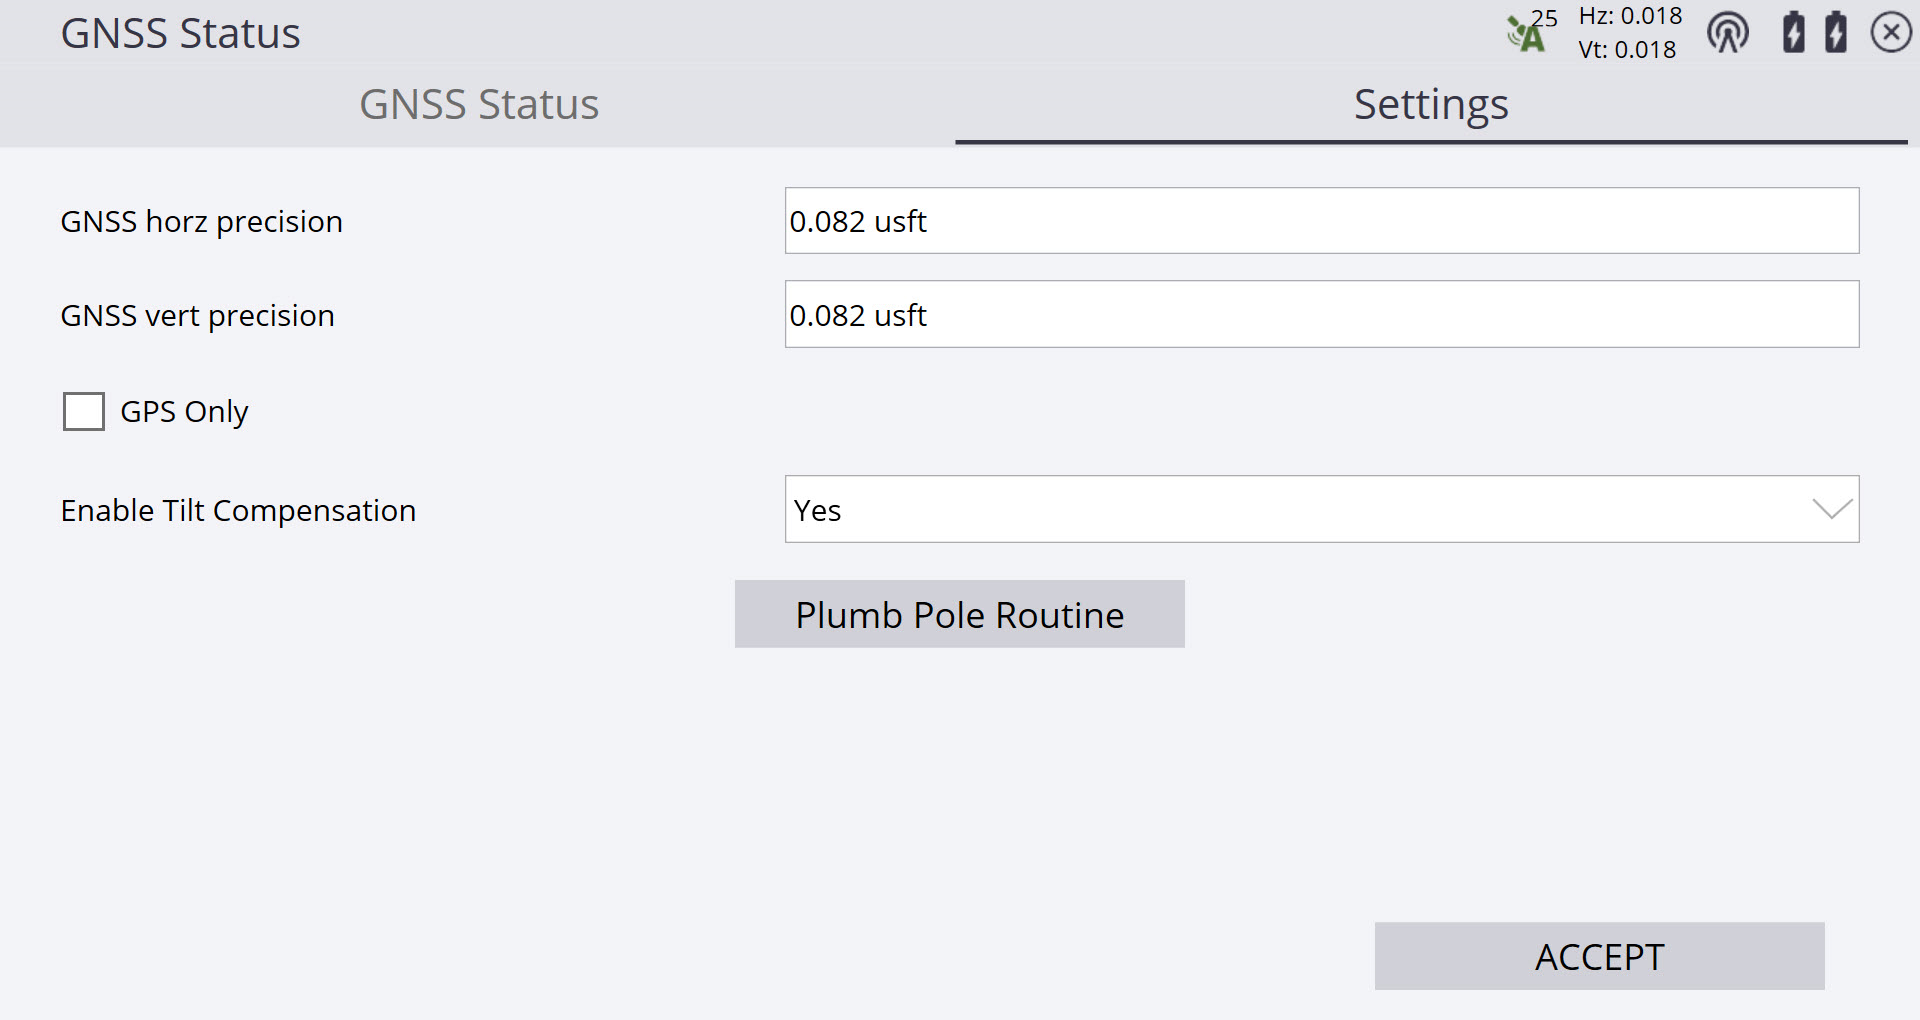
To access the Plumb Pole routine, tap the Precisions icon in the top right corner. The GNSS Status (skyplot) screen appears. Select the Settings tab.
-
Tap the Plumb Pole Routine button to start the workflow.
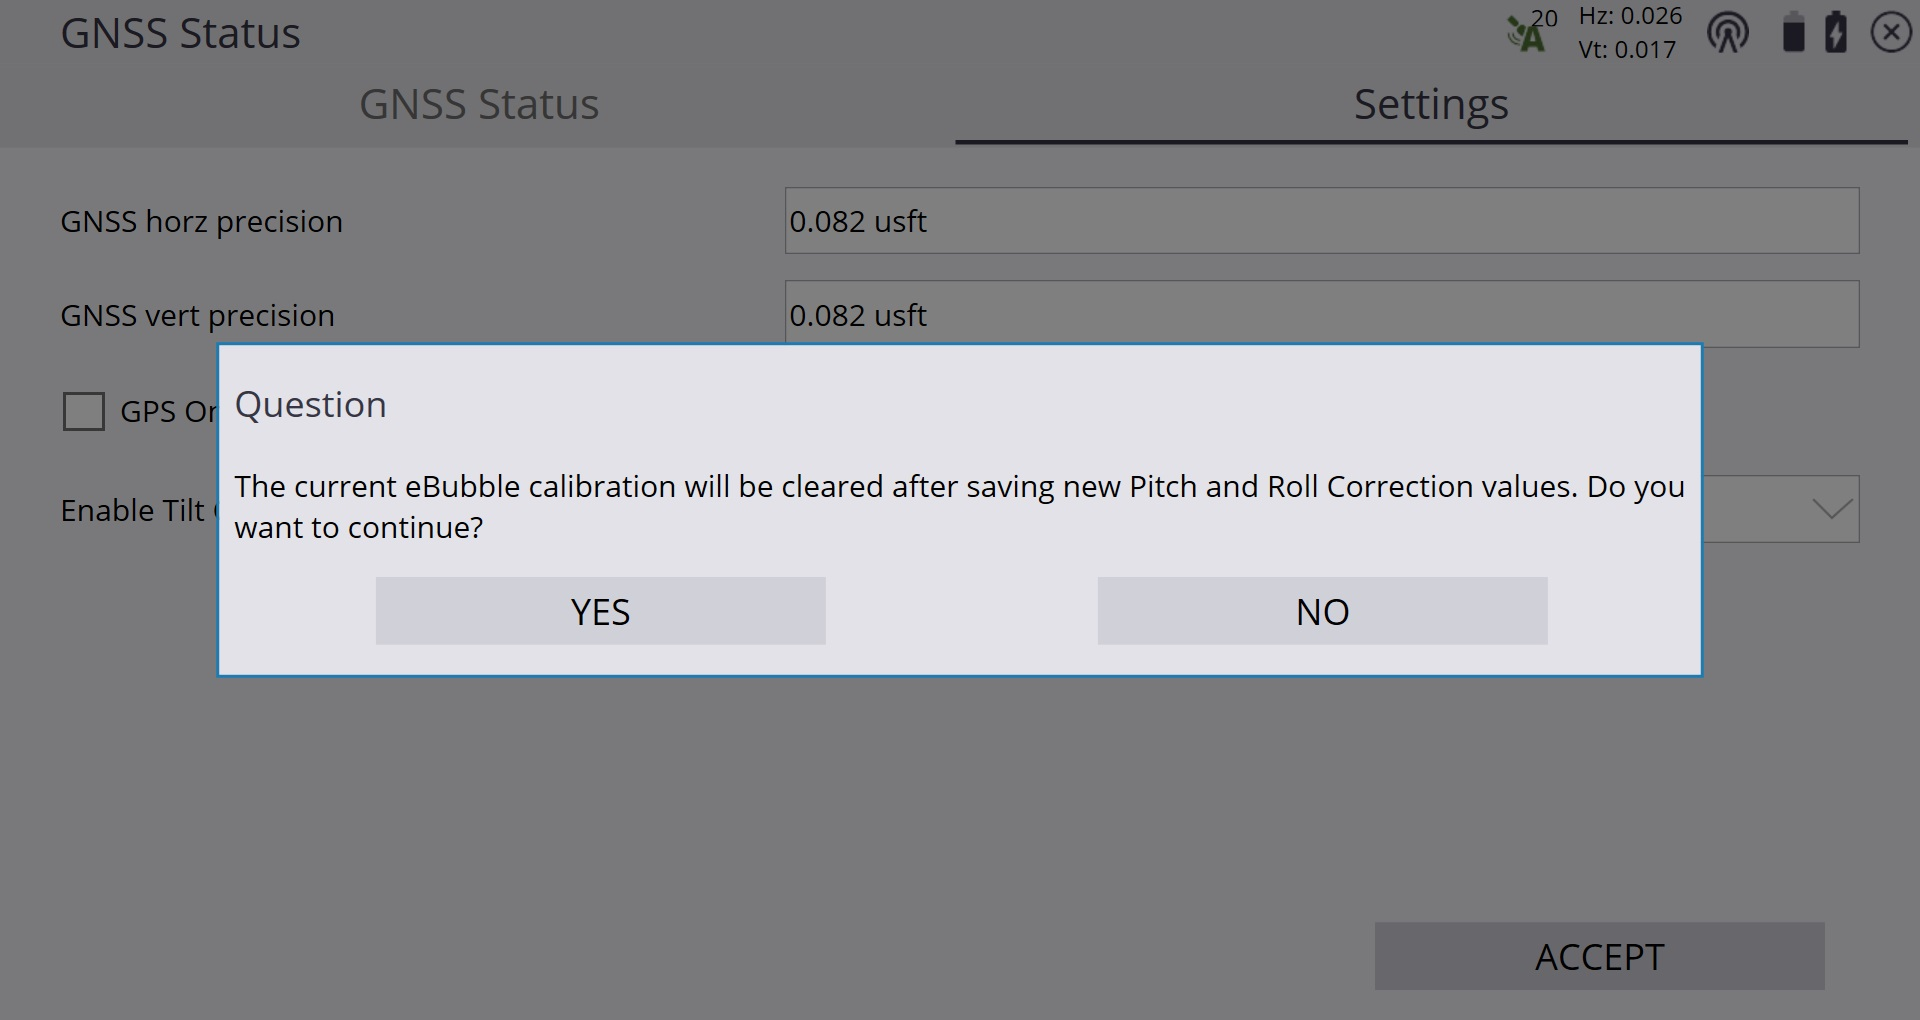
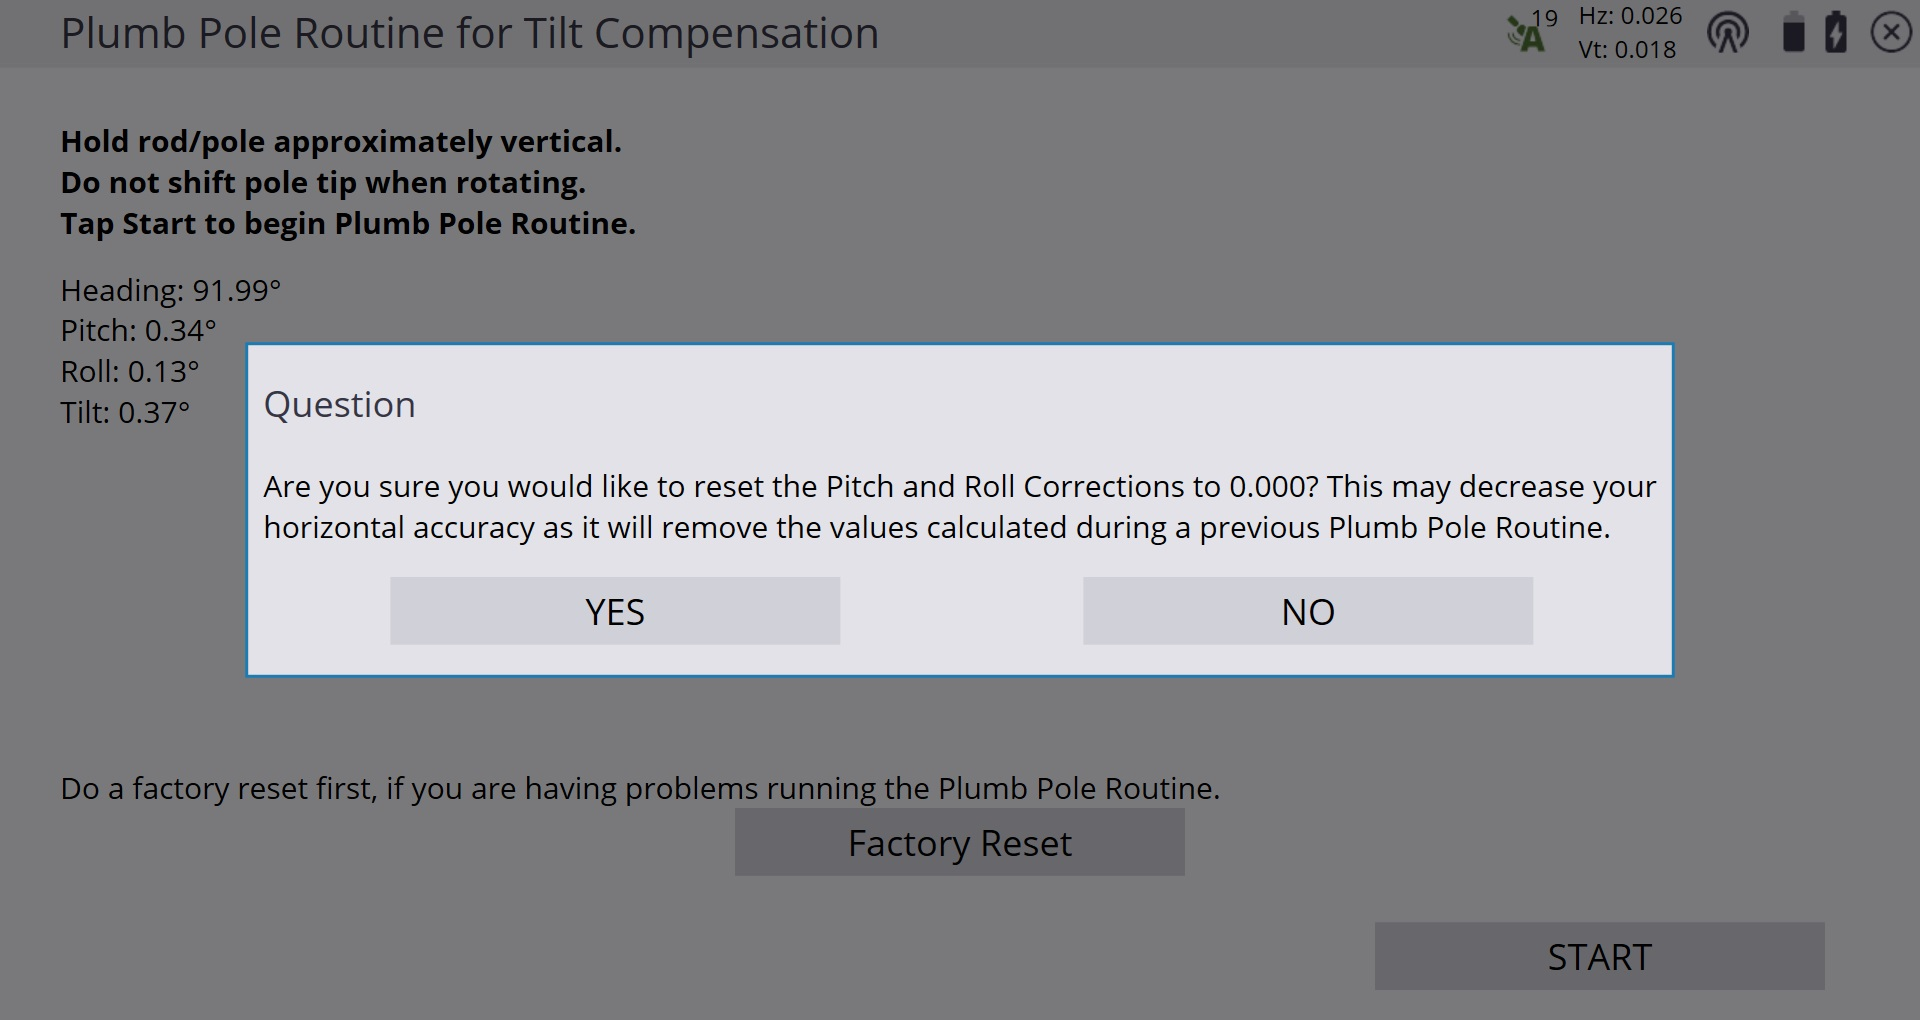
Running the Plumb Pole routine and either accepting the new values at the end of the routine, or doing a factory reset changes the eBubble to an uncalibrated state. After completing the Plumb Pole routine, you must complete a new eBubble calibration. A message appears asking if you want to continue. Tap YES. Tapping NO cancels the routine without any changes to the eBubble.
-
To enter the Plumb Pole routine, Tilt Compensation must be enabled, the receiver aligned, and the measurement mode in either standing or walking mode. If not, a message appears:

-
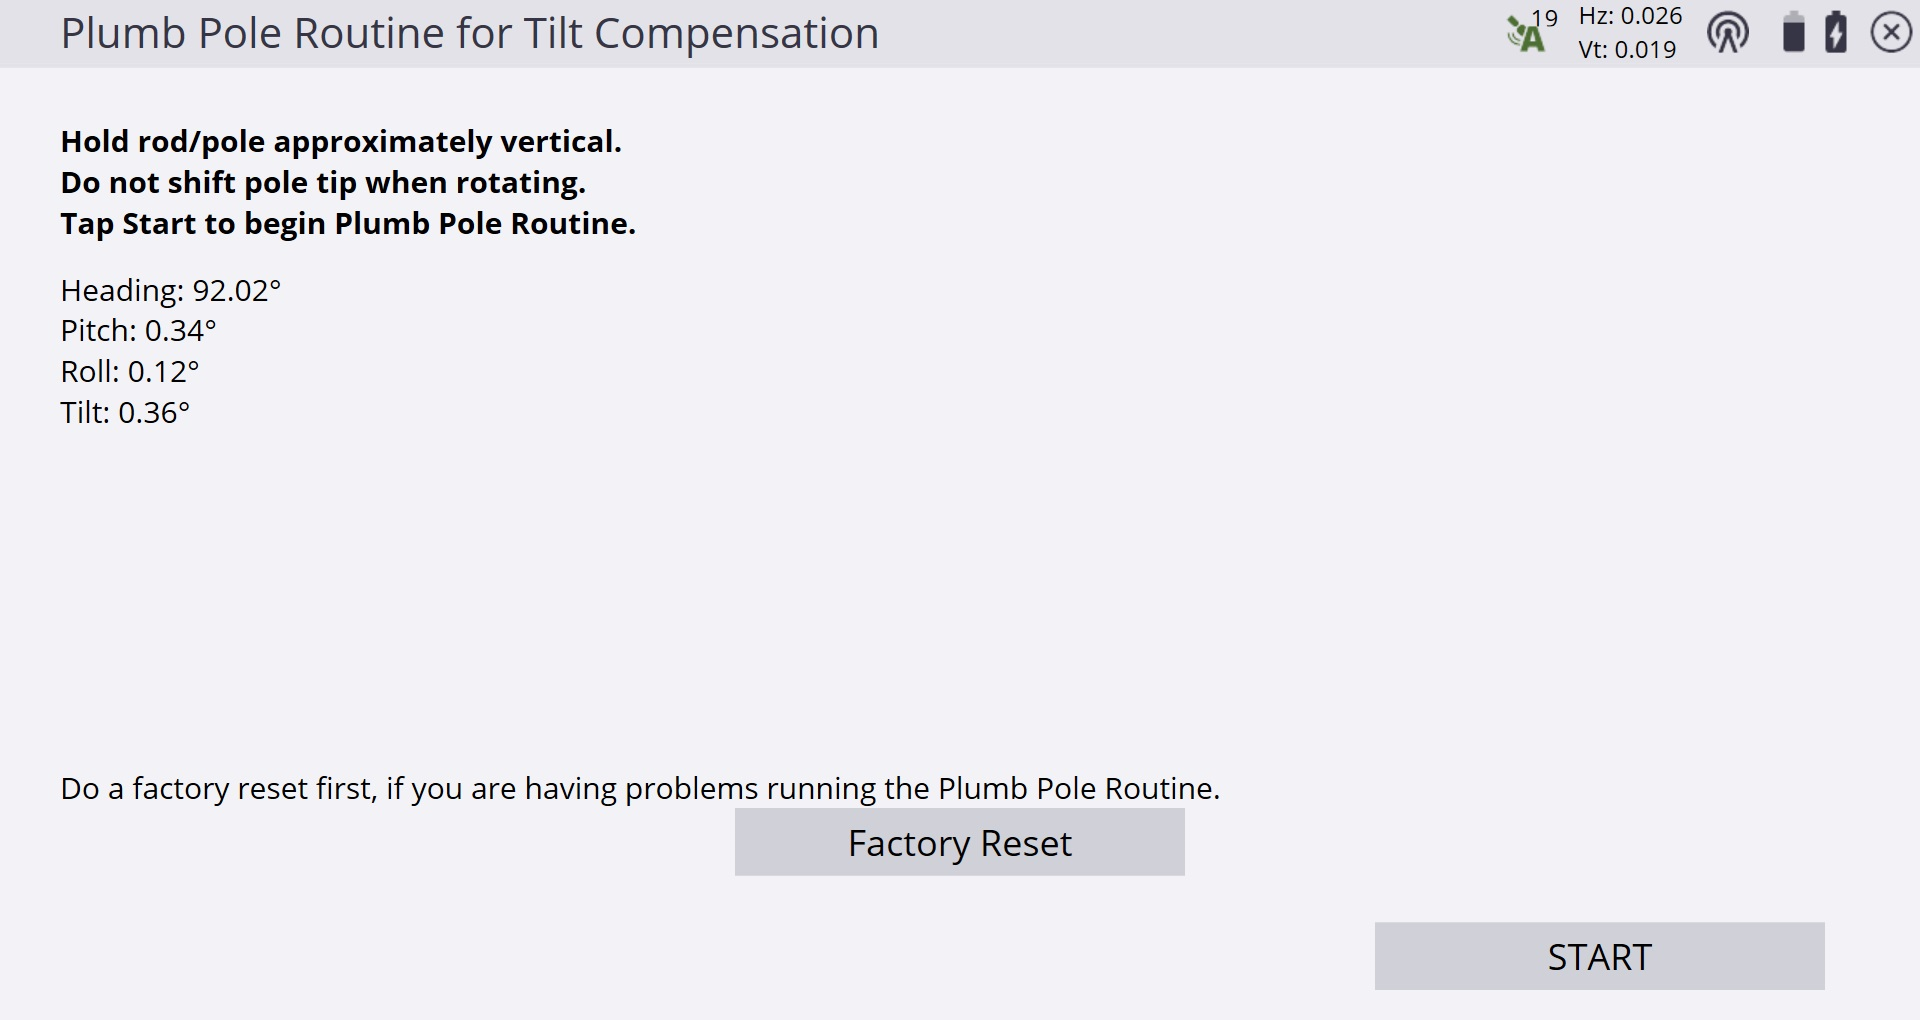
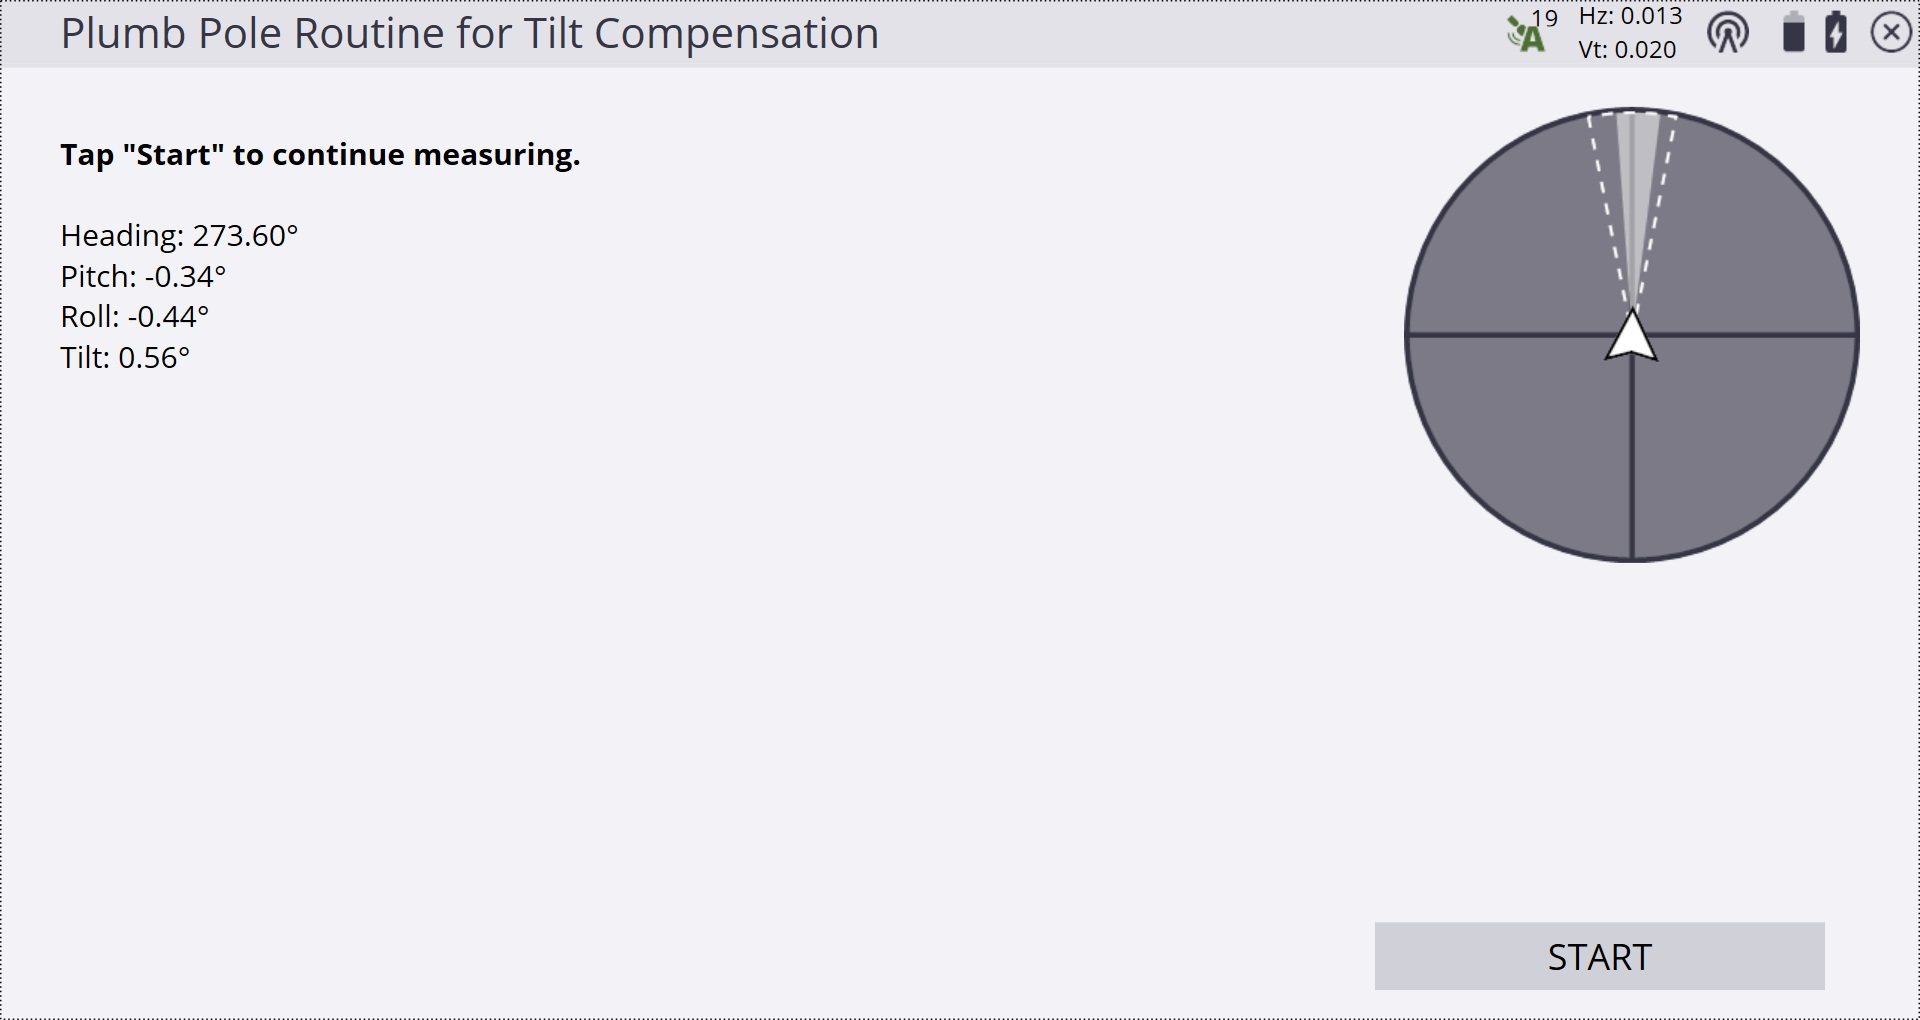
Carefully read the messages in the start screen. To start the routine, tap START.
-
The Factory Reset button should only be used if the routine fails to run after tapping START (for example, you get an out-of-tilt warning when the receiver is level). This button removes any values calculated during a previous routine and may decrease your horizontal accuracy. If a factory reset is completed, then the routine should be run directly after to obtain the most accurate results when in Tilt Compensation.
-
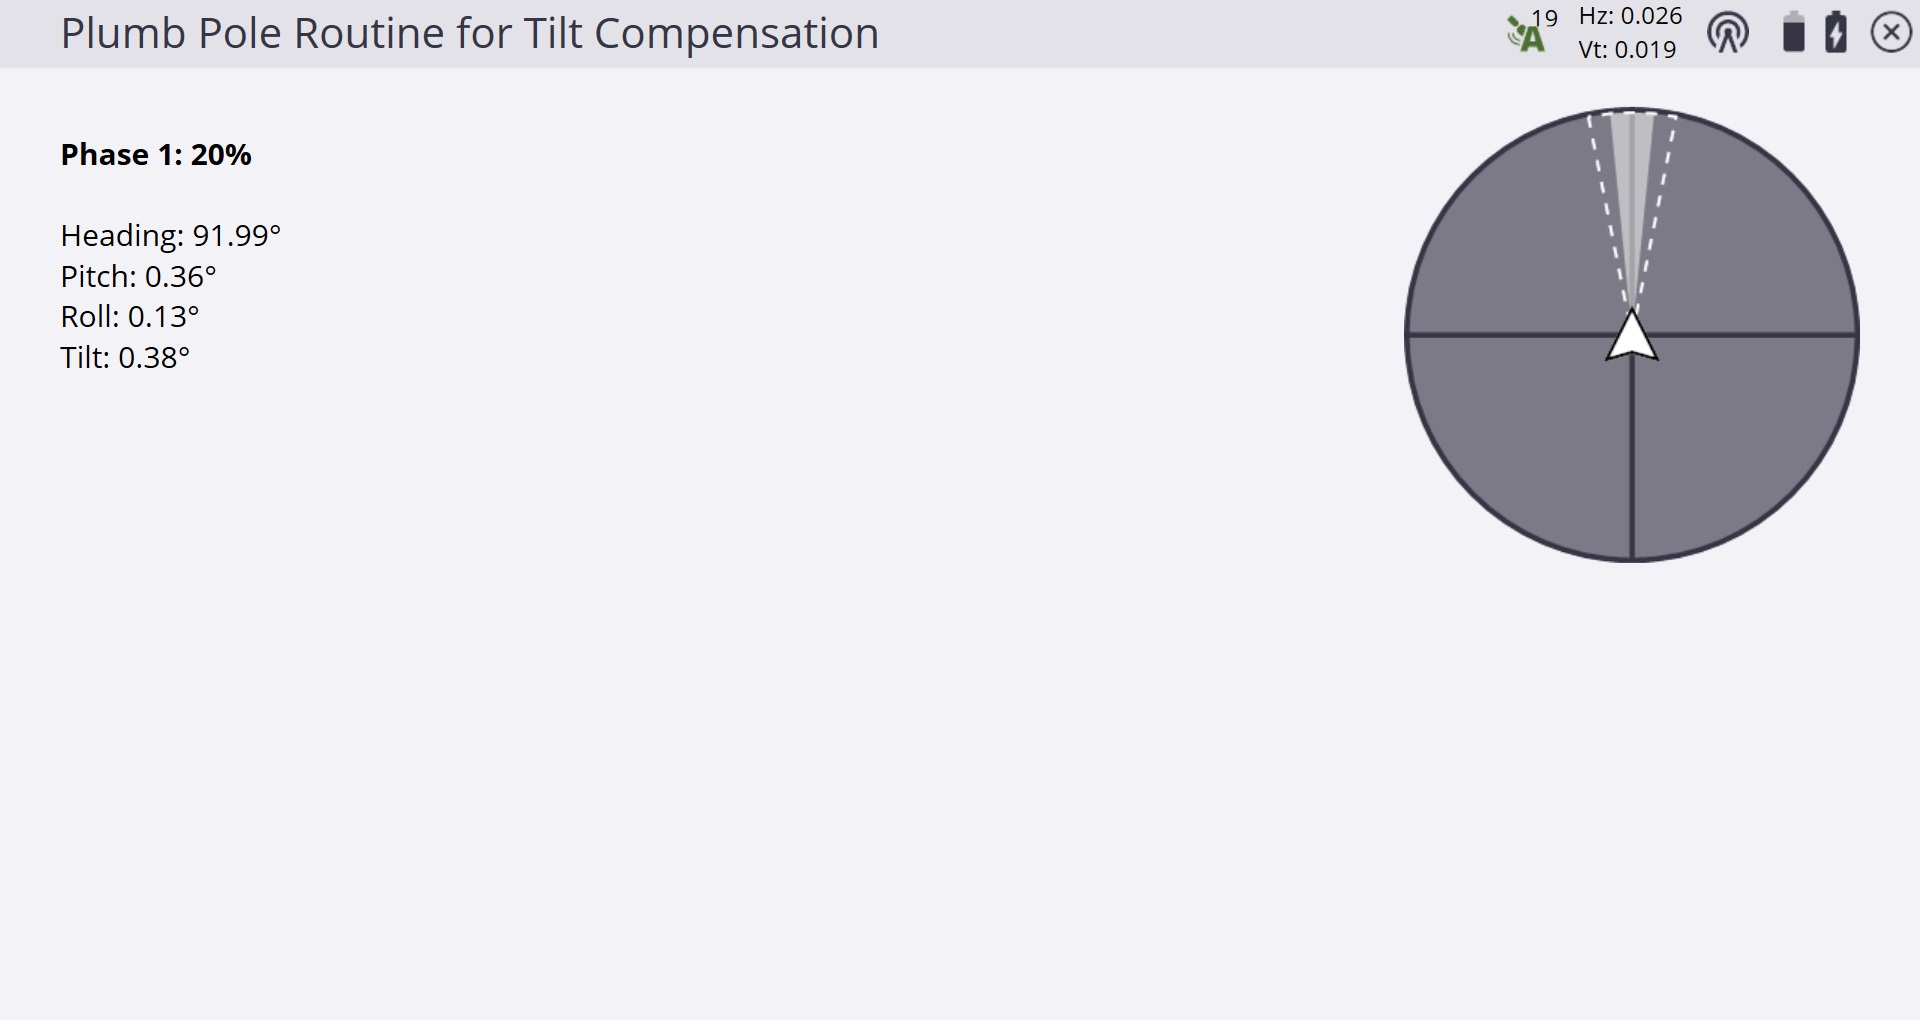
When the START button is tapped, phase one begins. Keep the pole level and stationary and the pole tip in the same location while the measurements are recorded. A bipod is not necessary, but ensure that you hold the receiver as stable as possible.
-
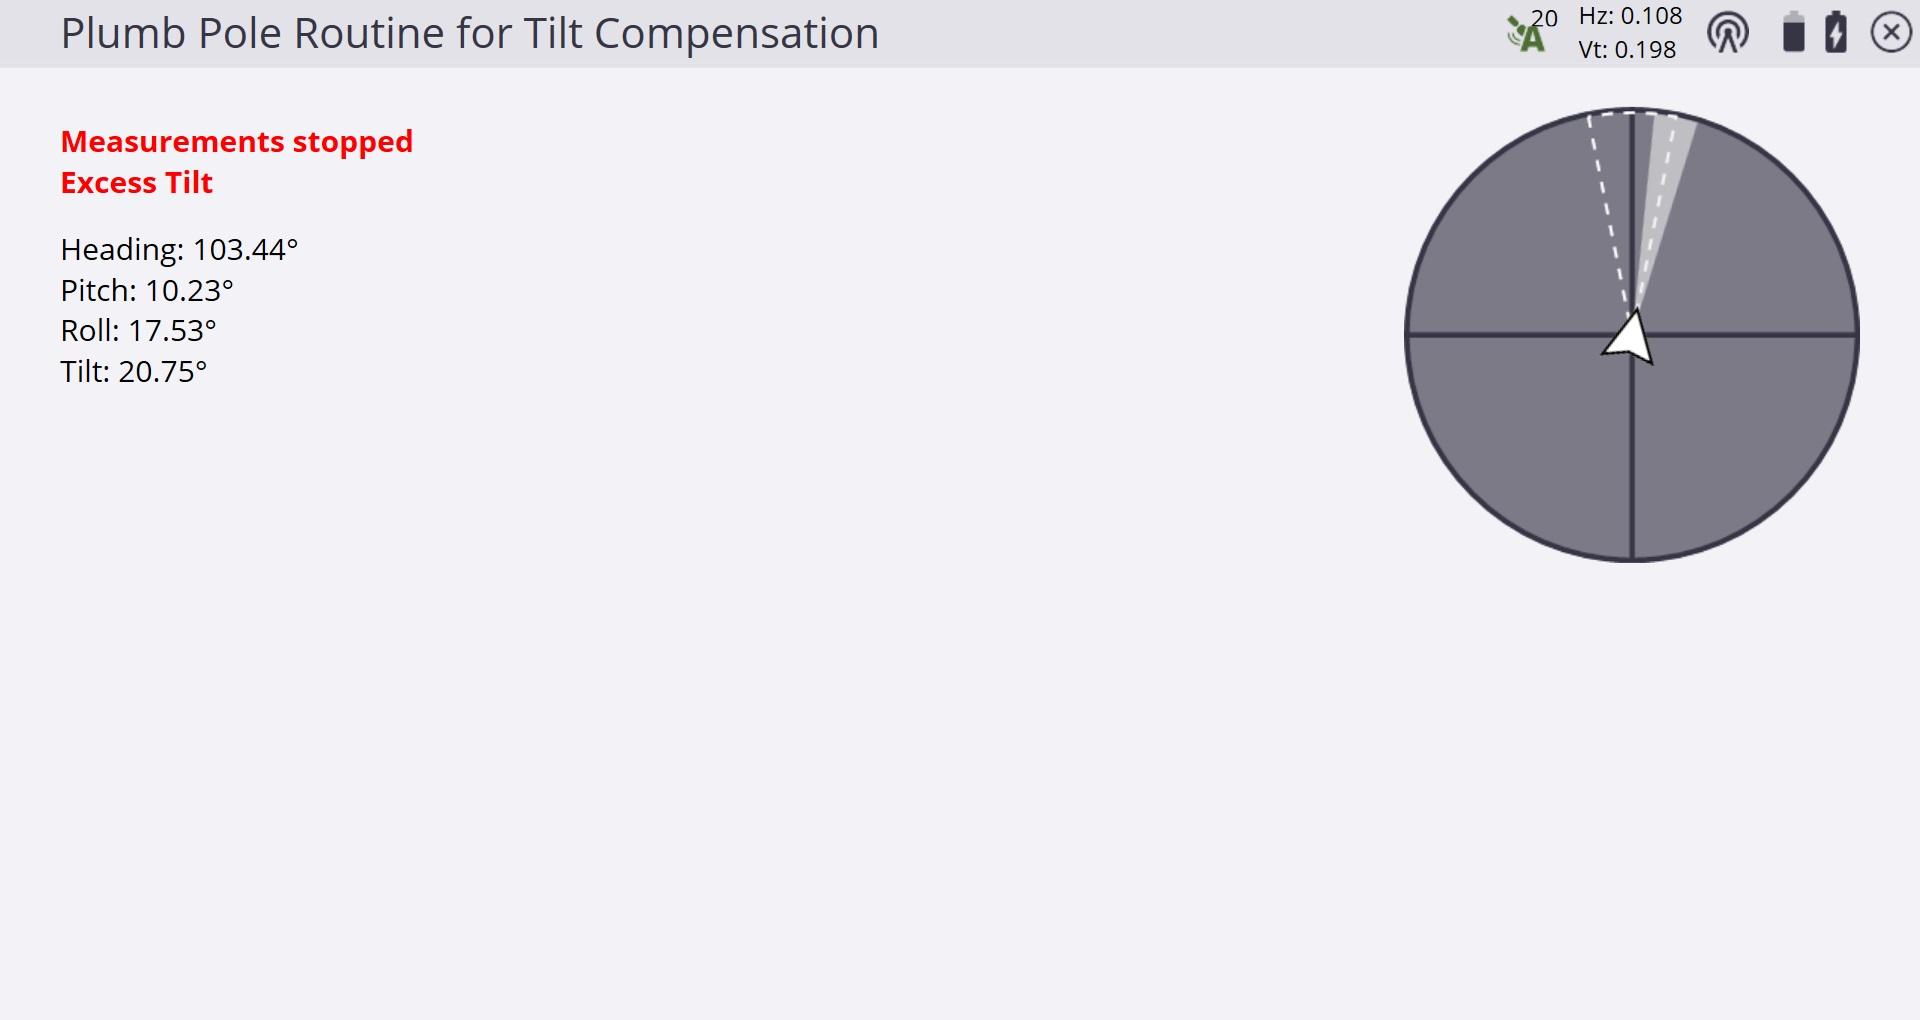
During the routine, values are constantly checked to ensure accurate measurements. If they go out of tolerance, the measurements stop and a message appears. Some of these checks include:
-
The receiver must be kept at the same rotation/heading.
-
The receiver must be kept roughly level.
-
The receiver must stay aligned.
-
The GNSS precision values of the receiver must stay in tolerance of 0.021 m Horizontal, 0.030 m Vertical. You cannot change these precision values.
-
-
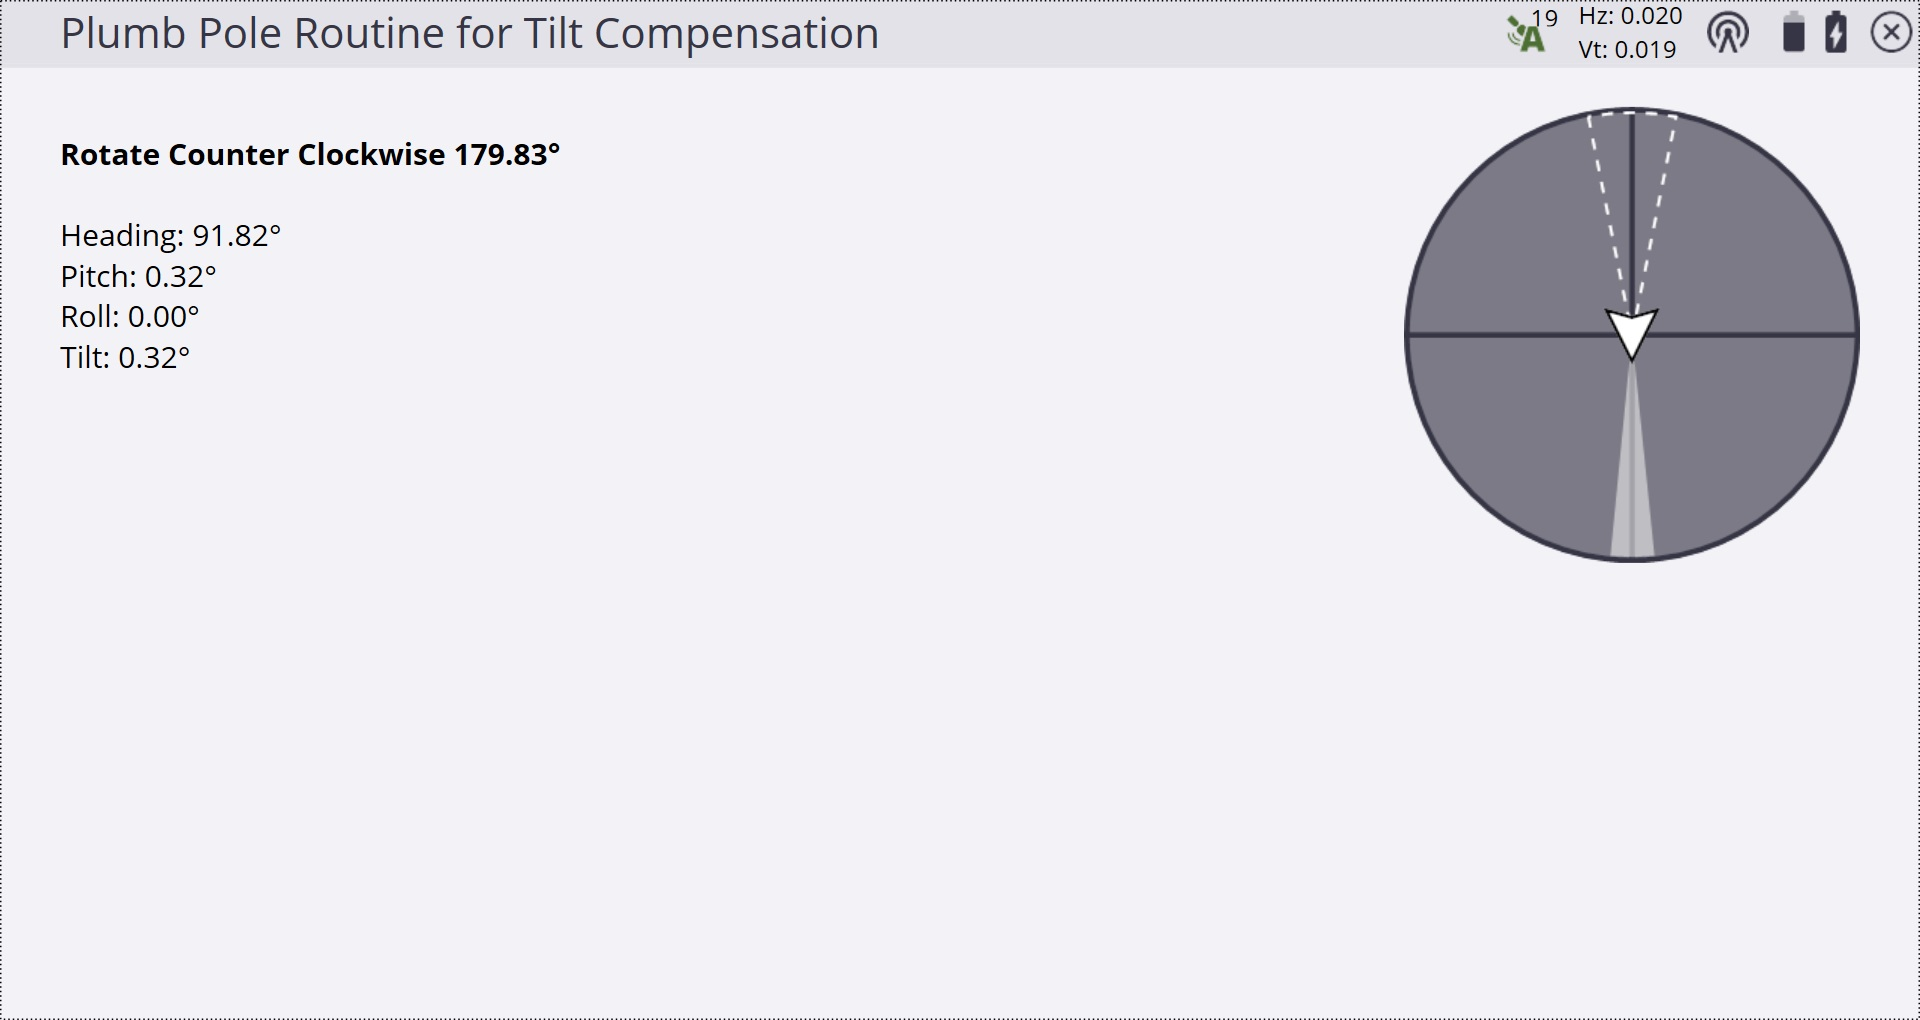
When phase one is complete, rotate the receiver 180° without moving the pole tip. Once rotated, the START button appears in the lower right. Tap START to begin phase two.
-
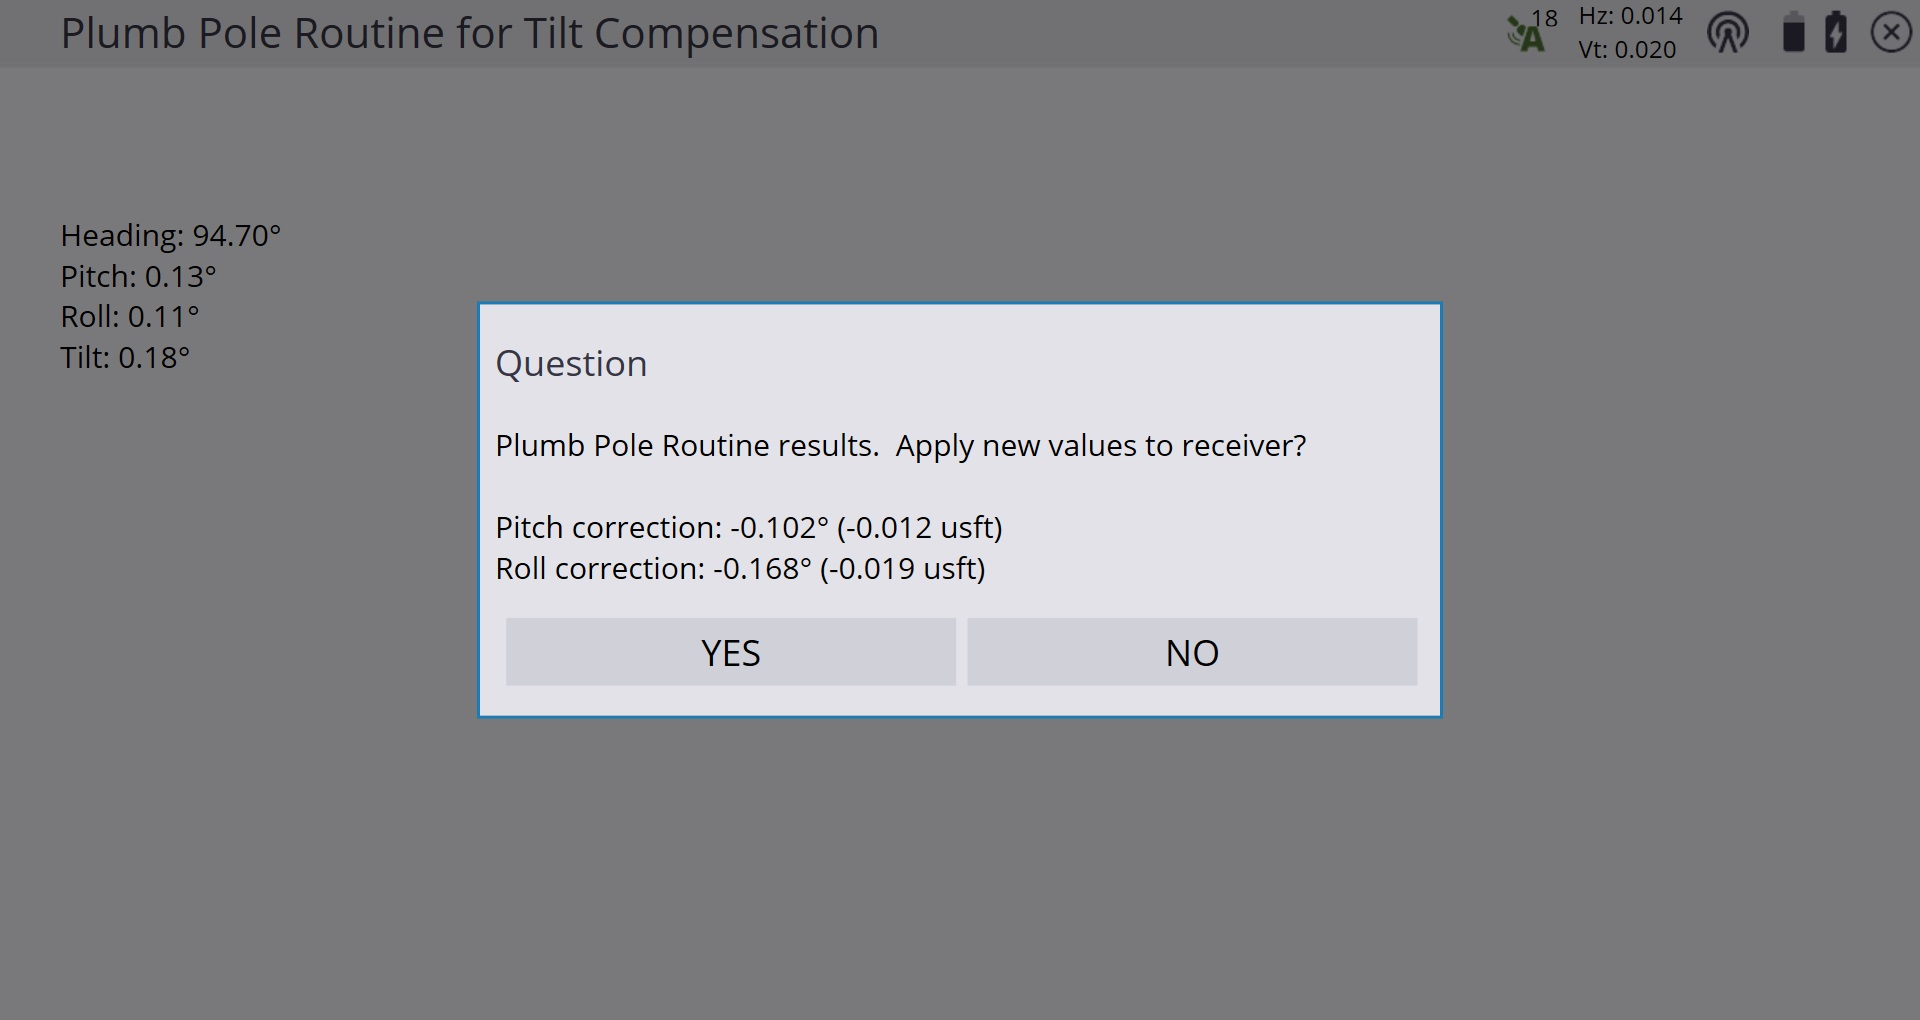
At the end of the routine, the values are displayed and you can apply the new values. A good guide is to apply the values if they are above 5 mm (0.02 U.S. survey feet) or when using a 2 m (6.562 U.S. survey feet) long survey pole.
-
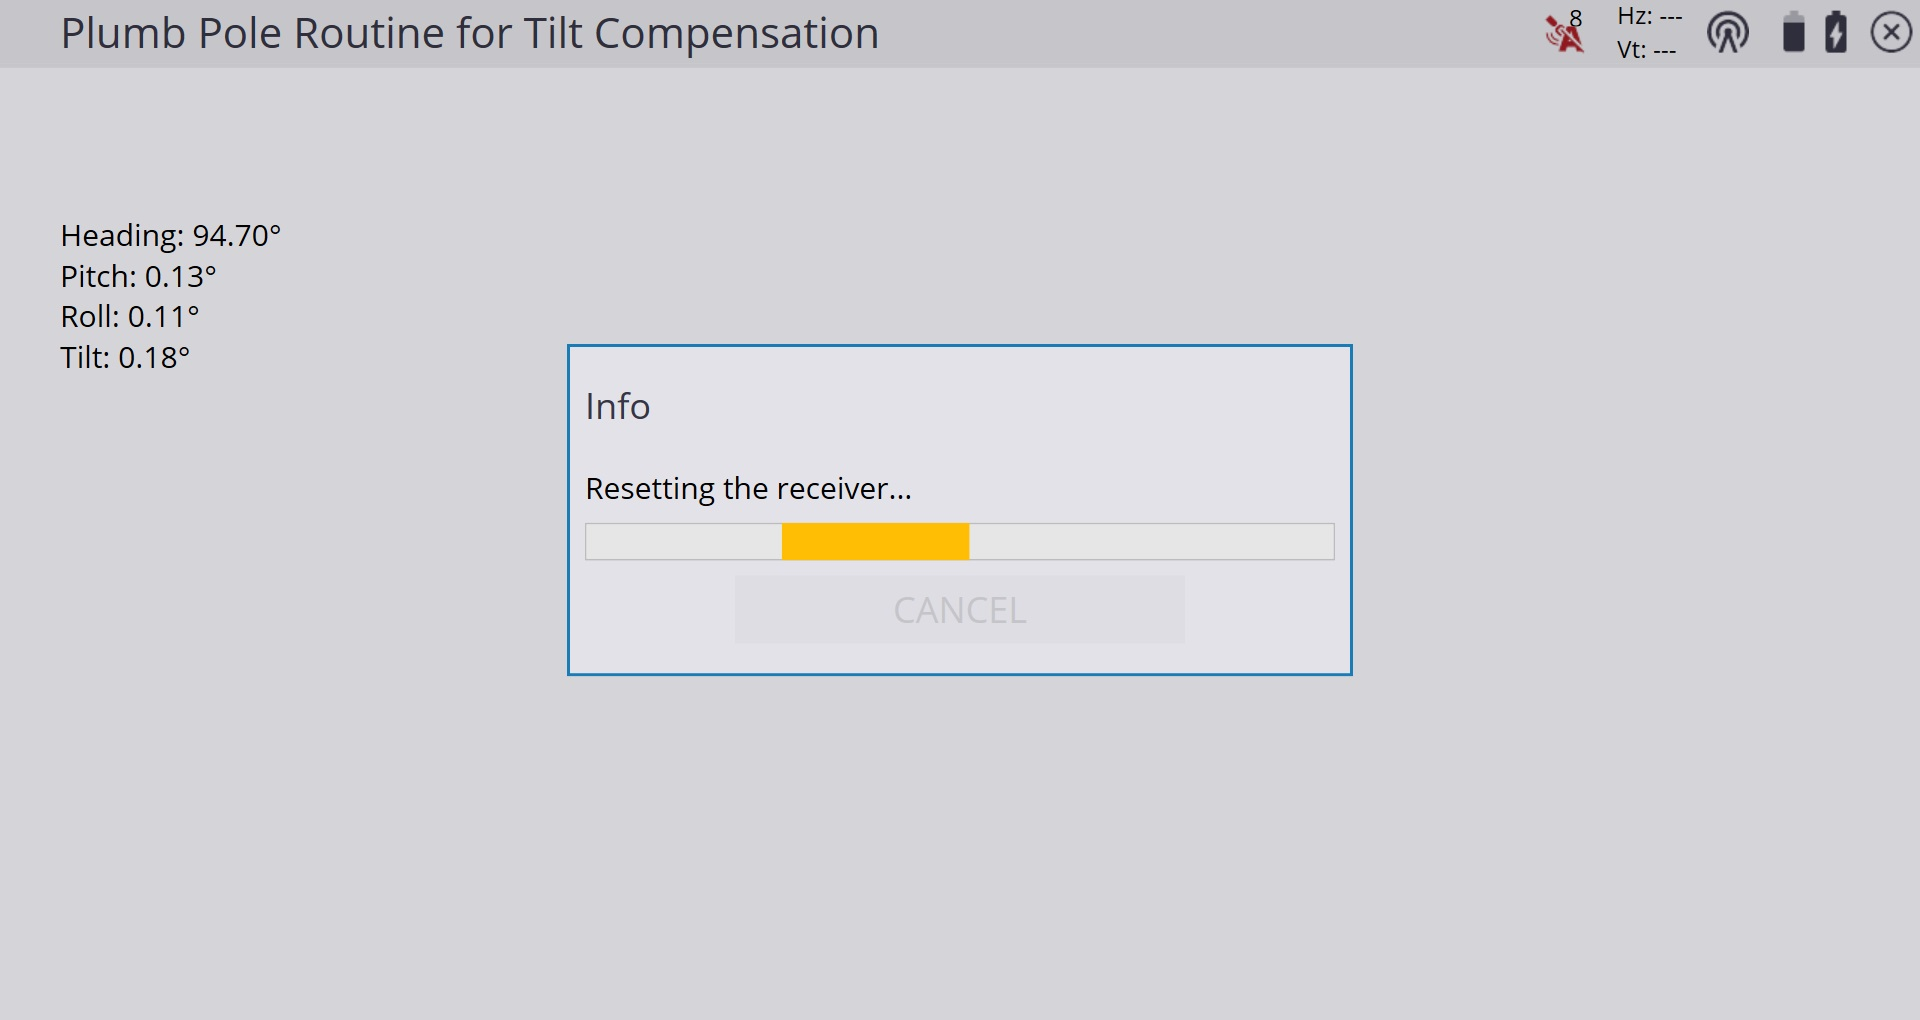
If you tap NO, the values are not applied to the receiver and the eBubble values are not reset. This is a useful way check the accuracy of the receiver. If you tap YES, the values are applied to the receiver, the eBubble Calibration is reset, and the receiver is reset.
-
A message appears once connection is established with the receiver. Check the accuracy of the completed routine by running through the accuracy check above (keep the pole tip on a control point, measure two points, and rotate the receiver 180° between each observation).

