Configuring and collecting a scan
To configure a scan, tap the Measure Mode icon ![]() to show the various measure modes when in the main map screen. Select SX Scan to enter into the Scan workflow.
to show the various measure modes when in the main map screen. Select SX Scan to enter into the Scan workflow.
The existing “DR Scanning” available on the SPS series total stations has been removed from this menu when connected to an SX12 scanning total station, since a full point cloud can now be collected. DR Scanning is still available with SPS series total stations. The Stockpile scanning functionality with the SX12, available in Menu / Measure remains the same as with SPS total stations.
![]()
You can also access the SX Scanning menu option through the Menu / Measure / SX Scanning:

In the New Scan window, configure the Scan name, Framing (Rectangle, Polygon, or Full Dome), Density, and if a photo Panorama is to be collected.
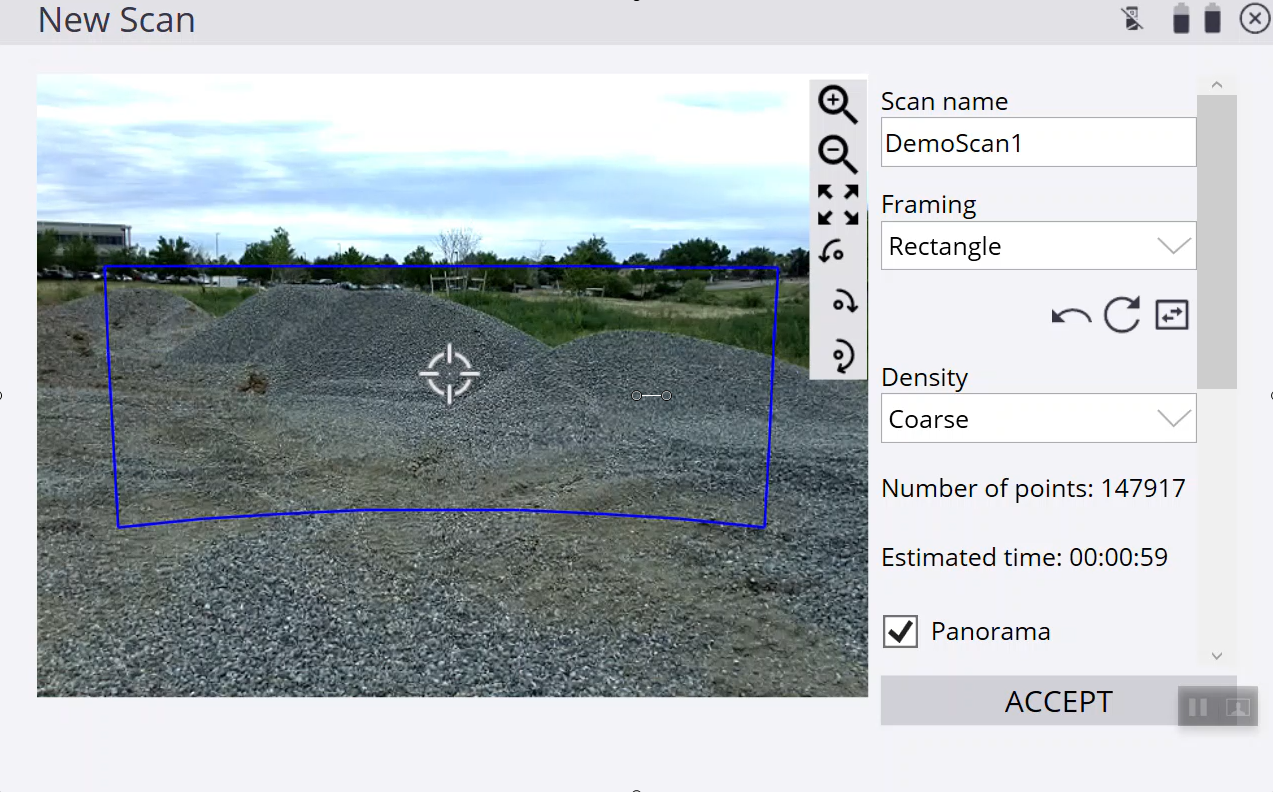
Selecting Rectangle allows for tapping two corner points of a rectangle and collecting the scan and photo panorama within the rectangle. Tap on opposite corners of the rectangle to create it on screen. The rectangle may show curved top and bottom boundaries that reflect the true geometry of the rectangle when overlain onto the video image.
To tap a corner point outside the current field of view, drag on the screen to pan the view or use the turn 90° left ![]() / right
/ right ![]() or 180°
or 180° ![]() to turn the instrument and then tap on the second corner point of the rectangle. It does not matter if you tap on the lower or upper corners of the rectangle first, however the side of the rectangle that is tapped first will configure the geometry of the rectangle: Tapping first on the left and then right of the video view creates a rectangle between the two points. Tapping right first and then left creates an “inverted” rectangle that is drawn behind the instrument and represents a horizontal band scan connected on the outside of the tapped points.
to turn the instrument and then tap on the second corner point of the rectangle. It does not matter if you tap on the lower or upper corners of the rectangle first, however the side of the rectangle that is tapped first will configure the geometry of the rectangle: Tapping first on the left and then right of the video view creates a rectangle between the two points. Tapping right first and then left creates an “inverted” rectangle that is drawn behind the instrument and represents a horizontal band scan connected on the outside of the tapped points.
To reverse or invert the rectangle, tap ![]() .
.
The ![]() button undoes the last selected point and
button undoes the last selected point and ![]() resets the rectangle.
resets the rectangle.
The estimated number of points and time to collect the point cloud are updated in real time depending on the size of the rectangle.
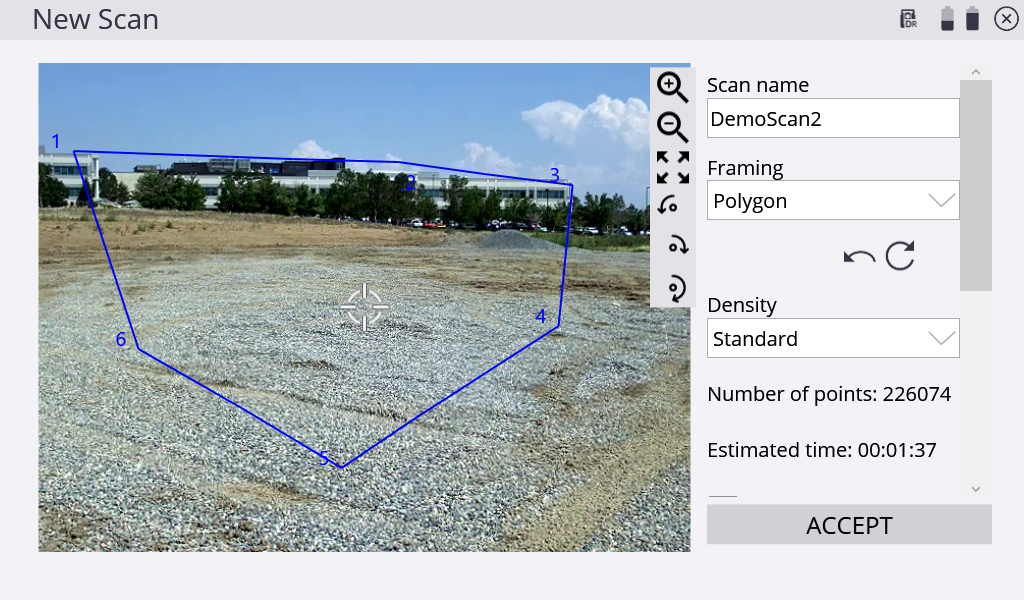
Select Polygon to draw a closed polygon around the area of interest to collect a scan and panorama within the polygon. Tap points on the video view to draw a polygon. A minimum of three points are required. To tap a point outside the current field of view drag on the screen to pan the view or use the turn 90° left ![]() / right
/ right ![]() or 180°
or 180° ![]() to turn the instrument and then tap on the next points of the polygon. The polygon may appear to show curved segments that reflect the true geometry of the polygon when overlain onto the video image.
to turn the instrument and then tap on the next points of the polygon. The polygon may appear to show curved segments that reflect the true geometry of the polygon when overlain onto the video image.
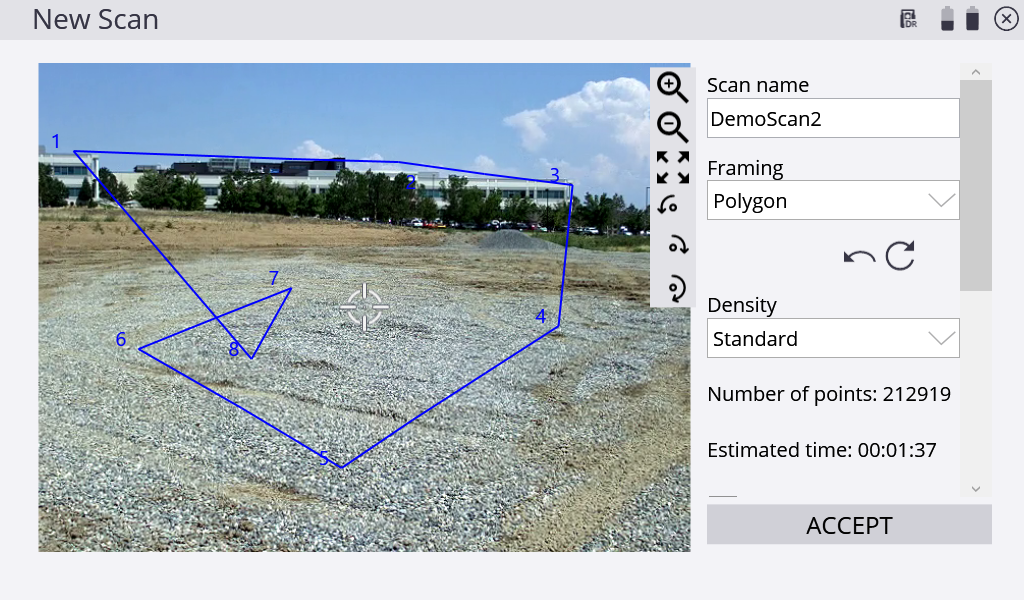
The polygon segments are not allowed to cross each other, and Siteworks sends an error if any of the segments cross over. For example, the polygon geometry shown below is not permitted and causes an error in Siteworks.
The ![]() button undoes the last selected point and the
button undoes the last selected point and the ![]() button resets the polygon. You cannot edit the shape of the polygon once drawn, other than by undoing individual points or resetting the entire polygon. The estimated number of points and time to collect the point cloud are updated in real time depending on the size of the polygon.
button resets the polygon. You cannot edit the shape of the polygon once drawn, other than by undoing individual points or resetting the entire polygon. The estimated number of points and time to collect the point cloud are updated in real time depending on the size of the polygon.
A Full Dome scan collects a full 360° scan from the lowest downward facing view of the SX12 instrument, up to the sky, and all the way around the instrument.
Min Max – This setting is used to configure the distance range over which scan points are collected. Only those points between the min and max will be saved to the point cloud. At this time, the setting only accepts values in project units, for example, you cannot enter "5m" for using meters in a foot project, or feet in a metric project.
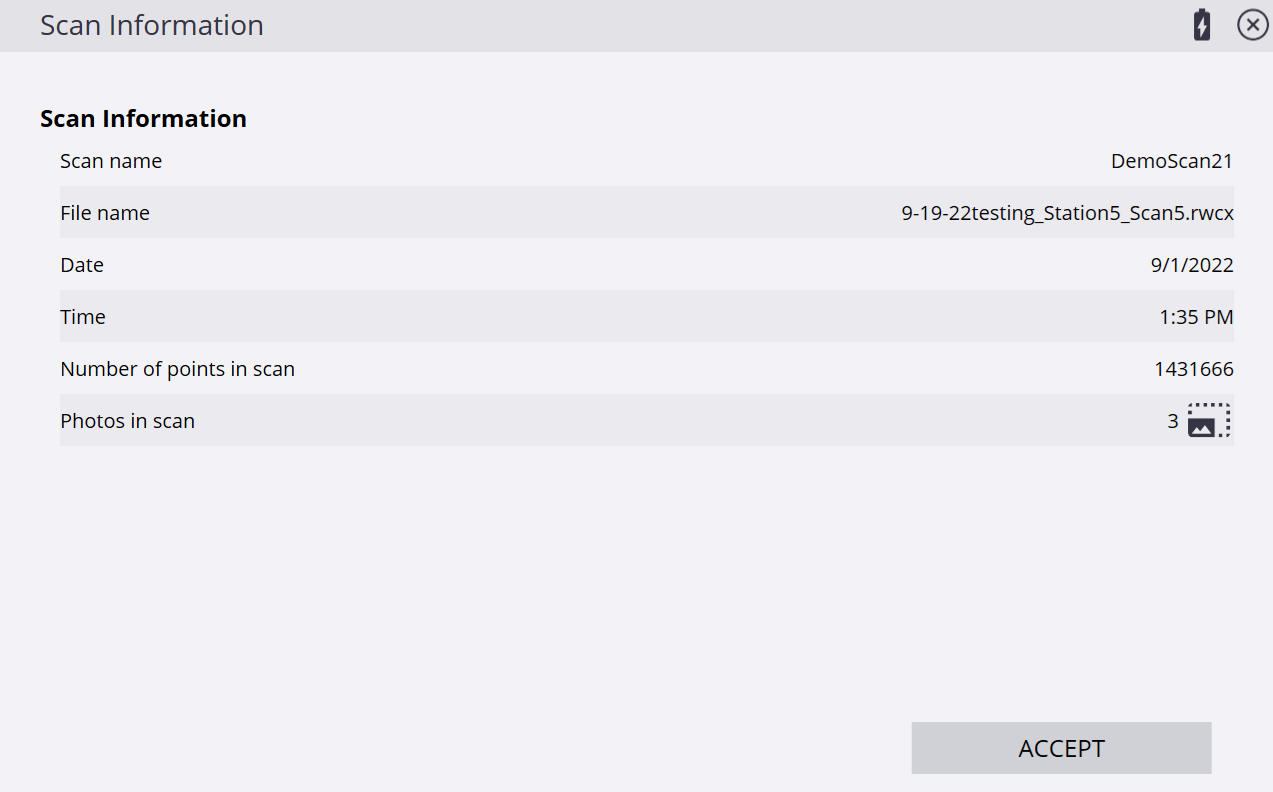
Scan location markers & Scan Information – A new red triangle symbol has been added to indicate the location of scan stations on the plan view. The symbol is similar to the control point marker, just red in color. Tapping and holding on this marker will open the Scan Selection screen, where you can choose from the scans made at that station. If only one scan was performed, then the Scan Information screen appears. The scan information page indicates the scan name, file name of the RWCX file collected, date, time, number of points, and number of photos in the panorama.
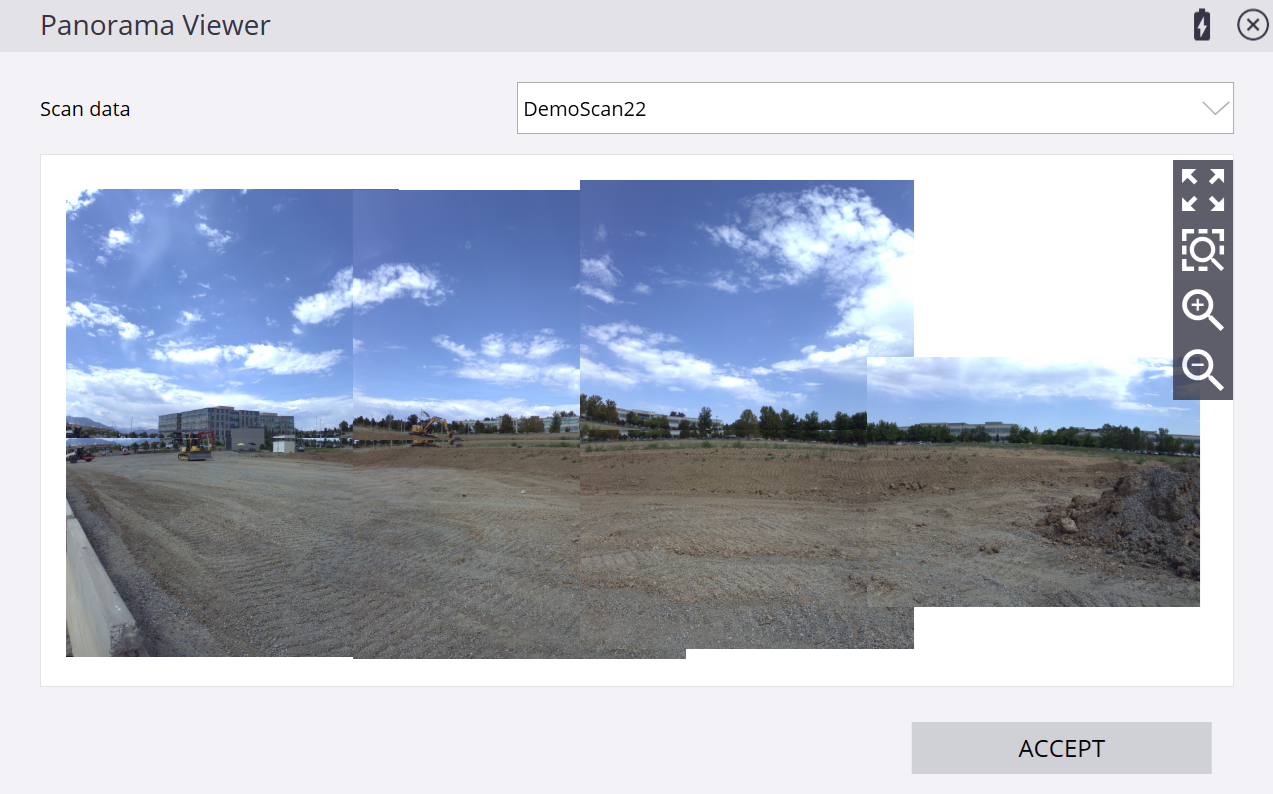
Tapping the ![]() icon next to the number of photos will open the Panorama Viewer screen. This icon is only present if a photo panorama was collected. The Panorama Viewer allows for panning and zooming on a stitched panorama of the photos collected at each station. To select a different scan, select it from the dropdown menu at the top of the screen. Tapping in the panorama will show the individual photo that is tapped on.
icon next to the number of photos will open the Panorama Viewer screen. This icon is only present if a photo panorama was collected. The Panorama Viewer allows for panning and zooming on a stitched panorama of the photos collected at each station. To select a different scan, select it from the dropdown menu at the top of the screen. Tapping in the panorama will show the individual photo that is tapped on.