Operating the locator
Once the locator is correctly configured and connected to the Siteworks software, whenever the software is in measure mode pressing the depth button on the locator will trigger either a point or line measurement depending on what measure type is selected. Depth and other data streamed from the location is also recorded.
Pressing the Measure key while connected to a locator will record a normal measurement that will not include any information from the locator. The only way to record locator data in Siteworks is by triggering the measurement by pressing the Depth button on the locator. The locator cannot be used to trigger a measurement while in Stake mode.
If the Apply Depth Correction is set to Yes in the Utility Locator Setup screen, then the depth calculated by the locator will be subtracted from the survey rod tip elevation. This will record the elevation of the utility. The original, unadjusted surface elevation is also recorded with the point, but the measured point stored in Siteworks will represent the surface elevation at the rod tip minus the depth the locator calculated.
For best results, ensure that both the locator and survey rod tip are in the proper location when a measurement is triggered with the locator depth button. Refer to the locator’s operating instructions for how to obtain the best quality depth readings, to understand the limitations of the calculated depth values, and for more information on setting up the Bluetooth connections.
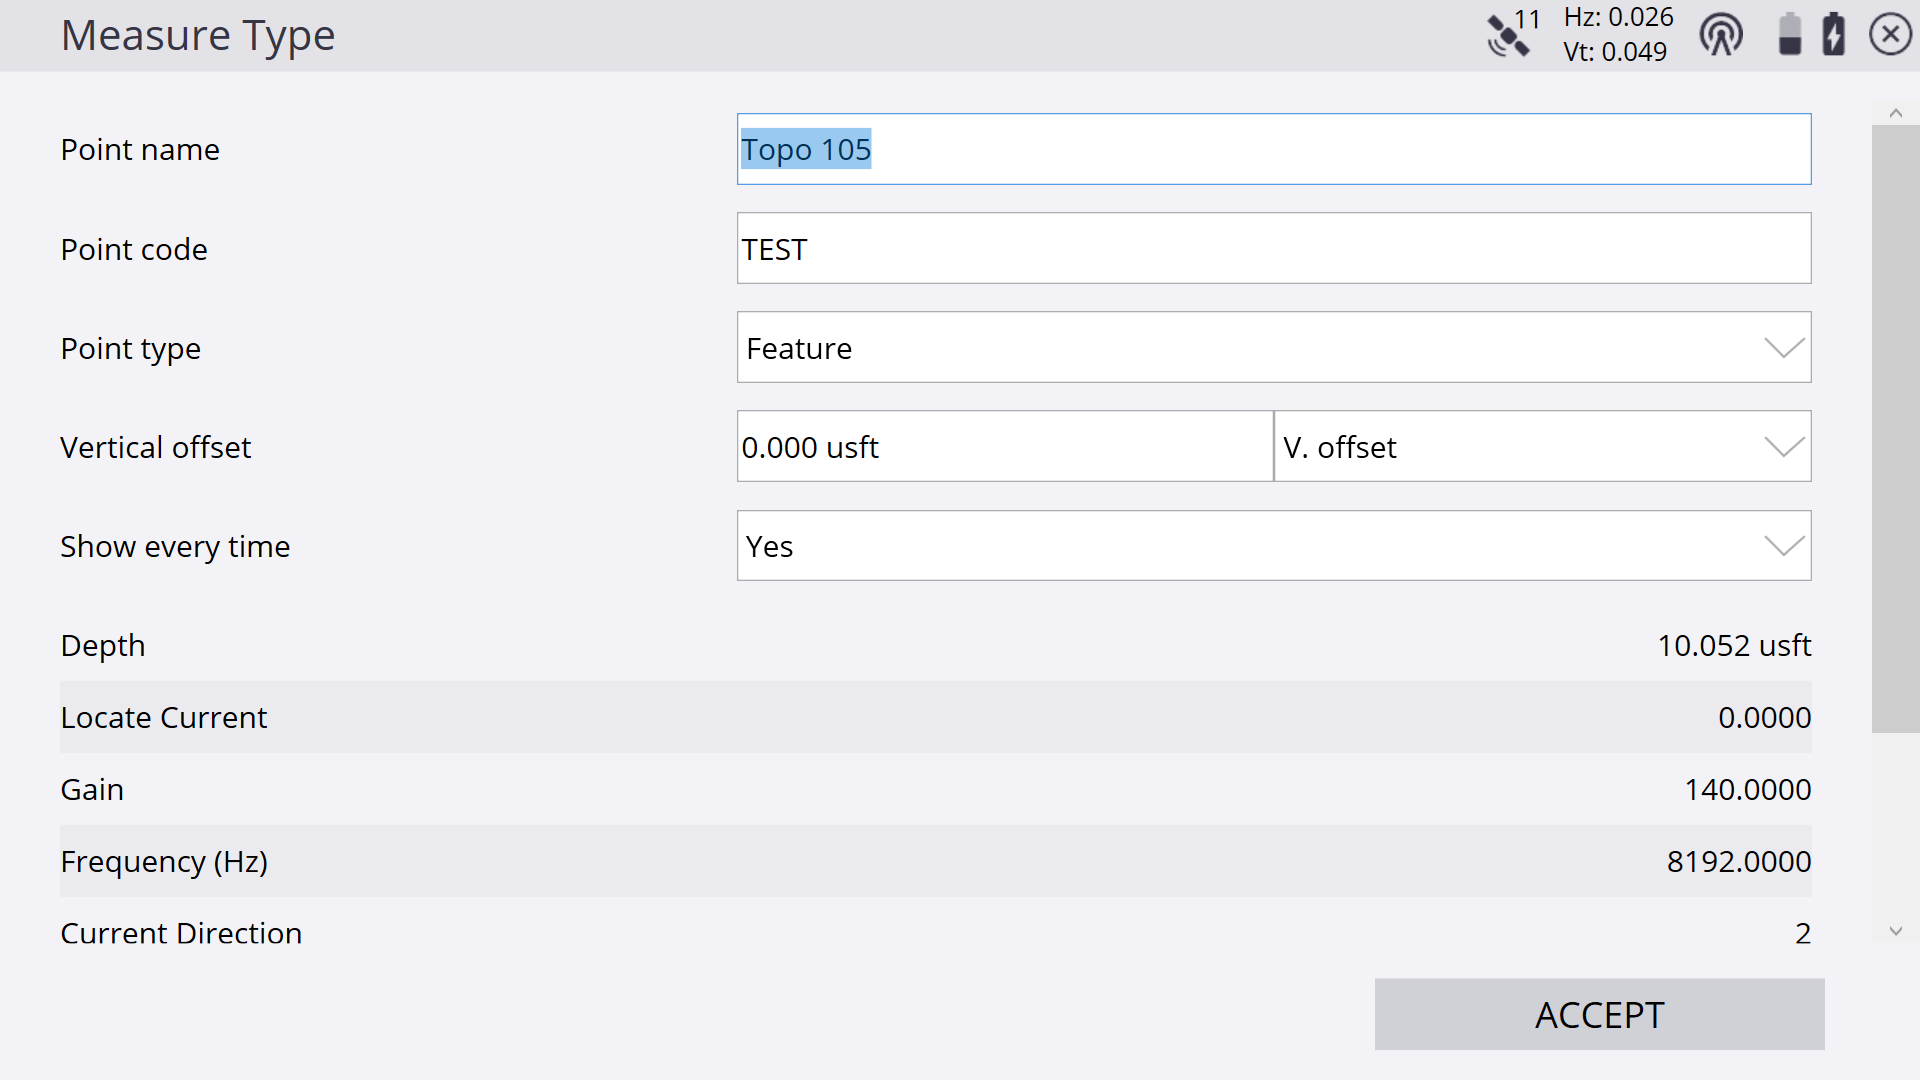
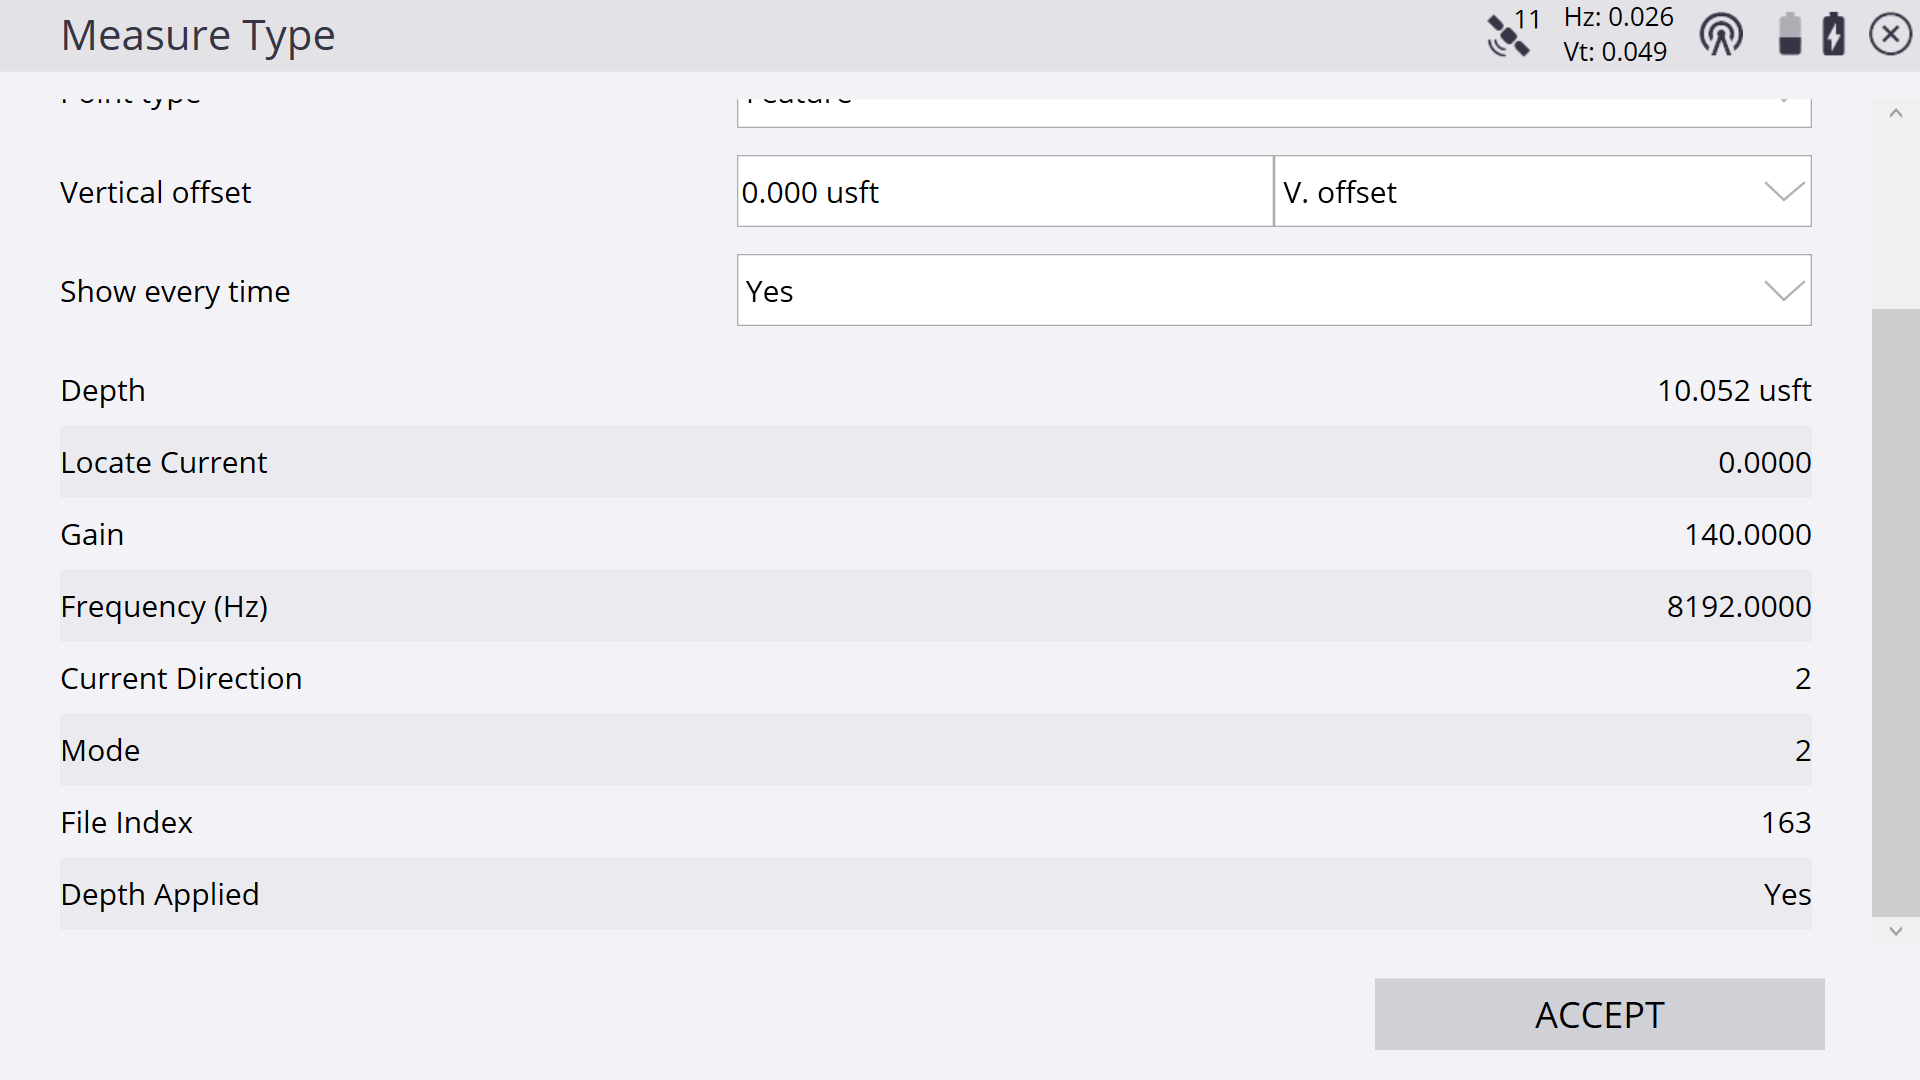
A preview of the data output from the locator is shown in the Measure Type screen for point measurements before being stored. Tap Accept to record the point and store the data. This preview function is not available for line measurements, as those are always stored without a preview option.
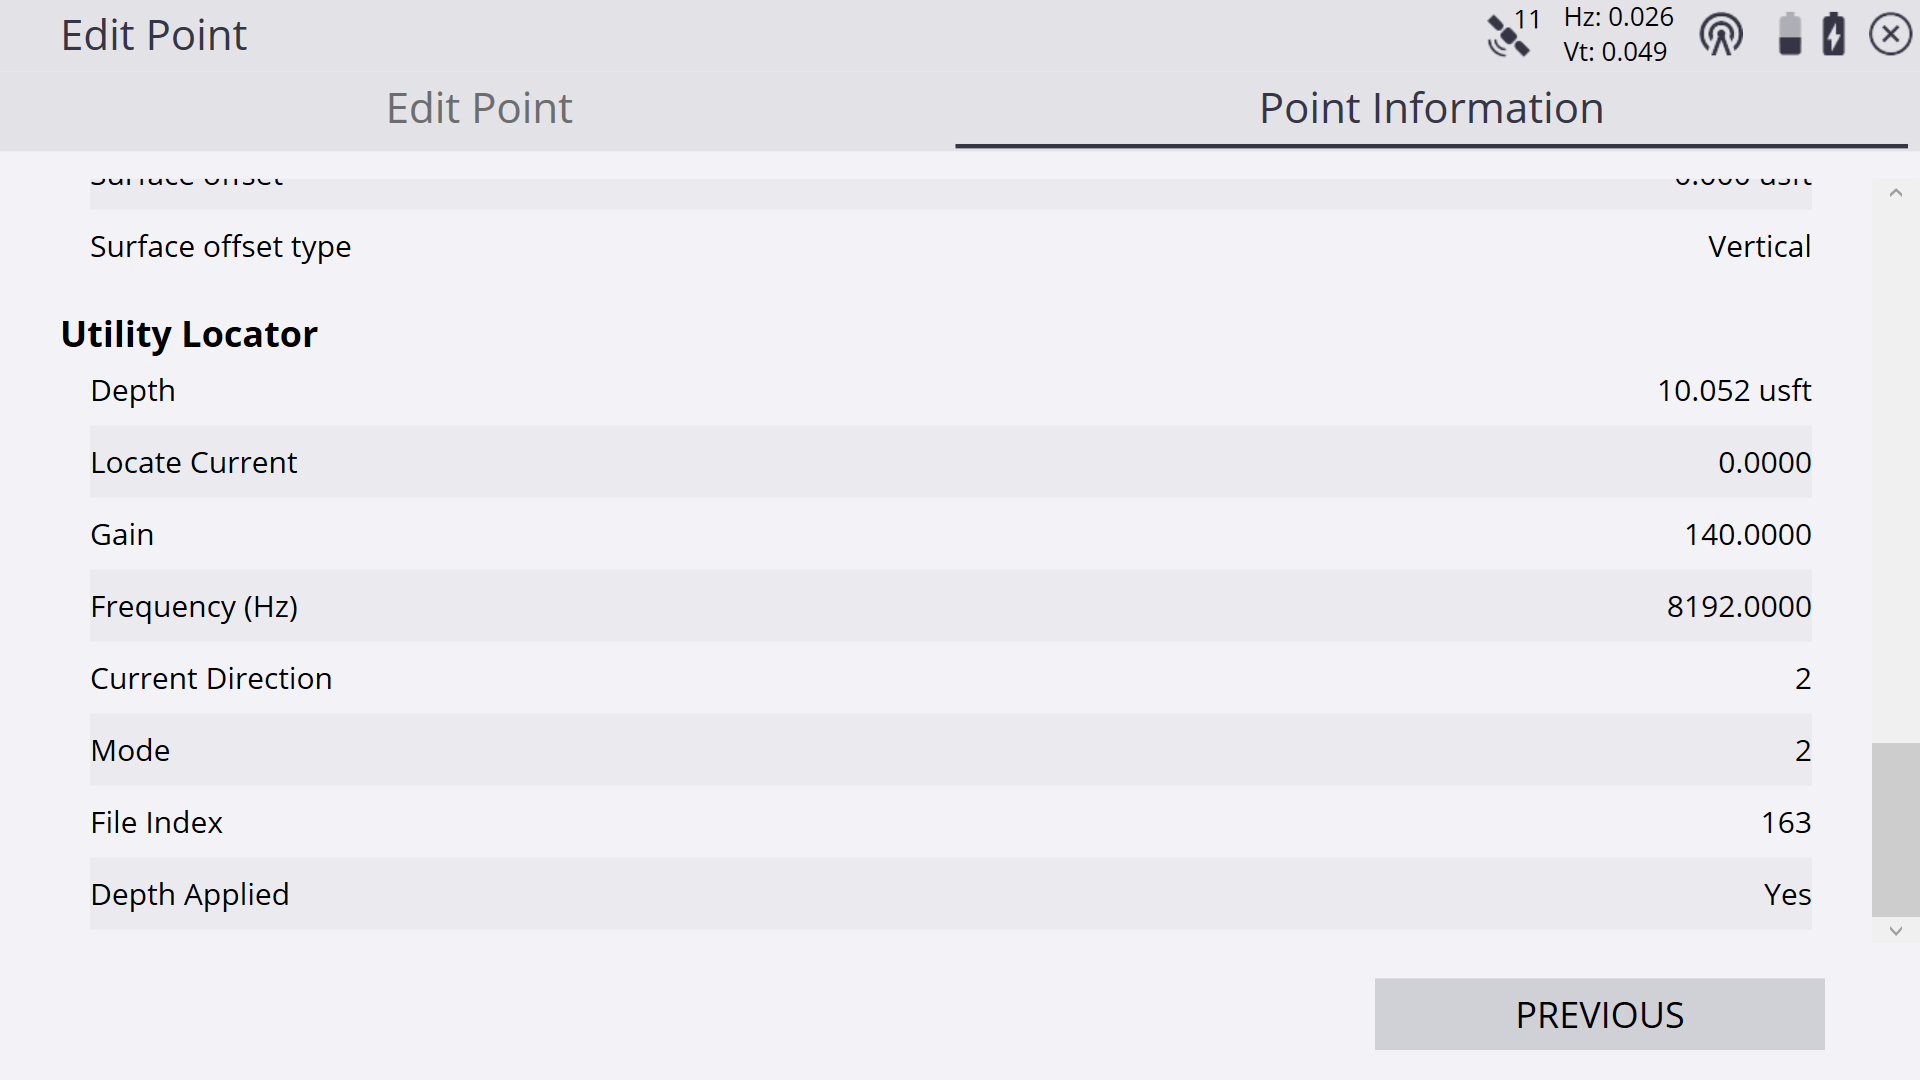
The stored locator data for both points and line points can also be reviewed by tapping and holding on a point and selecting Point Information or via the Point Manager.
While measuring, consider the line measurement type, especially if applying depth corrections based on the locator output. For example, if you are measuring surface topography for grade checking, then it may not be desired to measure utility lines as breaklines or volume boundaries, or include utility point measurements in as surface points (i.e., set them as “feature” points in the Measure Type settings) as not to disrupt any other measured surface points.
To export the recorded locator data for use in other software programs, select the Include QA data option in the CSV export of Measured Data. The locator data is also included in the exported Record.txt file.
