Create a 3D Portable Document File (.pdf)
Use the Create 3D PDF command to save your 3D model as a PDF (Portable Document File; .pdf). This 3D data can then be viewed and manipulated in Adobe® Acrobat or Adobe Reader as in the 3D View, enabling you to explore your model from any computer or mobile device with 3D PDF support (does not include Android devices at this time).
To quickly open the project folder that you are currently working in, select Open Project Folder.
In the reader, the navigation gesture are different than in Trimble Business Center:
- Zoom in/out - Right-click and drag up/down
- Orbit (around the center of the view) - Click-and-drag
- Pan - Press [Control] +click-and-drag
Note: In the 3D PDF, points appear as solid black dots, and images do not appear.
Prerequisites:
- Licensed module; See the Subscription Plans page. For a license matrix by command, see the License page in the TBC Community. Also see View and manage licensed features.
- Model objects
To access the command:
- Select Create 3D PDF in Drafting > Print.
To export your model to a 3D PDF:
- Filter your view and set properties and layer options to ensure that your model displays all and only the objects you want in the colors and styles you want to appear in your PDF.
- Type a path and file name for the exported file in the File name box, or click the Browse icon to browse for a location and specify a file name.
Note: By default, the exported file is given the name of your project.
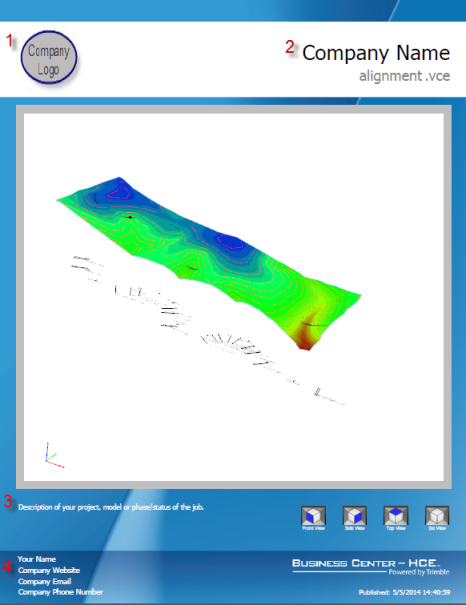
- Enter the User name as you want it to appear at the bottom of the PDF (4 in the image above).
- Enter any Description text (about the model or project) that you want to appear below the PDF's 3D view (3 above).
- In the Company Information group, enter your company name as you want it to appear at the top of the PDF (2 above). Then enter contact details as you want them to appear at the bottom of the PDF under the user name (4).
Note:You can leave any of the user, description, and company boxes empty.
- To have the user and company information you entered update/overwrite the same fields in Project Settings > General Information, leave the Modify project settings box checked.
- To upload your company's logo or another icon/image and place it at the top of the PDF (1 above), leave the Include icon box checked; click the Browse button and browse to the file.
Tip: Square image files up to 512 x 512 px work best.
- Click OK to create the PDF. The PDF reader opens.
Dependencies:
- None; the PDF does not update with changes to your model
