Download (Read) Features from a GIS Data Source
Use the Read Features from GIS command to download feature data (not schema) from a GIS data source into your TBC project so that the project and the GIS data source are in sync.
Prerequisites:
See the Subscription Plans page. For a license matrix by command, see the License page in the TBC Community. Also see View and manage licensed features.
To download (read) features from a GIS data source:
- If you have not already done so, use the GIS Connection Manager to establish a connection to the data source you want to use to exchange GIS data.
- Select Read Features from GIS in GIS > Connection to display the Read Features from GIS command pane.
- In the Connection drop-down list, select the data source connection you want to use.
- In the Select drop-down list, select the appropriate option:
- Read all - Select this option to read features from the entire area covered by the data source.
- Window - Select this option to limit the search to only those features that are entirely or partially located within a user-defined rectangular border. To define the rectangular border, either enter coordinates in the Corner one and Corner two fields, or click in the fields and select the coordinates in the Plan View. This is a good option if you want to avoid unnecessarily long download times and the need for a large amount of disk storage space.
- Polygon - Select this option to limit the search to only those features that are entirely or partially located within a user-defined polygonal border. To define the polygonal border, do either of the following:
- Click in the Polygon points field, and then click three or more point coordinate locations in the Plan View to define a temporary polygon to use for the search border. If you need to extend a temporary polygon border you have created to cover a greater area, you can click back in the field and then click again in the Plan View to select new point coordinates to extend the border.
- Click in the Polygon selection field and then select an existing polygon in the Plan View to use for the search border. The last coordinate used to define the selected polygon is displayed in the Polygon points field.
Optionally, to extend the border of a selected polygon, click in the Polygon points field and select additional point locations in the Plan View to create additional polygon corners.
If necessary, click the Clear Selection button to clear points from the Polygon points field and, if applicable, the Polygon selection field.
Again, this is a good option if you want to avoid unnecessarily long download times and the need for a large amount of disk storage space.
 Click here to see if your GIS service provider supports polygonal selections...
Feature types included in the data source for the selected connection (and within the rectangular window border or polygonal border if used) are displayed in the Feature types list, along with the Total number of features found for each feature type and the number of features that have already been Linked to the project (downloaded).
Note: If you download a feature that has previously been downloaded ("linked") and the feature has been updated in the data source, it is updated in your project. Otherwise, it is ignored during import.
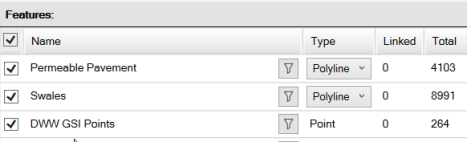
- To exclude the features of any feature type from the download, uncheck the feature type check box in the Features list.
Optionally, do either of the following:
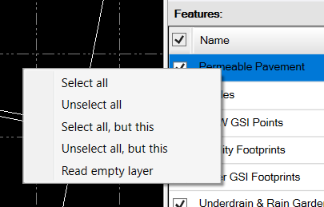
- Click in the check box in the column header to check or uncheck all of the check boxes in the Features list.
- Right-click any feature in the list and choose one of the feature selection options.
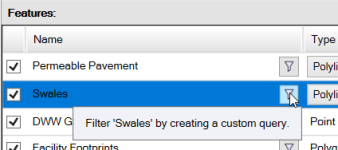
If your GIS service provider supports feature attribute queries, a filter icon button displays to the right of each feature in the Features list. This allows you to import only those features whose attributes match one or more specified values (for example, download only Pavement features whose Material attribute is equal to Concrete).
Click here to see if your GIS service provider supports feature attribute queries... - If applicable, specify an attribute query for any feature listed in the Features list as follows:
- Click the Filter button displayed to the right of the feature name in the Features list.
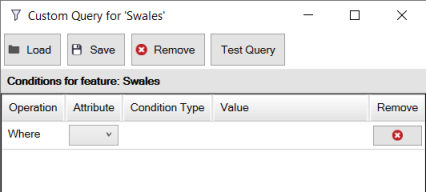
The Custom Query dialog displays. In addition to allowing you to specify a custom attribute query for the selected feature, this dialog allow you to save the query to a text file that can be re-imported at any time you want to apply the same query.
- If applicable, click the Load button and select a query text file you want to apply to the selected feature.
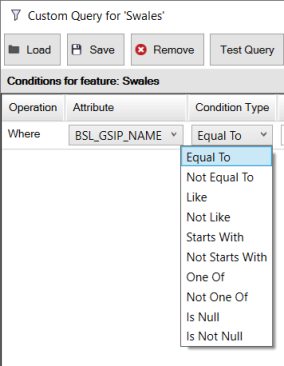
Each row in the Custom Query dialog displays the Operation type, Attribute (field) name, Condition Type (rule for applying the operation), and Value specified in the imported query. You can edit the query if necessary as described in the following step.
- If you are entering a new attribute query to apply to the selected feature, in the first row of the table, select the Attribute and Condition Type you want to apply. Then, enter or select from a list (if predefined choices are available for selection) a Value to include in the query.
Available Condition Type options for numeric attributes:
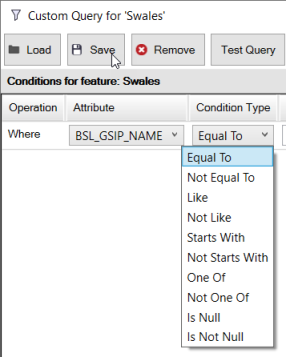
Available Condition Type options for text attributes:
If you want to add more attribute queries, click the Add Condition button to create a new row, and complete the fields as necessary. Unlike the first row in the table which included a fixed Operation of Where, each subsequent query row allows you to select the appropriate Operation to use(And or Or).
- When you are done, optionally click the Test Query button to view a message indicating if the query is valid and how many features match the query.
- Optionally, if you want to save the query to reapply it later, click the Save button and select a location to save the query text file.
- Optionally, click the Remove button to remove any query from the table.
- When you are done, click OK to close the Custom Query dialog.
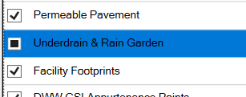
In the Features list in the Read Features from GIS command pane, the check box for the selected feature now includes a black square indicating the feature includes one or more custom attribute queries, which will be applied when importing the feature from GIS.
For each line feature, you can select whether to import it as a Polyline or Alignment in the Type drop-down list. If you select the Alignment type, the alignment can then be edited in TBC if necessary and uploaded back to the GIS data source with the Alignment feature type assigned using the Write Features to GIScommand.
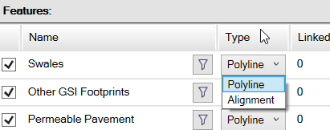
Note: If you download features again using the same connection, the line Type is no longer selectable. You must close and reopen the connection to make the Type once more selectable.
- Click the Filter button displayed to the right of the feature name in the Features list.
- Optionally, if available, click the Preview button to display in a graphic view the feature geometry to be downloaded before actually downloading it, allowing you to make changes if necessary. (To use this feature, your GIS data source must support any query.)
- To view a report showing details of the upload to the data source, click the Yes button in the Features Written to GIS message dialog.
- When you are ready to download features, click OK.
Features included in the selected feature types are downloaded into your project and the new feature points are displayed beneath the Points node in the Project Explorer. In addition, the selected data connection is displayed beneath the Imported Files node as an imported data source.
Notes:
- An Imported Files node is created only once for each data connection you select to download features. If you use the same data connection on subsequent occasions to download features, the existing node is updated.
- You can right-click the Imported Files node in the Project Explorer and select to sort the imported files either by their name or by the order in which they were imported, providing two options to more easily locate any imported file.
- When you exchange feature data with a GIS data source that includes feature attributes with attached files (for example, a photo JPG file), the attached files are included in the exchange. This ensures a more complete transfer of feature data to be shared with others.
- Elliptical arcs and cubic Bezier curves used to display graphic features in TBC can be included in the download.
- Feature geometry and attributes already imported into your project from a GIS data source are automatically updated when you re-import data from the same GIS data source, eliminating the need for the process to re-import the entire data set and greatly streamlining the feature geometry update workflow.
