Customize DOCX Report Templates
Note: For instructions on creating a DOCX report template prior to customizing it as described in this topic, see Create and Edit Customized Report Templates.
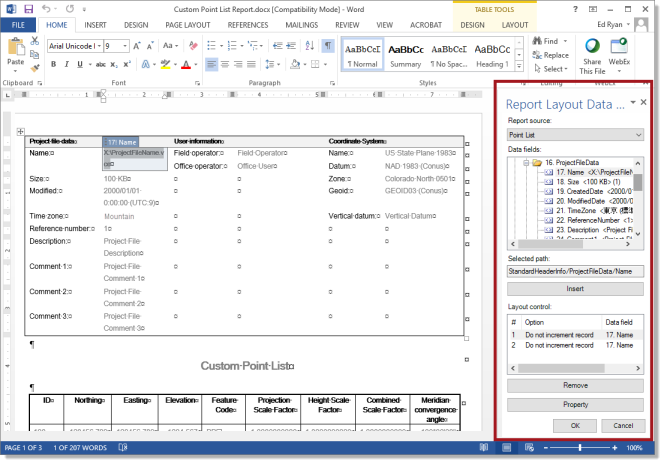
When you install or update Trimble Business Center, a Report Layout Data Files add-in is installed with your version of Microsoft® Word® (version 2010 or later). The add-in causes a new dialog to display when you open a DOCX report template using the Edit Layout button in the Create Custom Report dialog or Edit Custom Report dialog in TBC. You use the Report Layout Data Files dialog to add and remove data fields to and from the report template, and specify layout properties.
Notes:
- You cannot use the cloud-based version of Word in Microsoft® Office 365 to create custom reports.
- If you open a DOCX report template directly from an Explorer window or the Word application, the Report Layout Data Files dialog will not display and you will be unable to make data field edits in the template. To display the Report Layout Data Files dialog with the template in Word, you must open the template using the the Edit Layout button in TBC.
When you select to create a DOCX report template, you have the following options:
- Create the template "from scratch" using a predefined Word (DOCX) document with an appropriately defined layout that typically includes one or more tables with table titles and column headings to support the type of data you want to include. In this case, you will simply add available data fields (based on your data source selection in TBC) to the appropriate cells in tables in the template and specify field layout properties as necessary. If required, you can edit the tables and column headings in the template at the same time you are adding data fields.
- Create the template based on an existing predefined DOCX template (a read-only file installed with TBC) by saving the template with a new name. In this case, you will remove and/or add available data fields (based on your data source selection in TBC) to the appropriate locations in the template and specify field properties to modify the template as necessary to meet your needs. If required, you can also edit the layout and labeling in the template.
Note: Mapping data fields display at the end of the template when in editing mode. Although they are required to add fields and build the report, you can ignore them. They will not display in the report itself when you run it.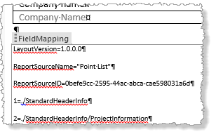
To customize a report template:
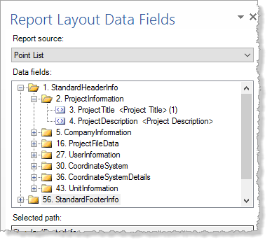
- In the Report Layout Data Fields dialog, select the data source for the report in the Report source drop-down list.
The data source you specified in TBC is the default source in the list. In some cases, it is the only source in the list. In other cases, the list may include a one or more sub-report data sources you can use to add different types of data to the report. For example, if you select Baseline Processing Report in TBC, Baseline Processing Report is the default source in the Report source down-down list, but the list also includes the Point List data source, allowing you to add data fields from this source to the report as well.
The data fields associated with the selected report source are displayed in the Data fields list, organized in folders and sub-folders by data type. Each folder and data field is numbered sequentially. Text displayed in <brackets> is the place holder text that will appear in the template when you add the data field. This placeholder text will be replaced by project data when you run the report. A number in parenthesis follows the placeholder text time a data field is added to a template, a number increments at the end of the field in parenthesis indicating how often that same field has been inserted into the template.
- Do either of the following to add a data field to the template:
- Select one or more locations in the template where you want the field to display. Then select the field in the Data fields list and click the Insert button. Or, select a folder in the Data fields list and click the Insert button to insert all of the fields contained in the folder in sequence, starting with the insertion cell.
- Select the field in the Data fields list and then drag it to a single location in the template. Or, select a folder in the Data fields list and drag it to a single location in the template to insert all of the fields contained in the folder in sequence, starting with the insertion cell.
The field name displays at the insertion point along with the placeholder text.

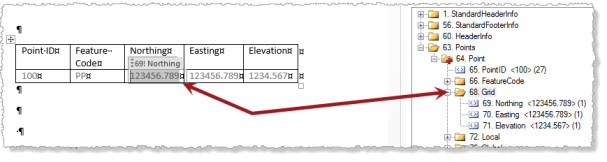
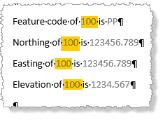
In the following example, the Grid folder was inserted, which, in turn, automatically inserted the three data fields included in it: Northing, Easting, and Elevation.
A folder may include a red plus symbol (
 ). This indicates that the first data field in the folder is a parent field and all data fields nested beneath it in the folder and all subfolders are child fields. The data in the child fields is dependent on the parent field. For example, a PoinID field is a parent field that includes numerous child fields, including FeatureCode, Attributes, Northing, Easting, Elevation, and additional property fields for the point. You can insert a parent/child folder () into the template, which, in turn, automatically adds the folder's parent field first, followed by the child fields contained in the folder and subfolders.
 Note: When inserting any regular folder or parent/child folder, only those data fields that fit in the table row are added. Additional data fields for which there are no columns defined are ignored.
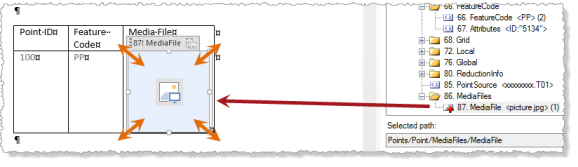
When you insert a data field that references a graphic file, an image frame displays in the template. You can click and drag to resize the image frame as necessary to specify the size of the image in the actual report. (You must also check the Stretch image to fit the control check box in the Property dialog. See the next step in this procedure.)
Template:
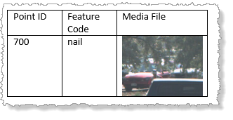
Report:
Once you have inserted a data field into the template, you can copy and paste the field (or the table cells containing it) as necessary to create additional instances. For example, you could create a single table row and populate it with data fields as necessary. Then, you could copy the row and paste it repeatedly to create the specific number of like-formatted rows you need for the table.
When you select a data field in the template or in the Data fields list, it's data path is displayed in the Selected path field. In addition, once the field is inserted in the template, the insertion instance is displayed in the Layout control list. If the data field has been inserted multiple times in the template, each instance is included in the list, along with any properties specified for it in the Property pane (see next step). Note that you can select one or more of the multiple field instances in a list to remove them from the template (click the Remove button) or specify common properties (click the Property button).
Continue to add data fields to the template as necessary. At any time, you can add properties to the any of the fields that specify how data is formatted when you run the report. See the next step for instructions.
- In the template or in the Layout control list, select the data field instances whose properties you want to specify. Then click the Property button to display the Property dialog and make changes as necessary.
Note: If applicable, use Ctrl + click and/or Shift + click to select multiple instances of a data field in the template or in the Layout control list so you can change all of their properties to the same settings at the same time.
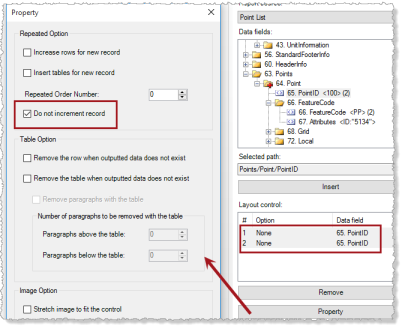
In the following example, two data fields are selected in the Layout control list and the property for each is being changed in the Property dialog to include the Do not increment record option.
Following are descriptions of each of the options in the Property dialog.
- Repeated Option:
- Increase rows for new record - Check this check box if you want each instance of the selected data field to add a new row to the existing table.
Template:
Report:
As an alternative, you can create a fixed number of rows you want to include in the table and populate each with the appropriate data fields (for example, create the first row and copy and paste to create additional rows). In this case, ensure this check box is unchecked for all of the fields in all of the rows.
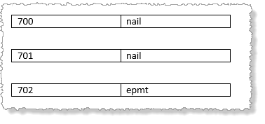
- Insert tables for new record - Check this check box if you want each instance of the selected data field to be added to its own "table" (see note below). In this case, you must create a borderless row at the end of the table.
Template with borderless last row (highlighted):
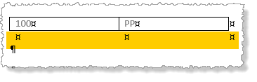
Report:
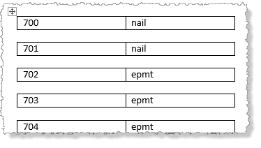
Note: Although each record appears to be in its own table in the report, if you select to display symbols (click
 on the Home ribbon in Word) you can see that the records are actually all in the same table, separated by borderless empty rows.
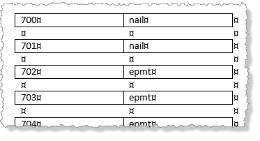
As an alternative, you can create a fixed number of tables you want to include in the report and populate each with the appropriate data fields. In this case, ensure this check box is unchecked.
Template:

Report:
- Repeated order number - If a table includes multiple records in the same row, you can use this control to determine the arrangement of the records in the table.
Note: This option is not available if the Increase rows for new record or Insert tables for new record check box is checked.
In this example, the table includes six columns: PointID, FeatureCode, PointID, FeatureCode, PointID, FeatureCode). If the Repeated order number is set to 0 for all of the fields in the table, the records will arrange themselves in the actual report in a horizontal direction first and then in a vertical direction.
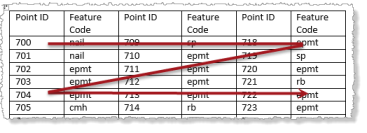
If the Repeated order number is set to 1 for all of fields in the first two columns, 2 for the next two columns, and 3 for the last two columns in the template table...
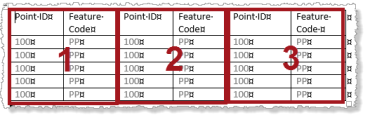
..the records will arrange themselves in the actual report in a vertical direction first and then in a horizontal direction.
- Do not increment record - By default, when the Report Generator in TBC encounters an instance of the same type of data field already used in a template, the next data record is used as applicable. You can check this check box option to override this behavior and specify that the same data record be used for each included instance.
Note: This option is not available if the Increase rows for new record or Insert tables for new record check box is checked.
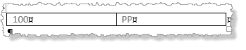
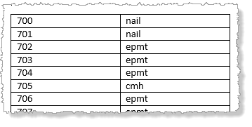
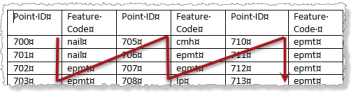
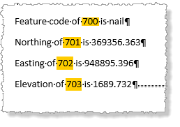
For example, if the four instances of the PointID data fields in the following template sample do not have this check box checked...
... the actual report will look like this. The point IDis incremented based on the next record in found.
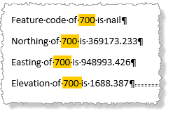
If the four instances of the PointID data fields do have this check box checked, the actual report will look like this. The point IDis not incremented.
- Increase rows for new record - Check this check box if you want each instance of the selected data field to add a new row to the existing table.
- Table Option:
- Remove the row when outputted data does not exist - Check this check box to specify that a predefined row be removed from a table if data required to populate the row does not exist (that is, all data fields have empty values).
- Remove the table when outputted data does not exist - Check this check box to specify that a table be removed if data required to populate the rows in the table do not exist (that is, all data fields have empty values).
- Remove paragraphs with the table - If you check the Remove the table when outputted data does not exist check box, you can check to specify that paragraphs located above and/or below the table are removed along with the table.
- Image Option:
- Stretch image to fit the control - Check this check box if you want to stretch a graphics data field image to fit the image frame created when you inserted and, optionally, sized it in the template (see previous step in this procedure) if the image is smaller than the frame. Whether or not this check box is checked, if the image is larger than the frame, it is automatically shrunk to fit. (The aspect ratio is always maintained.)
- Repeated Option:
- When you are done adding data fields and specifying properties, click the OK button to save the template and close the Word application.
- In the Edit Custom Report dialog in TBC, click OK to add the report template to the Reports list in the Report Options command pane.
You can select to run the new report in any project. See Run a Report for instructions.
