Create CAD Entities With Two Clicks Method
The Two-Click method can be used to create CAD entities by measuring free 3D points from images.
To Create CAD Entities With Two Clicks Method:
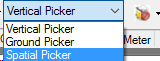
- Click on the 3D Coordinate Picker Type pull-down arrow.
- Choose the Spatial Picker from the drop-down list.
- Select e.g. Create Point.
- Or right-click Points in the Project Explorer, and select Create Point from the context menu.
Note: Any CAD tool that has a coordinate picker can be used in combination with the Spatial Picker to define CAD entities on the Mobile Mapping data.
- Type a name for the point in the Point ID field.
- Click in theEasting field.
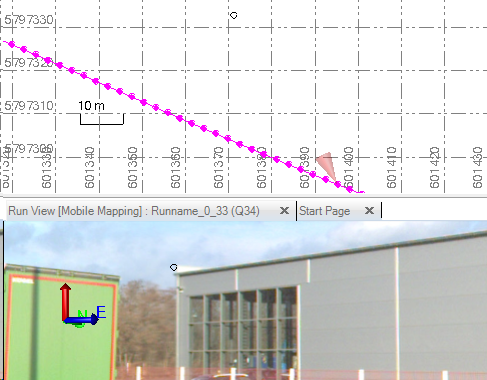
- From your current point of view, in order to sight your first point measurement:
- Change the direction of the view, sideways and/or up and down to sight a point on the Run View.
- Change the field of view from each station in the run, click in the Run View tab and scroll the mouse-wheel up or down.
- Pick a point in the Run View.
A photogrammetry observation is made from the current point of view (station). An epipolar line representing the photogrammetry observation appears in the Plan View and in the Run View. The Run View jumps a couple of stations forwards (or backwards) depending on the setting in the Mobile Mapping Options.
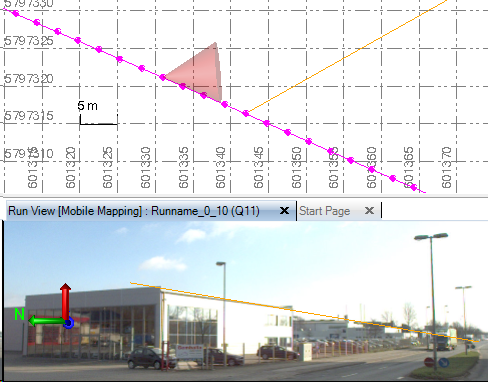
- Jump to another point of view (station) on the run so that the resulting photogrammetry observation is as much perpendicular as possible to the previous photogrammetry observation.
- Repeat the steps from 7 to 8 for the second photogrammetry point measurement.
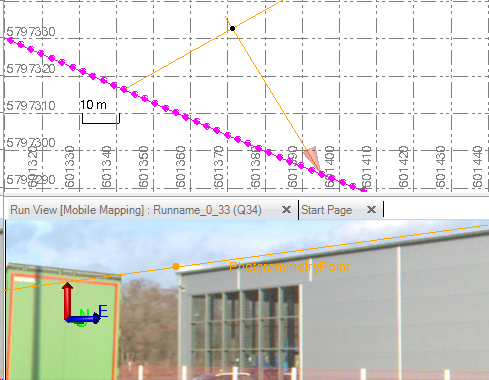
- Click Add. A photogrammetry point is created in the Plan View and in the Run View.