Work with Line Control Codes
Surveyors can assign line control codes to points during field data collection to specify properties for an associated line feature. For example, they can assign a line control code to a point to specify where a feature line starts or ends. When the feature codes are processed, line control codes modify line objects according to the actions (instructions) associated with the code.
To create a new line control code:
- In the Project Explorer, right-click the Line Control Codes node and select New Line Control Code.
A new Line Control Code node displays nested beneath the Line Control Codes parent node in the Project Explorer. In addition, the Line Control Code Properties pane displays.
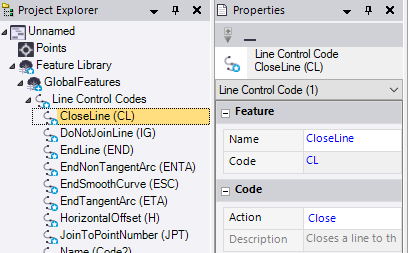
- Complete the fields as described in "Properties" below.
Your changes are saved automatically.
To edit or delete an existing line control code:
In the Project Explorer, right-click the node for the line control code you want ot edit or delete and do either of the following:
- Select Properties to display the Line Control Code Properties pane. Then, make any necessary edits as described in "Properties" below. Your changes are saved automatically.
- Select Delete.
Note: If you delete a control code that has been assigned to a point in your project and then reprocess the feature codes, the deleted code will no longer be recognized and will be reported as "Unknown" in the Feature Code Processing Report.
Properties:
|
Feature |
|
| Name |
Enter a name for the line control code. |
| Code |
Enter a unique code for the line control code. Duplicate line control codes cannot be used in the same Feature Definition (.fxl) file. Typically, the code is an abbreviation for the line control action that can be easily assigned to a point in the field. |
|
Code |
|
| Action |
Select the predefined code representing the action to be performed on the feature line (see "Available action codes and descriptions" below). |
|
Description |
Displays a read-only description of the action code selected in the Action drop-down list. |
|
Available action codes and descriptions |
|
| Start |
Start a new line joining sequence. The previous joining sequence with the same code is ended. Use this to prevent the point from being joined to the previous point with the same code, and to start a new joining sequence. In some applications, this control code is not required to start a new line if line features with the same name are joined automatically. Note: You can use Start action to produce results similar to the End action. |
| End |
End a line joining sequence. Use this when you want to prevent a line from being drawn between the point with the End control code and the next point with the same feature code. |
| Join To Point |
Join a line sequence to a specified point ID. |
| No Join |
Ignore any joining operations assigned to the feature line. |
| Close Line |
Close the line to the first point in a sequence with the same feature code. At least three points are required. The points must have the same feature code, and the feature code for the final point must be followed by the Close action code. Use this to close a line when a new one is started or the feature is ended. If there is a line style defined for the common feature code that was used, the close is drawn using the line style defined. If there is not a line style defined, the line is drawn in the default line style for the current layer. Tip: Set the default line style for layers first. |
| Start Arc |
Start a tangential arc. Points defining the entry tangent are required. The azimuth between the point that has the start arc control code and the previous point with the same feature code defines the entry tangent direction. An arc can be created in these situations:
|
| End Arc |
End a tangential arc. Points defining the exit tangent are required. The azimuth between the point with the end arc control code and the next point with the same feature code defines the exit tangent direction. When these control codes are used, the center point for the arc is determined by calculation using the available data. |
| New Arc |
Start a non-tangential arc. A previous point with the same feature code is not required. A non-tangential arc requires three or more points (the New Arc point, the End On Arc point, and one or more points between them that define the arc). The points used must have the same feature code. Note: If there are no points with the same feature code between the New arc point and End on arc point, the arc is drawn as a tangential arc, where the center point is the mid point of the line between the two points. |
| End On Arc |
End a non-tangential arc. A next point with the same feature code is not required to end an arc this way. This ends the non-tangential arc started by the previous new arc control code. An arc is defined by three points. When these control codes are used, a curve of best fit is drawn between the points. From the curve, the center point is determined. |
| Start Curve |
Start a smooth curve. This creates a smooth curve that goes through all the points located between the start and end smooth-curve point codes, similar to splines. |
| End Curve |
End a smooth curve that was started by the StartCurve control code. |
| Start Circle Edge |
Start a circle with three known points on the circle. The control code is specified for the first point only. |
| Start Circle Center |
Do either of the following:
|
| Start Rectangle |
Do either of the following:
|
| Horizontal Offset |
Start an offset line at the horizontal offset distance specified. The offset line has the same style as the line feature definition. The offset control code overrides any offset line definitions specified for a line feature definition. |
| Vertical Offset |
Start an offset line at the vertical offset distance specified. The offset line has the same style as the line feature definition. The offset control code overrides any offset line definitions specified for a line feature definition. |
