Check Line Deflections
 The Check Line Deflections command enables you to search selected lines to find and highlight nodes that exceed a chosen deflection angle. Use this command to find string errors before sending data to the field, or to display deflections as text on screen.
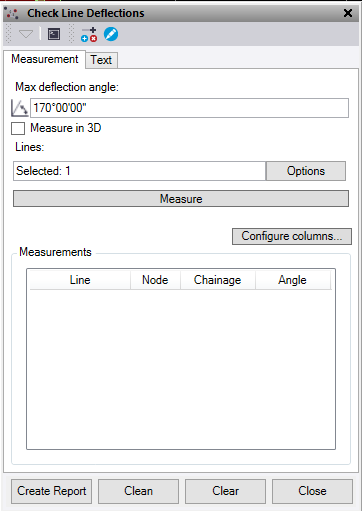
Measurement Tab
- Enter a Max deflection angle.
- Check the Measure in 3D box to check 3d deflection. Otherwise, the deflection is measured in the XY plane only.
- Click in the Lines field and then, in the Plan View, select one or more lines.
- Press the Measure button to check the lines and populate the Measurements text box.
This process reports the number of nodes and attaches an orange flag to any nodes that exceed the deflection angle.
- Click Configure columns to select which measured values are displayed in the measurements text box and included in the report.
- In the Measurements text box:
- Select a node to highlight the flag in red.
- Optionally, right click on a line to delete node. The view automatically removes the flag.
- Use the shortcuts at the top of the command to edit a linestring. Leave the Check Line Deflections command open to keep the flags on the screen and update as you edit them.
- Click Create Report to create an Excel file of the data.
- Click Clean button to remove all flagged nodes.
If the closing angle of a closed linestring is flagged, it will not be deleted.
Tip: Delete the first node with a deflection angle flagged, then recheck the line from the start. Continue to delete nodes until you have removed all nodes that exceed the deflection angle. This enables you to clean up data prior to sending it to the field.
Caution: Review your data before and after using this function.
- Press the Clear button to clear the measurements text box.
Text Tab
- Select the Text tab to draw the measurements taken and recorded in the measurement tab to text.
- Define the Layer. A layer called "Text – CheckLineDeflections" is automatically created.
- Choose a Color.
- Choose a text Style.
- Enter a text Height.
- Enter a Gap between the location and the start of the text. This moves text to the right.
- Click Create Text to create text of all the measurements in the Measurement tab.
- Click Clear Layer to delete everything on the selected layer.
Note: Delete node and Clean only work on linestrings.
