Create Best Fit Circle
 Create Best Fit Circle enables you to select at least 3 points and fit a circle using the least squares method. A preview is available to check the resulting delta values from the original points to the created circle.
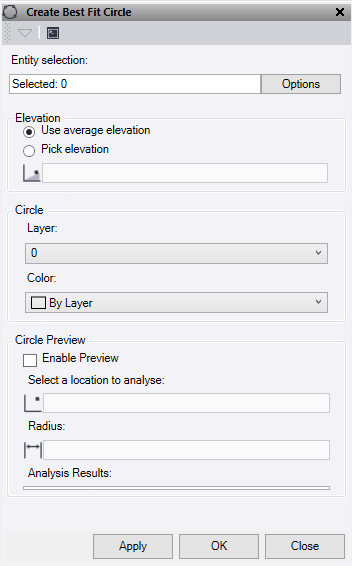
- In the Entity selection, choose at least 3 points to use in a graphic view, or click Options for additional selection options.
- Under Elevation, select one of the following;
- Use average elevation – This will set the elevation of the new circle to the average elevation of the points used.
- Pick elevation – Select or enter an elevation to be used for the circle.
- Select or create a Layer for the circle.
- Select a Color for the circle.
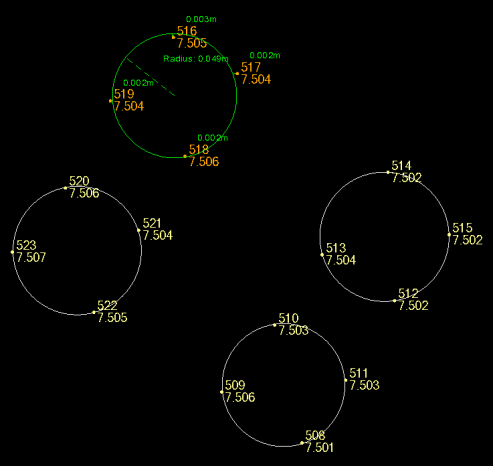
- Under Circle Preview, check the Enable Preview box then move your curser over the plan view for a dynamic preview of the circle and deltas to be displayed.
- Enter or Select a location to analyse. This location defaults with the center of the circle calculated by the best fit. If a different circle center point is selected in the Plan View, the preview will update to show the new delta values. The circle drawn will use this center point.
- Enter or Select a Radius. This box populated by default with the calculated radius, but can be edited to a user defined value.
- Analysis Results displays the delta values for all the points used compared to the calculated circle location.
- Do one of the following:
- Click Apply to create a circle and keep the Create Best Fit Circle command pane open.
- Click OK to create a circle and close the Create Best Fit Circle command pane.