Create Slope Markers
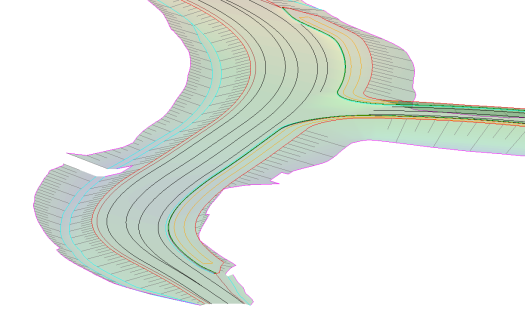
 The Create Slope Markers command enables you to select a control line and two other lines, generally the top and toe of an embankment, and create markers between them perpendicular to the control line at nominated intervals.
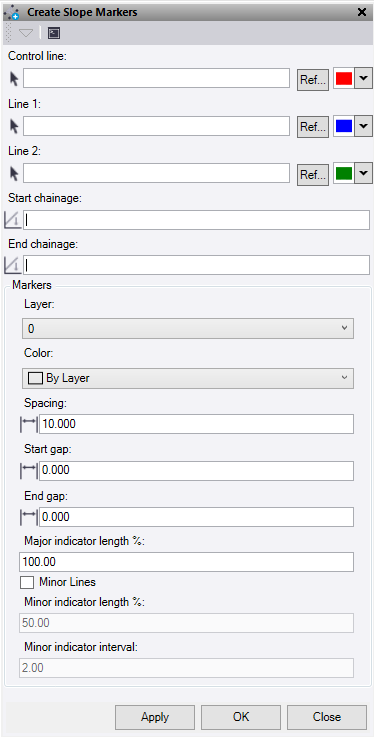
- Select a Control Line. This is the line the markers will run perpendicular too. Optional: Change the selection highlight color.
- Select Line 1. This is the top or toe of embankment. Optional: Change the selection highlight color
- Select Line 2. This is the other top or toe of embankment. Optional: Change the selection highlight color
- Start chainage and End chainage are set using the chainages from Line 1 and 2 as much as possible. Click in the boxes to edit the values if required.
- Select or create a Layer for the slope markers to be placed.
- Select a Color for the slope markers.
- Under Spacing, set the "control line" chainage interval for the major lines.
- Under Start Gap, set the distance in from the start chainage that the first line is drawn.
- Under End Gap, set the distance in from the end chainage that the last line is drawn.
- Under Major Indicator Length %, set the percentage for the line to be drawn between the line 1 and line 2. 100% will touch both lines.
- Check the Minor Lines box to add secondary lines to the display.
- Under Minor Indicator Length %, set the percentage for the line to be drawn between the line 1 and line 2. 100% will touch both lines.
- Under Minor Indicator Interval, set the number of minor lines to be drawn between the major lines.
- Click Apply to create lines and keep the Create Slope Markers command pane open, or click OK to create lines and close the Create Slope Markers command pane.