Entering readings for a sensor
This section describes how to enter readings for a particular sensor.
This topic explains how to
-
Create a dataset and enter a few sensor readings
-
Export the dataset to a data XLSX File
-
Add more readings using Excel and upload the completed data XLSX File to create a new completed dataset.
-
View the completed dataset and apply the readings to the sensor.
Creating a new dataset for the sensor
There are two methods to create a new dataset for sensor data entry.
Method 1: Add dataset from Data Entry area
To view the Data Entry area, select Data Entry from the Sensors menu or from the Home page.
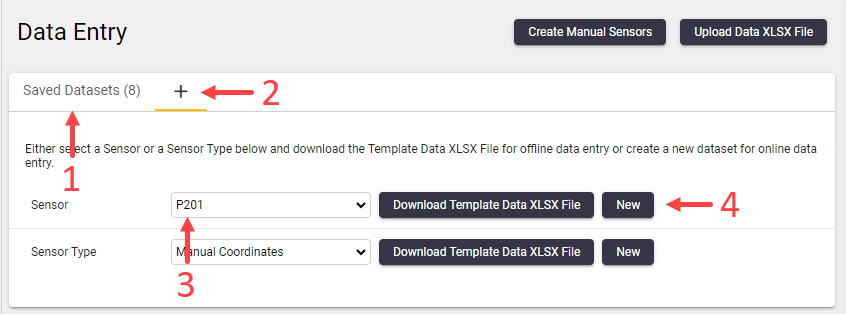
The Data Entry area appears as a tabbed view. The Saved Datasets tab (1) lists all the datasets saved online. We will discuss this later.
The tab marked ‘+’ (2) shows options to download Data XLSX files or to create a new dataset for a specific sensor or sensors of the same sensor type. In this example we have selected a manual sensor (3) in the Sensors drop-down list.
Click New (4) to create the dataset.
Method 2: Add dataset from Sensor List or Sensor Details page
Alternatively you can create a new dataset for a specific sensor by moving your mouse over a manual sensor in the sensor list of the Sensors area or by clicking the Enter Data button in the sensor details view.

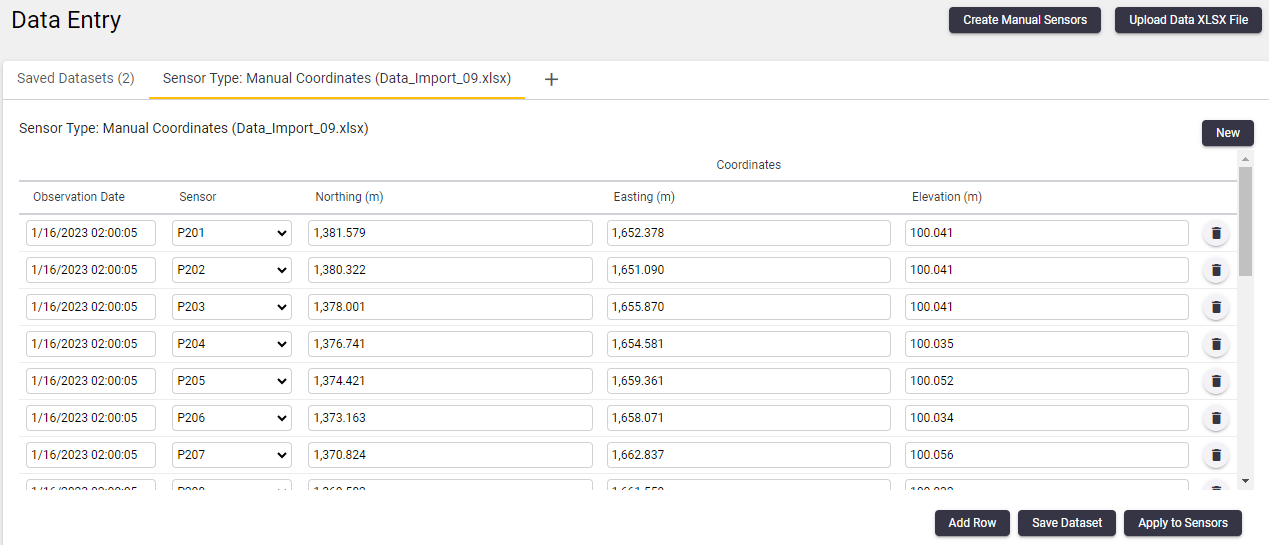
Enter sensor readings
The new dataset appears in the Data Entry area tabbed view as a tab called (New Dataset).
The online dataset editor allows you to specify observation dates and enter readings for those observation dates.
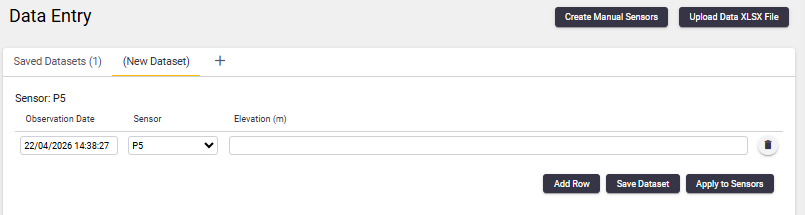
To add another row to your dataset, click the Add Row button or press TAB on the last reading field in the dataset row.
To remove a dataset row click the Delete icon next to the row.
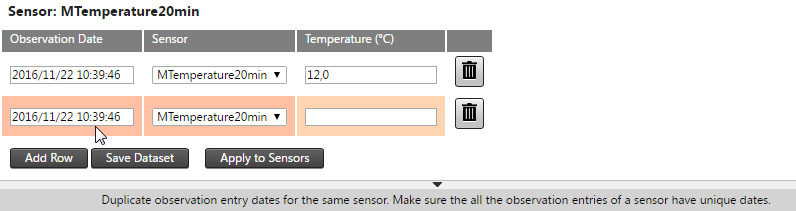
Some cells may be marked with validation warnings. You can view the validation warning by hovering over the cell.
Once you fix all the validation warnings in a dataset click Save Dataset to save your dataset online.
To apply the readings to the sensor immediately, click Apply to Sensor. This applies the readings to the sensor and directs you to the Sensor details page. If you do not save a dataset before clicking the Apply to Sensors button, then the new dataset you created is not saved online. If you do not plan to use the dataset again, it is not necessary to save a dataset during data entry.
After saving the dataset, click the Saved Datasets tab (1) to view your saved dataset.
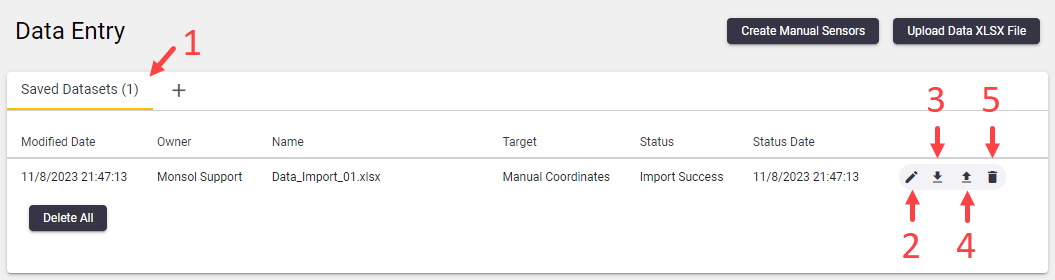
Click the:
-
Edit icon to edit the dataset,
-
Download icon to download the dataset as a Data XLSX Files,
-
Apply to Sensors icon to apply the readings captured in the dataset to the sensor
-
Delete icon to delete the dataset.
Export sensor data to a Data XLSX file
In the Saved Datasets (1) tab, click the Download icon to download the dataset as a Data XLSX file.
Open the Data XLSX file to change or enter additional readings. You can also send the Data XLSX file to someone else to capture readings.
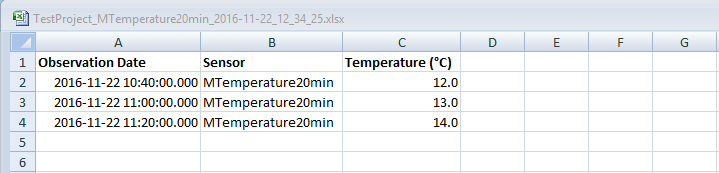
Remember to save your Data XLSX file after making changes.
Upload the data XLSX file
Once you have captured readings in the data XLSX File, you can upload your readings by navigating to the Data Entry area and clicking the Upload Data XLSX File button.

Click and drag the Data XLSX File onto the upload area, or click the Add Files button to upload the Data XLSX File.

View the completed dataset
The readings in the data XLSX File are shown as a dataset in T4D Control Web and you can proceed to edit the readings online or apply the readings to sensors.