Sensor administration
To view the Sensor Listing page, select Project Manager > Sensors in the menu.

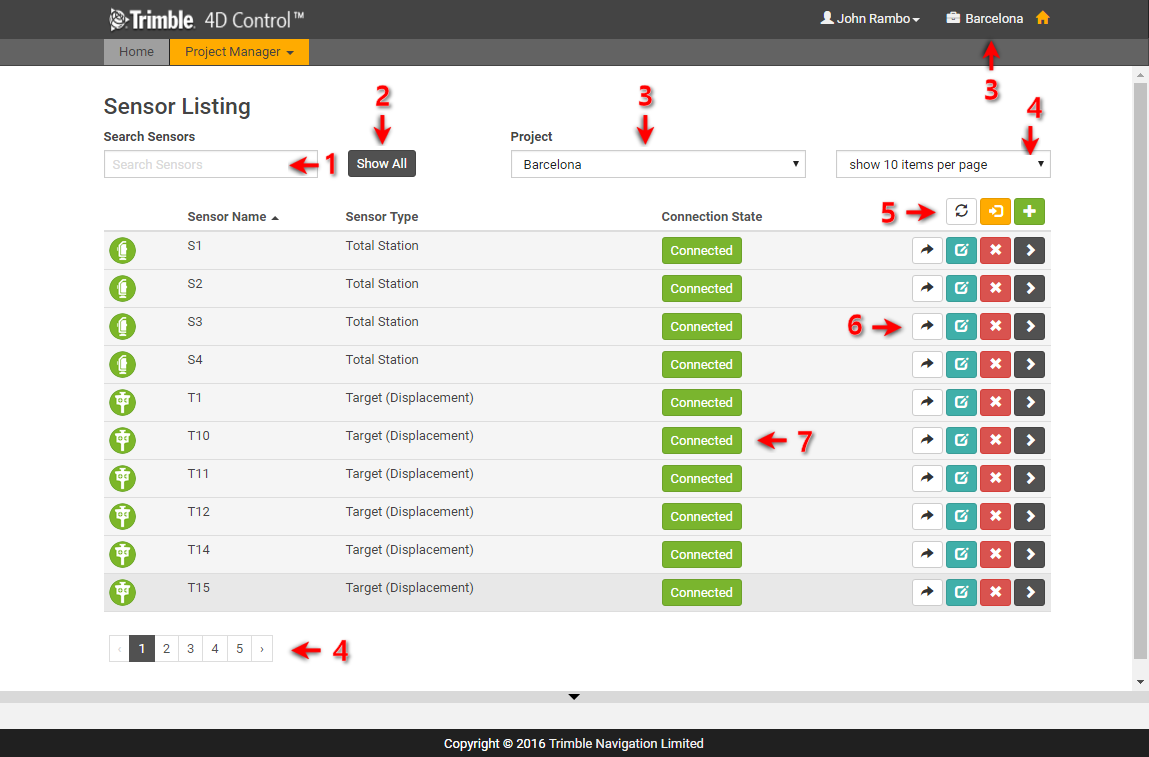
The Sensor Listing page will show a list of all the existing sensors in the current project.
The important controls on the Sensor Listing page enable you to manage sensors in the project:
View existing sensors
-
Use the Search Sensors field to search for specific sensors.
-
Click the Show All button to clear the Search Sensors field and show all the sensors available in the current project.
-
Use the Project drop-down to switch between projects. This has the exact same effect as clicking on the Set Current Project button on the Project Listing page.
-
Some projects may contain large numbers of sensors and so the sensors on this page may be paginated. You can change the page size using the drop-down on the top right of the page and you can switch between pages by making use of the paginator control on the bottom left of the page.
-
Click the Refresh button
 to refresh the current Sensor Listing.
Add sensors
-
Click the Import or Bulk Add button
 to import multiple prisms into the project.
 -
Click the Add Sensor button
 to add a new sensor to the project.
Edit or delete sensors
Within each row of the Sensor Listing page, a number of buttons are available to interact with the sensor listed in that row:
-
Click the View Sensor button
 to navigate from the admin area to the View Sensor page in T4D Web. You can open the View Sensor page in a new browser window by holding down the Ctrl key when clicking on this button.
 -
Click the Edit Sensor button
 to view the Edit Sensor page.
 -
Click the Delete Sensor button
 to delete the sensor from the project.
 -
Click the Expand Details button
 to view all the Data Sources connected to the sensor.
Disconnect sensors
The Connection State of the sensor appears next to each sensor. You can disconnect sensors by clicking on this button. When you disconnect a sensor the sensor icon changes to gray and dataflow stops. To reconnect the sensor, click the Connection State button again.