Configuring the SQL databases
-
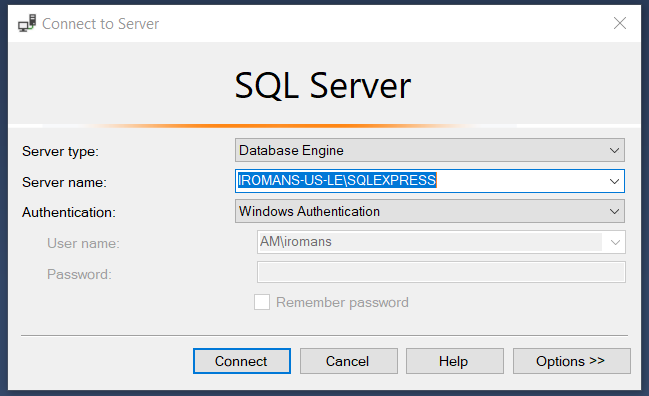
Open SQL Management Studio.
-
Login with the default Windows Authentication and click Connect.

-
Right-click on the root of the Object Explorer tree and select Properties.

-
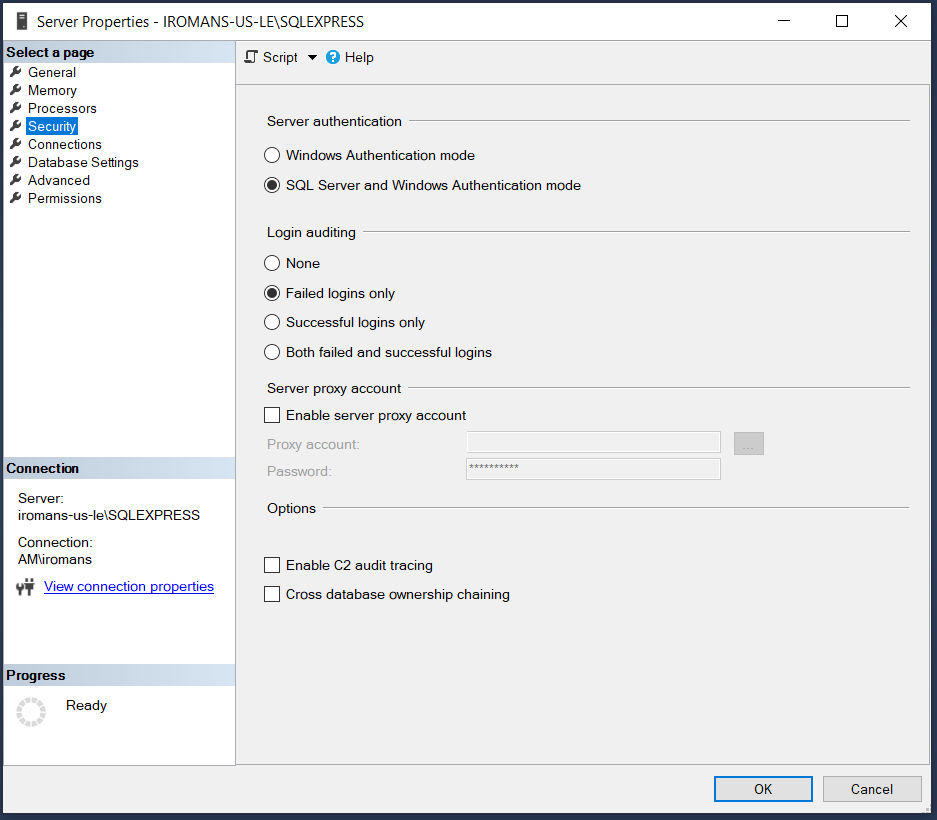
In the Server Properties window:
-
Select Security.
-
Change the Server Authentication to SQL Server and Windows Authentication mode (also known as Mixed Mode). This information can also be set during the SQL installation if it hasn’t already been configured.
-
Click OK.

-
-
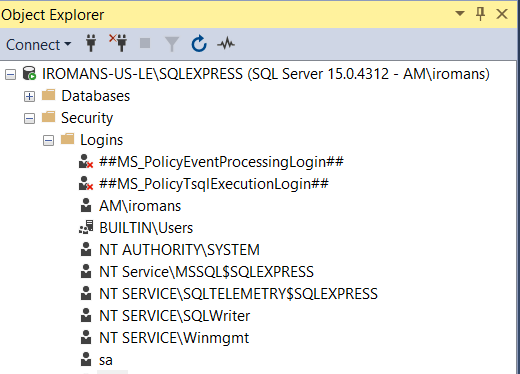
In the Object Explorer tree, expand the Security folder and then the Logins folder.
-
Right-click the ‘sa’ login and select Properties.

-
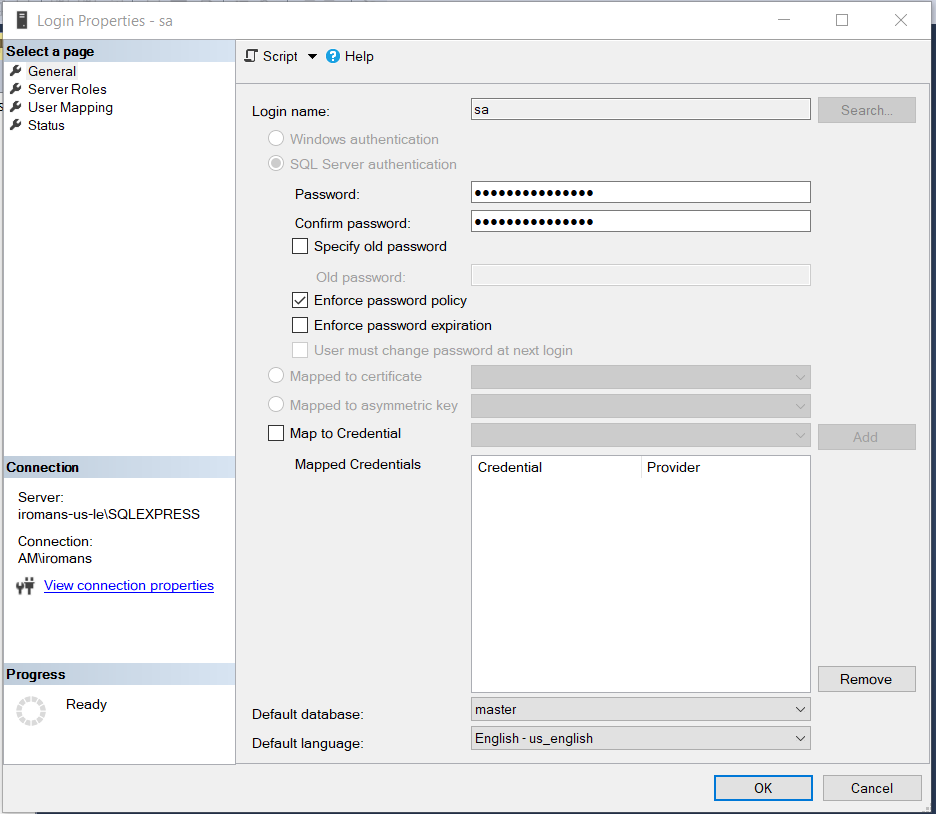
In the Login Properties window:
-
Select the General page.
-
Enter a new password into the Password and Confirm Password fields.
Make a note of the password for future reference. You will use this login and password later during the installation.

-
In the same Login Properties window, select the Status page.
-
Ensure that the Settings are set to:
Permission to connect to database engine, select the Grant option.
Login is set to Enabled.

-
Click OK.
-
-
In the Object Explorer window, click the Refresh icon (the blue circular arrow) to see the "sa" Login become active.

You must restart Windows to ensure that all changes to the SQL database are applied.