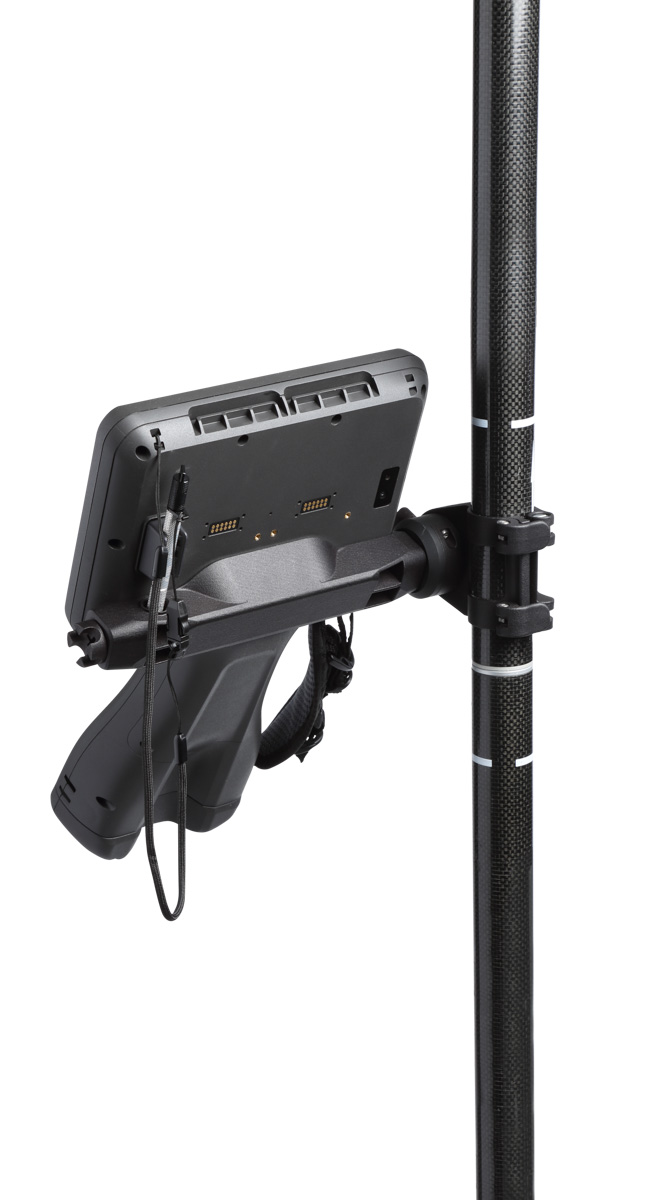
Attaching the pole bracket (optional)
 An optional accessory for the TSC710 controller, the pole mount consists of two parts:
-
a custom bracket which attaches to the back of the TSC710 controller.
-
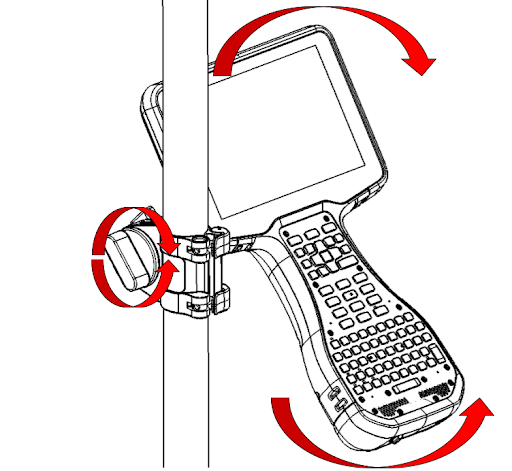
a pole clamp. This can remain on the pole and still fit in a 4” tube, and has a friction twist grip to easily adjust the angle.
The bracket is designed to stay attached to the controller semi-permenantly; the controller can be comfortably carried and used in the hand even with the bracket installed.
The bracket easily plugs into the pole clamp for quick attachment and release.
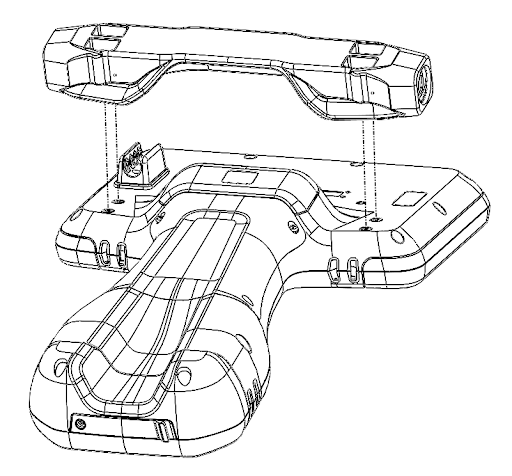
To install the bracket on the TSC710 controller:
-
Remove the stylus from the holder, and place the TSC710 controller display-side down.
-
Place the bracket in the orientation shown.
-
Firmly tighten the four (4) captive screws with the Phillips screwdriver on the stylus, or use a #1 Phillips screwdriver. Do not over tighten; there is a thread-locker on the screws to prevent them from loosening.
-
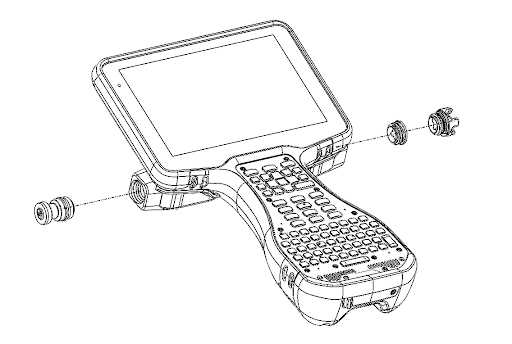
Turn the TSC710 controller over, display-side up.
-
Install the metal quick release pin using the flat head portion of the stylus or a flat head screwdriver. Make sure to tighten the pin until it stops.
For right-hand configuration (shown below ) install the pin on the left side of the bracket. For left-hand configuration (not shown) install the pin on the right side of the bracket.
-
On the opposite side of the bracket from the quick-release pin, install either the stylus holder or the end cap. Use the flat head portion of the stylus, or a flat head screwdriver. For the stylus holder, adjust the position to the desired angle.
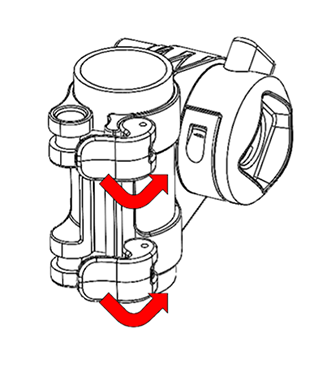
To install the pole clamp:
-
Unclamp and open the cam locks.
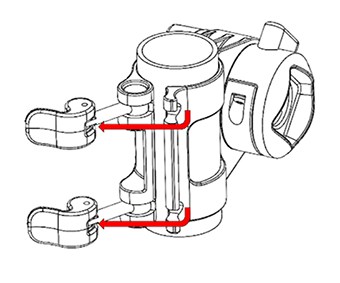
-
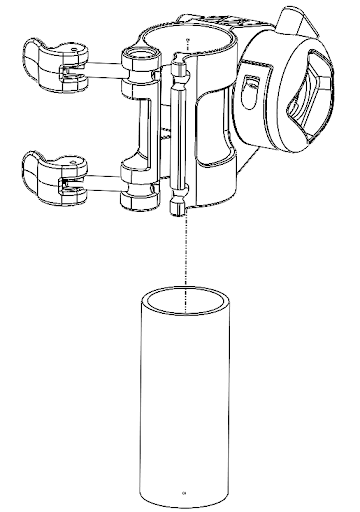
Remove the cardboard tube (if applicable).
-
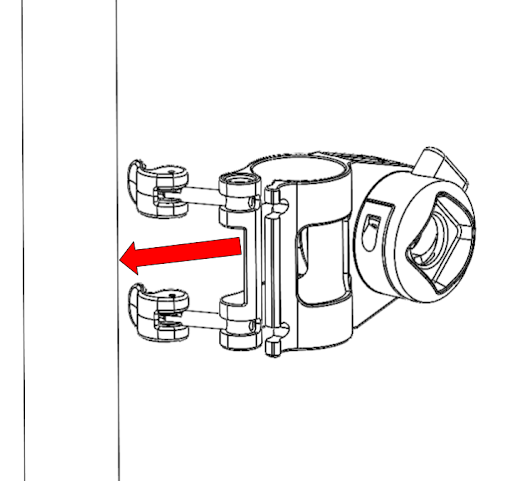
With the quick-release button facing up on the far side of the pole, pull the bracket toward you to snap it over the pole.
-
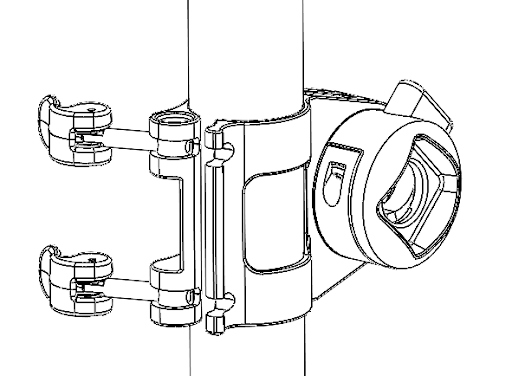
Position the pole mount (vertically and axially) on the pole where desired.
-
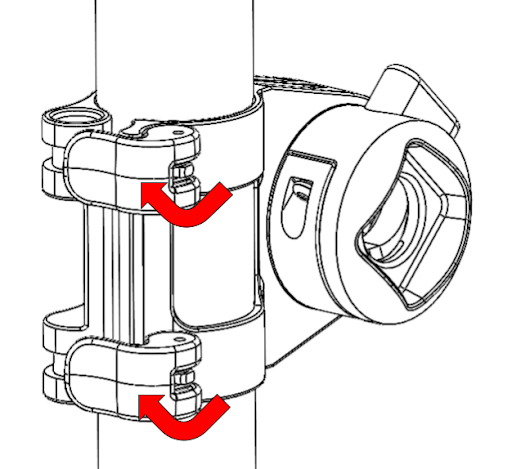
To lock in place, fold over the cam arms and engage the cam clamps.
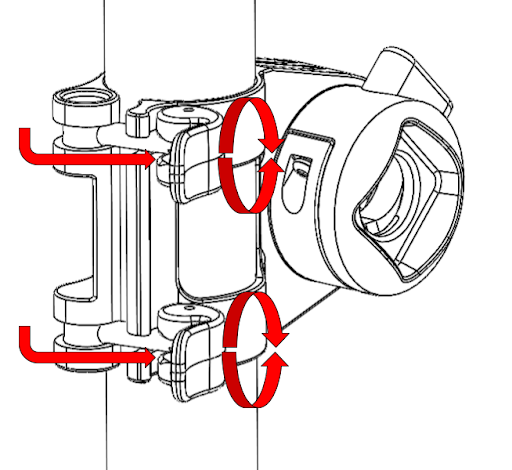
To adjust for variations in pole diameter, turn the cam lock screws (right turn to tighten and left turn to loosen) so that the cam is resting against the stop surface, before engaging the cams.
To attach the TSC710 controller to the pole:
-
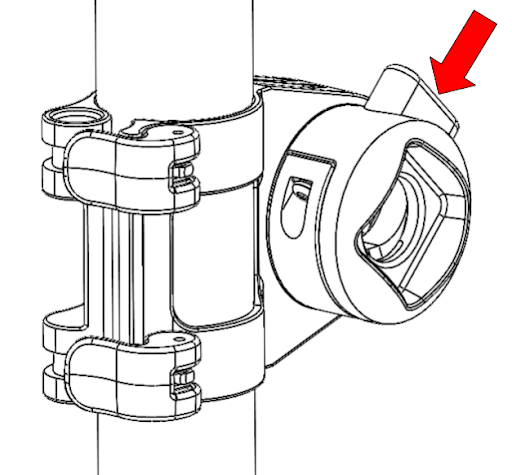
Push and hold down the quick release button on the pole mount.
-
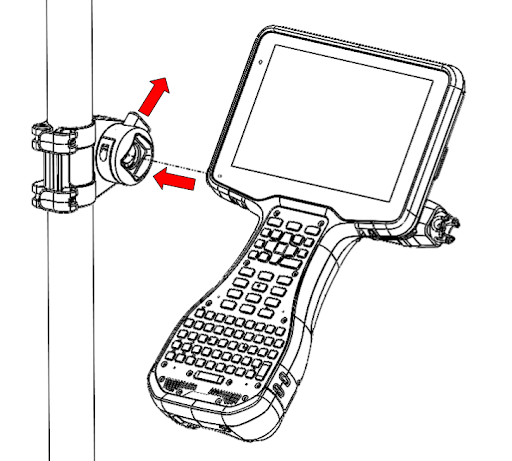
Install the quick-release pin side of bracket into the pole mount, and release the quick-release button.
-
Loosen the rotation lock handle to adjust the viewing angle of the TSC710 controller, then tighten (right to tighten, left to loosen).
To release the TSC710 controller, push the button and pull the device out of the clamp.
