Powering the instrument on and off
Turn the instrument on and off with the On/Off key.
Powering on the instrument
With a battery inserted, power on the instrument with a short press of the On/Off key.
With the external power supply connected to the power connector, the instrument automatically powers on.
Powering off the instrument
To power off the instrument, press and hold down the On/Off key within one second and five seconds until you hear one beep followed by descending beeps and the On/Off key LED starts to flash with a high frequency. The LED continues to flash with a high frequency until the instrument powers off.
On/Off Key LED
The On/Off LED indicates different instrument modes, see the table below.
|
On/Off key LED |
The instrument is … |
|---|---|
|
Off |
off. |
|
Yellow, flashing |
starting up or shutting down. |
|
Yellow, flashing slow |
ready, but not connected to a controller. |
|
Yellow, solid |
ready and connected to a controller. |
|
Yellow, flashing fast |
updating the firmware. |
Multi-color LEDs
The five LEDs indicate different states of the instrument, see the table below.
|
All LEDs |
The instrument is … |
|---|---|
|
Off |
off. |
|
Orange, flashing |
starting, shutting down, updating firmware, or running a diagnostic or field calibration report. |
|
Green, solid |
ready to scan with controller or scan button operation. |
|
Blue, flashing |
initializing, calibrating, leveling, and scanning. |
|
White, flashing |
acquiring images. |
|
Red, solid |
encountering an issue with the battery, the SD card, leveling, auto-calibration, acquiring data, or there is a hardware failure. |
|
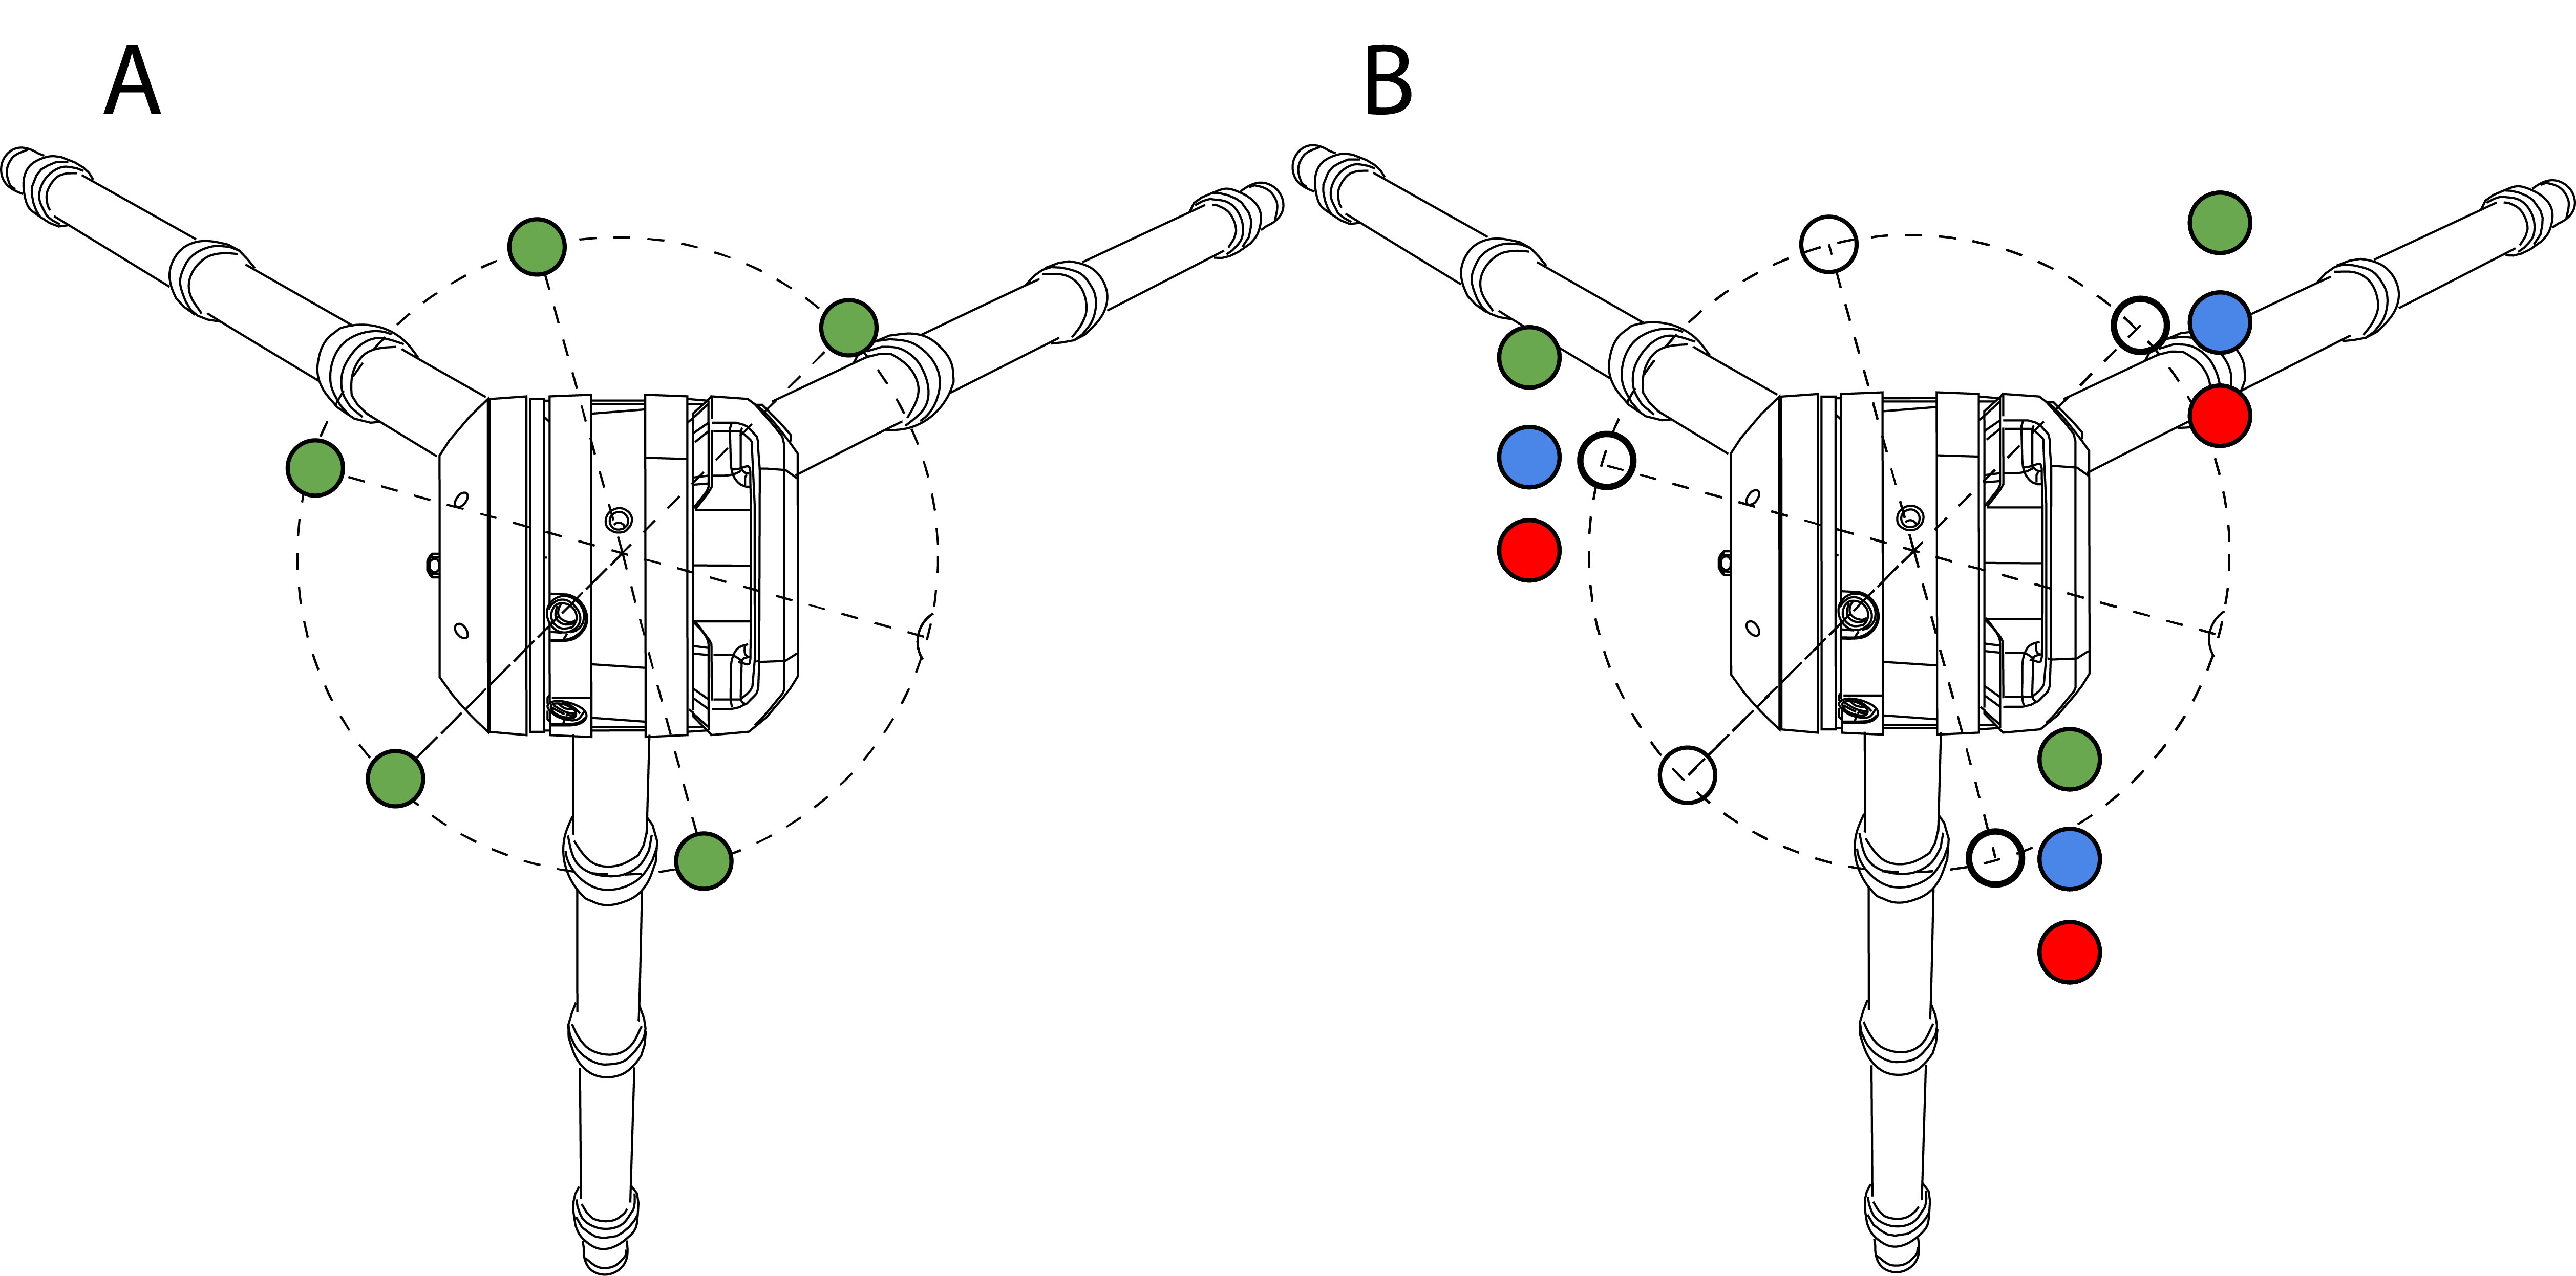
Leveling LEDs |
The instrument is … |
|---|---|
|
All five LEDs are green solid (see A) |
leveled. |
|
Three LEDs are flashing (see B)
|
not leveled. Tripod leg near the LED does not need adjusting. Tripod leg near the LED is too low. Tripod leg near the LED is too high. |
All LEDs and LED leveling guides can be turned on/off. Refer to the field software documentation.
Sound notifications
|
Sound |
The instrument … |
|---|---|
|
Ascending beeps |
is starting. |
|
One beep |
is starting a scan or having the memory card removed. |
|
One long beep |
is completing a scan or a diagnostic or field calibration report. |
|
One short beep |
has successfully created a precision point. |
|
Two short beeps |
has failed to create a precision point. |
|
One beep, followed by three beeps (after ten seconds) |
is saving an emergencylog.zip file on the memory card after pressing the On/Off key for ten seconds. This file will help Trimble Support to troubleshoot issues with the instrument. |
|
Four beeps |
is encountering an issue, has moved during the operation, the battery is low, or there is not enough space left in the memory card. |
|
One beep followed by descending beeps |
is shutting down. |
|
One beep, followed by three beeps (after ten seconds) and then five beeps (after ten more seconds) |
is resetting the Wi-Fi password to the factory default value and the Wi-Fi settings to 2.4 GHz Auto mode. |
