Applying an atmospheric correction
The scanner uses the EDM (Electronic Distance Measurement) technology to collect points. Distance measurement is function of the velocity of light in the atmosphere and the velocity of light depends on the refractive index of air, temperature, pressure, and humidity. The Atmospheric Correction feature applies corrections to the distance measurement—expressed in PPM (Parts Per Million)—according to the atmospheric conditions. The default PPM value is zero.
Connect to a scanner. If the Atmospheric Correction option in the  Settings > Scanner panel is:
-
OFF, all scans will be captured without any atmospheric correction being applied.
-
OFF, and you turn the option ON.
-
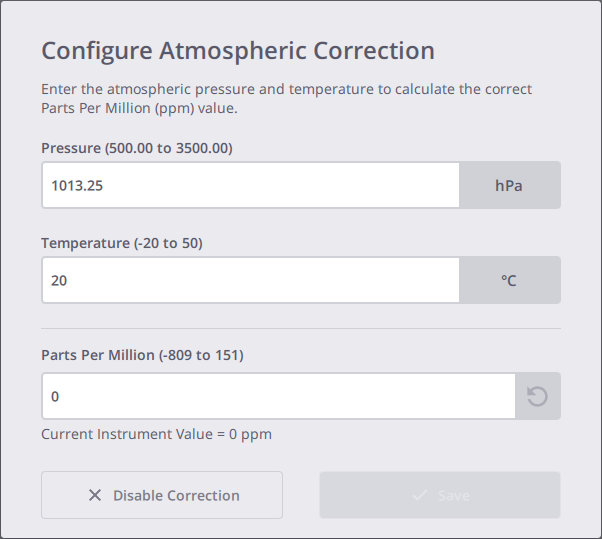
The scanner has an atmospheric correction of zero, the Configure Atmospheric Corrections panel opens:
-
Define an atmospheric correction value:
-
Enter a pressure and a temperature and press Enter. The PPM value is automatically computed.
-
Or enter a PPM value and press Enter. As the pressure and the temperature cannot be deduced from the PPM, the Perspective software displays them as "---".
-
Optionally, use
 to restore the previously saved PPM value.
If the input value is out of range, the corresponding field is surrounded in red:
-
Pressure: 500 mbar to 3500 mbar
-
Temperature: -20 °C to 50 °C
-
PPM: -809 to 151.
-
-
Tap Save.
-
-
Or disable the corrections. Tap
 to turn the Atmospheric Correction option OFF in the Scanner > Settings panel and to reset the PPM value of the scanner and in the Perspective software to zero.
-
-
ON, and the scanner has an atmospheric correction set which:
-
Is equal to the value saved in the Perspective software, the atmospheric correction value will be applied to all scans.
-
Tap
 to open the Scanner panel:
-
Tap
again to open the Configure Atmospheric Corrections panel: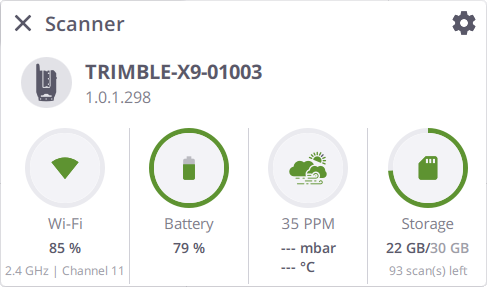
-
Define an atmospheric correction value as described above and optionally, use
 to clear all the values. "---" will be displayed in all fields:
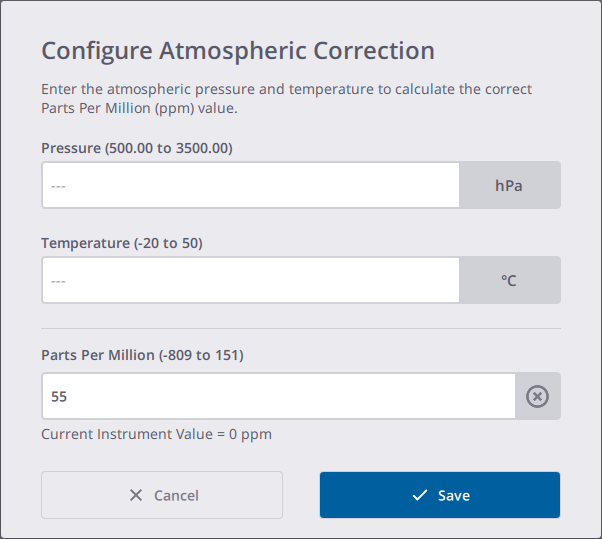
If you set zero to the atmospheric correction value, the PPM
 icon is displayed.
 -
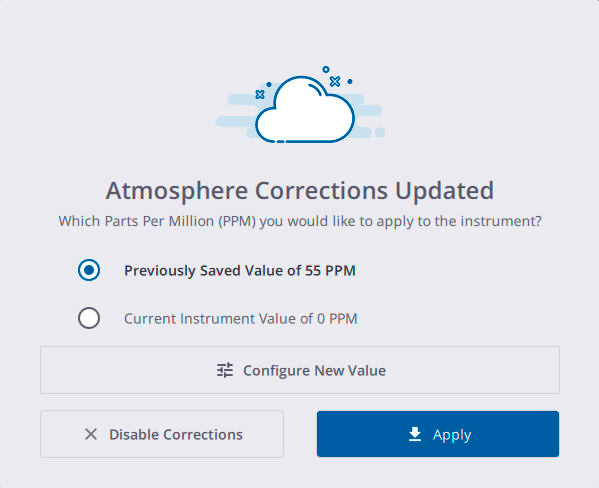
Is different from the value saved in the Perspective software, the Atmospheric Corrections Updated dialog opens:
-
Do one of the following:
-
Choose to apply the previous value (saved in the Perspective software) or the current value of the instrument.
-
Configure a new value. Tap
 to open the Configure Atmospheric Corrections dialog and define a new PPM value as described above.
 -
Disable the corrections. Tap
to turn the Atmospheric Corrections option off in the Scanner > Settings pane and to reset the PPM value of the scanner and of the Perspective software to zero.
-
-
-
-
-
When you turn OFF the scanner, the PPM value of the scanner is reset to zero. The next time you reconnect to the scanner, if you apply the instrument value of 0 PPM, the Perspective software will display the PPM icon in GRAY  .
.
