Best Practices When Using Depth Autos
NOTE – For Trimble Autos on Cat NGH series 07 machines or Cat NGH mini/micro machines, see Using Autos on other machine models.
Observe the following best practices to obtain optimal results when using Depth Autos.
NOTE – Use Autos with a bucket, do not use it with any other type of attachment.
NOTE – For machines with a two-piece boom, do not move the upper boom while in Autos mode.
WARNING – Do not leave the cab when Depth Autos is engaged. When Depth Autos is engaged, the system will control movement of the boom and attachment. These movements could cause injury to anyone near the attachment, or damage to the machine. Always put the attachment on the ground and engage the hydraulic lockout before you leave the machine.
Do not use Depth Autos if the ground conditions are unstable. Only use Depth Autos to grade a finish surface. Disarm Depth Autos when you perform other applications, such as lifting.
TIP – For optimum performance when using Autos features, avoid connecting the Operator App device to the system via Wi-Fi. Ensure that you use a wired connection.
Prepare the machine
Procedures that your technician or installer should perform before you use Depth Autos:
- Check that the machine is in good operating condition.
- Check that none of the connecting pins (boom, stick, attachment and cylinders) have excessive wear. If the machine is loose, the system cannot produce optimal results.
- Check that the measure‑up and calibration of the machine is accurate. The surface you build cannot be better than the accuracy of these measurements and calibrations.
- Check that a valve calibration has been performed.
Best practices for operating excavators
Depth Autos performs best when grading a finish surface.
Procedures to perform every time you use Depth Autos
-
Position the machine on solid, stable ground to prevent rocking.
Rocking will negatively affect the performance of Depth Autos. It is important that both excavator tracks are firmly planted on stable ground. It is not essential that the ground is flat (a sloping surface is okay).
NOTE – If you do not have a tilt bucket, the machine will need to sit on a surface that is close to the cross slope on the target surface. The roll of the excavator (slope of the machine measured from one track to the opposite track) will determine the cross slope of the finish surface.
TIP – If the attachment becomes unstable due to machine rocking, stop and wait until the attachment becomes stable before you try again. If the problem persists, prepare the ground that the machine tracks will sit on. Both tracks should sit on stable ground.
-
Make sure the machine’s hydraulic oil reaches its normal operating temperature (55°C/130°F ).
-
Select High Power mode and turn the throttle up to maximum revs.
The hydraulic pump should always have maximum power available to it, so the hydraulic system can respond to automatic commands as quickly as possible.
NOTE – It is okay to use the auto idle function on your machine
TIP – When starting the machine, make sure that it hasn't defaulted to another mode such as Economic or Standard Power mode. Some machines will default to a mode other than High Power when they are started.
-
Position the attachment within the control range.
TIP – Use the lightbars, cut/fills and buzzer to guide the attachment.
- If applicable, make sure the following features are disabled before you use Depth Autos:
- Crane/heavy lift mode
- Smart boom
Procedures to perform every time you change the attachment
-
Check that a precise measure‑up has been done for the attachment.
- If you have an Operator Plus account you can create and edit attachments via the Advanced button on the Edit Attachment screen.
- If you have an Operator account and it is a new attachment, your technician or dealer must enter the measure‑up in the Web Interface before you can select it in the Attachments screen.
-
Check the performance of Depth Autos every time you change from one attachment to another, especially if you are going from a large heavy attachment to a smaller one or vice-versa.
If necessary, adjust the sliders for the boom and/or attachment in the Autos Optimization screen. This can optimize Autos performance.
Procedures to perform, as required
-
Update the cutting edge length to account for the wear of the attachment. If required, update the value in the Edit Attachment screen, accessed via the Edit button on the Attachments screen.
If the cutting edge has worn unevenly, use an average value. However, guidance will never be better than the range of differences in wear.
NOTE – The frequency at which you need to check the cutting edge length depends on factors such as the type of material you work with and the durability of the cutting edge.
-
You can improve the performance of Depth Autos by adjusting the values in the Autos Optimization screen. For example, if the attachment is slow to curl for the full duration of the pass, increase the Attachment Curl Speed.
Another example of when you might need to adjust the Autos Optimization values is when material conditions change.
Operating practices that can improve performance
-
To improve grading performance when material conditions change, adjust the velocity of the stick movement, especially when you first initiate Depth Autos.
If you use the attachment in a flat position on hard clay, you can initiate the stick lever quickly.
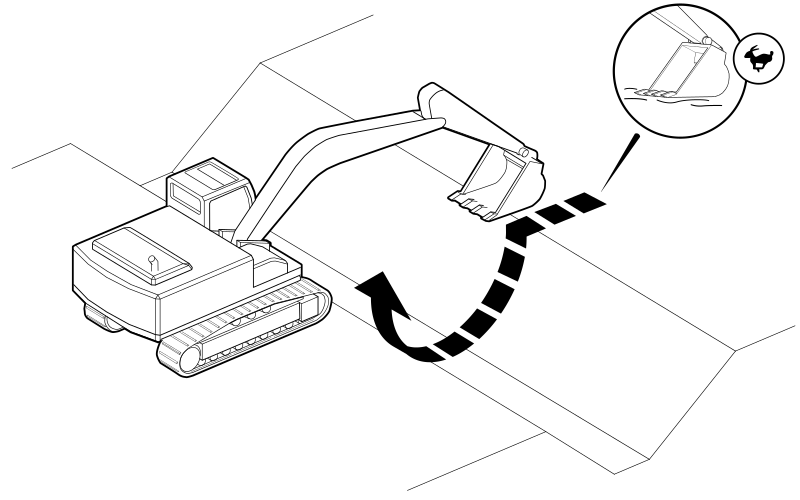
If you use the attachment in the raking position in loose gravel, initiate the stick lever slowly.
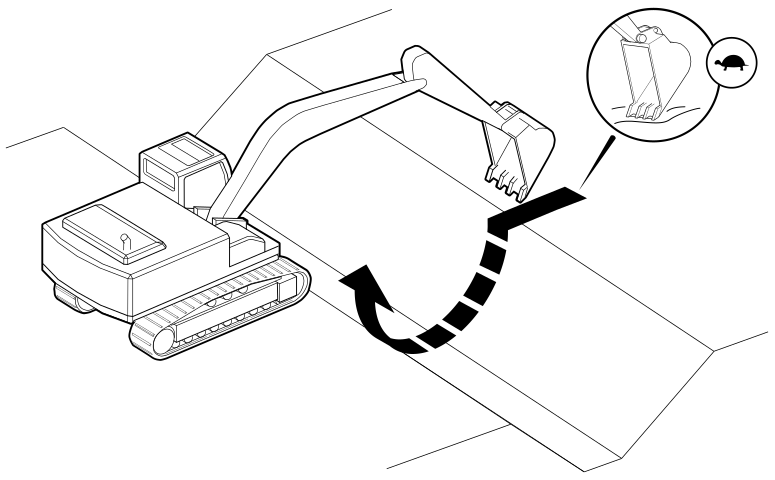
- Decrease the stick velocity when you reach and pass through the apex of the stick (when the boom changes from rising to lowering) or at transitions of slopes.
-
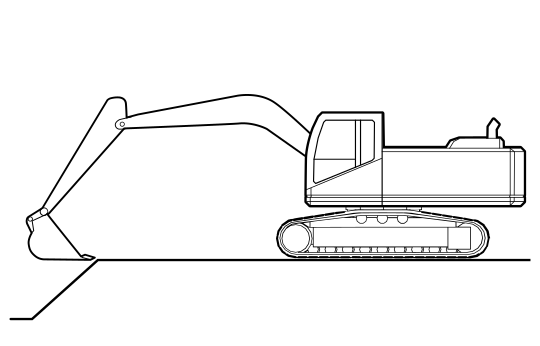
If you use the attachment in a flat position when the cutting edge transitions from a sloping to flat design, Depth Autos is often not quick enough to raise the boom and dump the attachment, while also keeping the attachment locked to the design plane. As a result the attachment can unsnap from the design, as shown below.
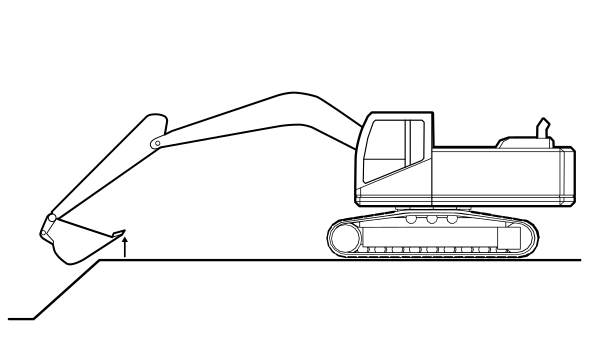
To avoid this, either grade through the transition with the attachment in the raking position or pass through the transition with a flat attachment and then re‑position the attachment to grade the flat section, as shown below.
-
To achieve the best results, leave the surface a little high before you make the final pass. The attachment is more stable while it is resting on material versus in the air.
-
Have the attachment flat against the design surface for the final pass.
Making a pass in loose material while the attachment is in the rake position will allow material to fall between the teeth. This results in the surface being a little high. For best accuracy, make the final pass with the attachment flat against the design surface.
-
To avoid under or over‑cutting at the start of a flat attachment pass, allow the attachment to snap to design slope before increasing stick velocity.
-
It is best to manually reach design grade with the attachment and then engage Depth Autos while you slowly pull in the stick. The boom transition into Autos is smoother while the stick is in motion versus no motion.
Avoid engaging Depth Autos while there is no stick motion and the stick is fully extended with the attachment in the rake position. If you do need to start a pass in this position, move the stick slowly to prevent cutting below the target surface.
-
When making a pass that will result in full stick cylinder extension, release the depth auto switch just prior to reaching full cylinder extent. This will allow smoother operation and avoid unwanted boom reaction when stalling the stick in Depth Autos.
-
The attachment attack angle that will provide optimal grading performance in most applications is to align the cutting edge with the design surface.
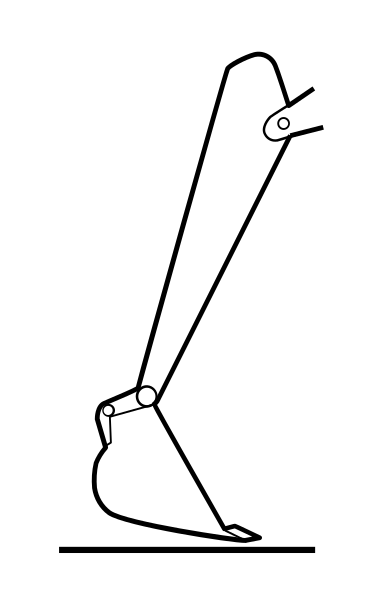
If the attachment attack angle is not aggressive enough, it will ride on the bottom of the attachment and will not allow the cutting edge to reach design. This will result in a system that will continually cut high and not get down to grade.
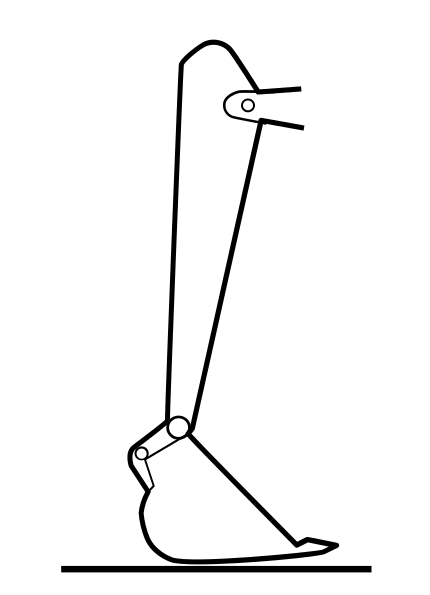
If the attachment attack angle is too aggressive, it will cut into the design when it encounters a load.
TIP – You may need to use this aggressive angle when you work with very hard material.
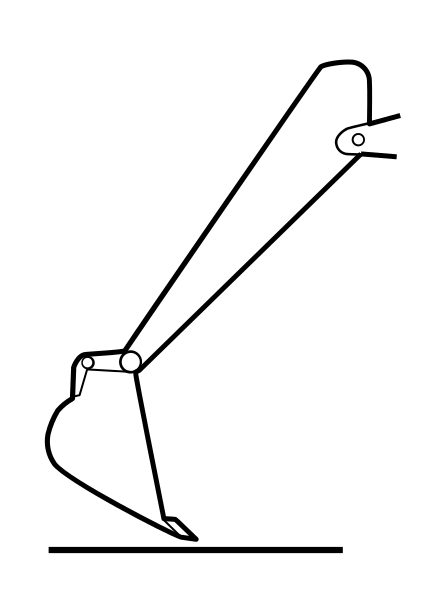
-
In the Autos Optimization screen you can also move the Attachment Attack Angle slider to change the angle of the bottom of the attachment to the design surface.
Zero is parallel, a negative value will lower the back of the attachment and a positive value will raise the back of the attachment
