Autos Setup
When you engage Autos the system automatically controls lift movement of the bowl.
TIP – For information on how to get the most out of Autos, see Best Practices when Using Autos.
TIP – For optimum performance when using Autos features, avoid connecting the Operator App device to the system via Wi-Fi. Ensure that you use a wired connection.
NOTE – If you use a John Deere R/RX series tractor (or potentially other series) with Direct Connect (DC) Autos, manual lift or lower commands from the SCV lever will disengage Autos. To re-engage Autos, move the same SCV lever to the lower detent position and release.
Autos status indicators
The Autos status indicators at the bottom corners of the work screen show you what state Autos are currently in. The Bowl Lift status indicators are on the left–hand corner of the screen.
| Lift status indicator | Status |
|---|---|

|
Manual Autos is not engaged. |

|
Autos engaged Autos is engaged and activated with the bowl inside the control range. In this state the system controls movement of the bowl. |
|
|
Autos not ready Autos is engaged but cannot be activated so Autos is temporarily suspended. Possible reason: GNSS precision is outside tolerance, or the bowl is off design. |

Engaging Autos
WARNING – The bowl may move without warning when Autos is engaged. These sudden movements could cause injury to anyone near the bowl, or damage to an unattended machine. Always put the system in Manual, lock out the hydraulics and engage the machine's park brake before you leave the machine, or when somebody is working near the bowl.
To use Autos:
-
Load a design or have a benched surface to guide to.
- Make sure the machine’s hydraulic oil is at its normal operating temperature.
- Turn the throttle up to maximum revs. If equipped, turn off Eco‑mode.
-
Position the bowl within the control range.
TIP – Use the lightbars, cut/fills and buzzer to guide the bowl.
-
Open the Autos Setup screen by either:
-
Pressing the auto switch
-
Opening the Work Settings menu
 and tapping Autos Setup.
-
-
Toggle Arm Autos on and tap Apply. The work screen opens with a notification message. Press the auto switch for one second to confirm arming Autos and release.
NOTE – Each press of the auto switch will cycle between Auto and Manual.
Remote switch
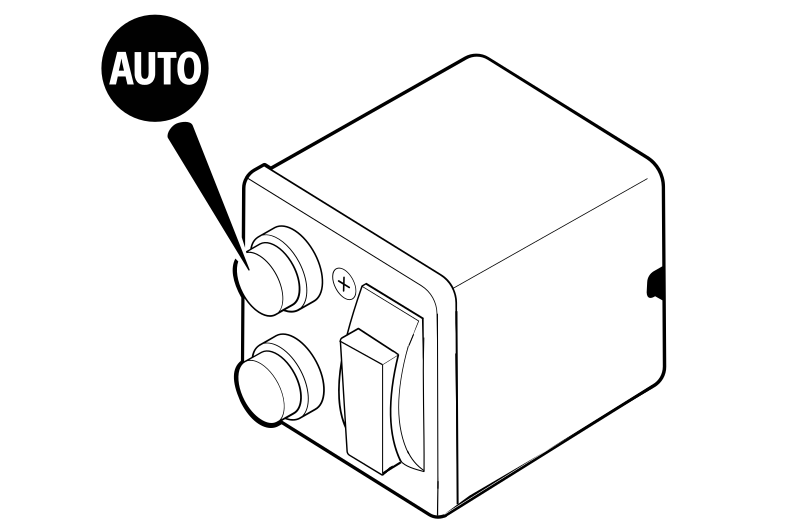
To switch Autos off and return to Manual, press the auto switch or you can temporarily over‑ride Autos by moving the joystick while you are in the Autos control window. Be aware that while Autos is disengaged you can cut beneath the design. Sometimes you may purposefully want to cut below design, however if this is not the case make sure that you monitor your cut/fills and lightbars.
To re‑engage Autos, press the auto switch again or if you temporarily over–rode Autos then return your joystick to the neutral position.
Using Autos
The system controls the blade when both blade tips are within the auto controls range limit (default to 0.45 m or 1.47 feet). Press the auto switch as the cutting edge approaches the design elevation to engage Autos.
Select and Apply a Preset
You can select and apply the active preset via the Autos Setup or Autos Optimization screen. You can access these screens via the Work Settings menu. There is always at least one preset stored which is the Default preset set by your technician in the Web Interface. This cannot be edited or deleted.
Select the active preset that you require and tap Apply.
You can create, edit or delete a preset via the Autos Optimization screen. For more information, see Autos Optimization.
Troubleshooting
The table below lists some of the error messages that may appear when you use Autos. You may need to enlist the help of your technician to resolve the error states.
| Error Message | Possible cause(s) |
|---|---|
| Unable to Enter Autos. No Valve Calibration Available. | Suspect that the valve calibration has not been completed in the Web Interface. |
| Auto State Not Visible. | Suspect that other menus or apps are obscuring the Autos icon. |
