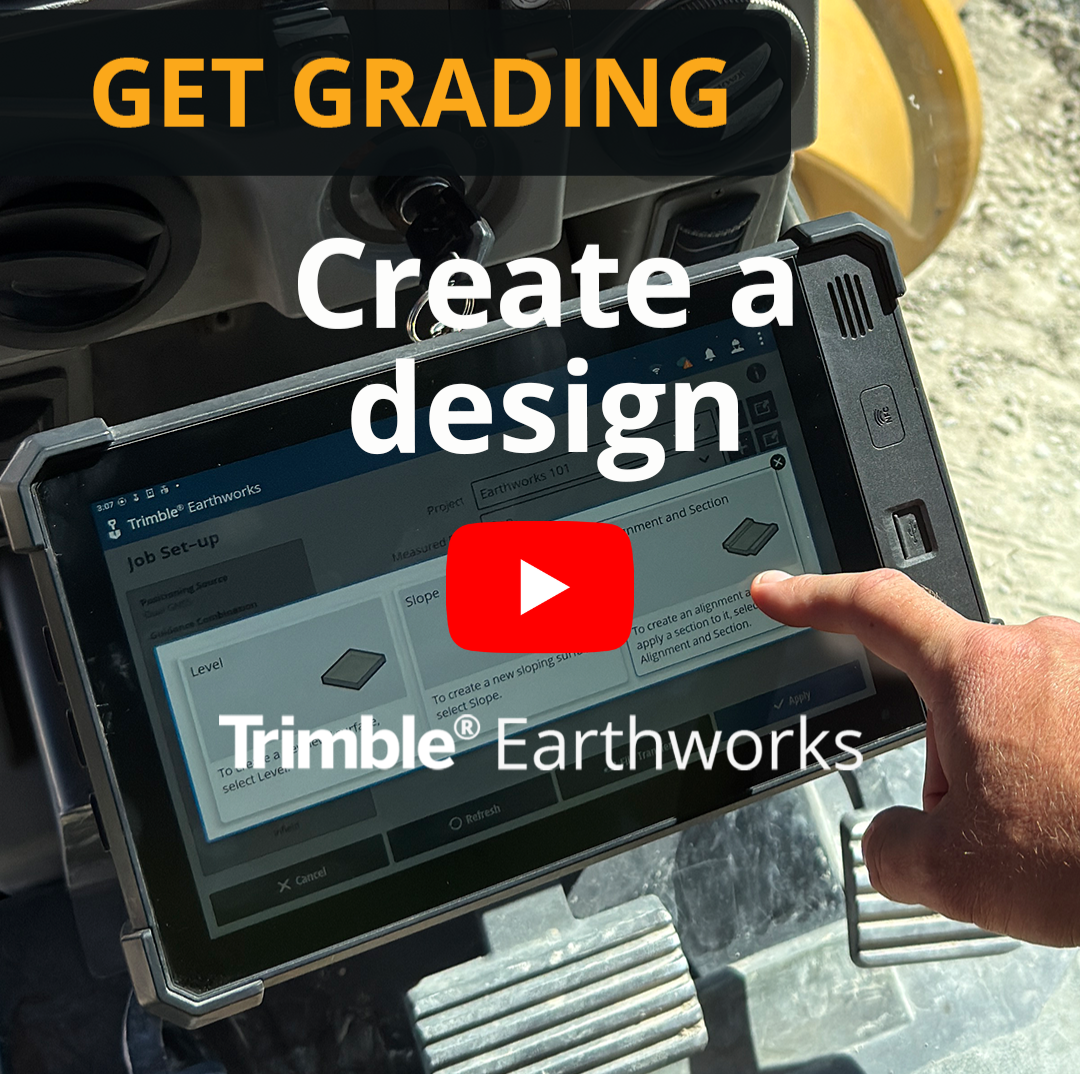
Create a design
If you need to finish a road but you don't have a design, you can create your own one using the Infield Designs feature in Trimble Earthworks. And you can save the design you create in case you need to use it again.
Watch the video
Watch an expert operator create a design for a road.
Step by step
-
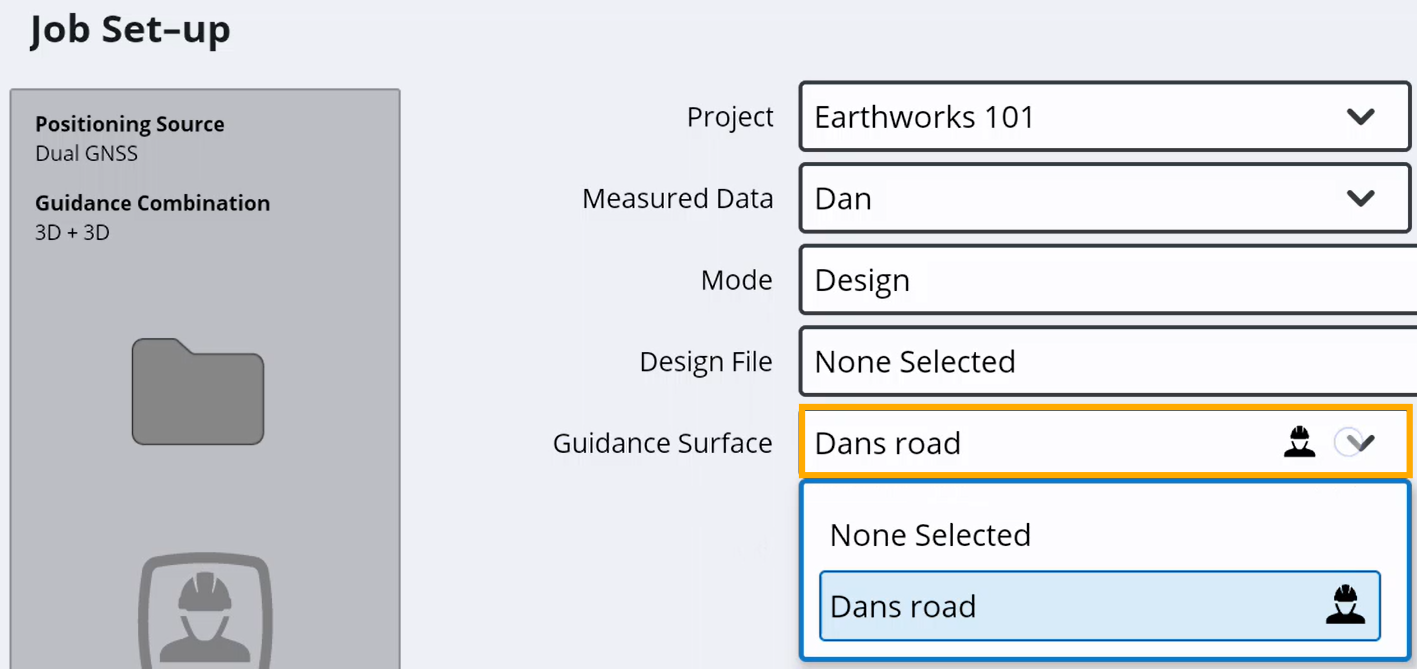
Tap and hold the Job Setup tile.
-
Tap the add
 icon beside the Guidance surface field.
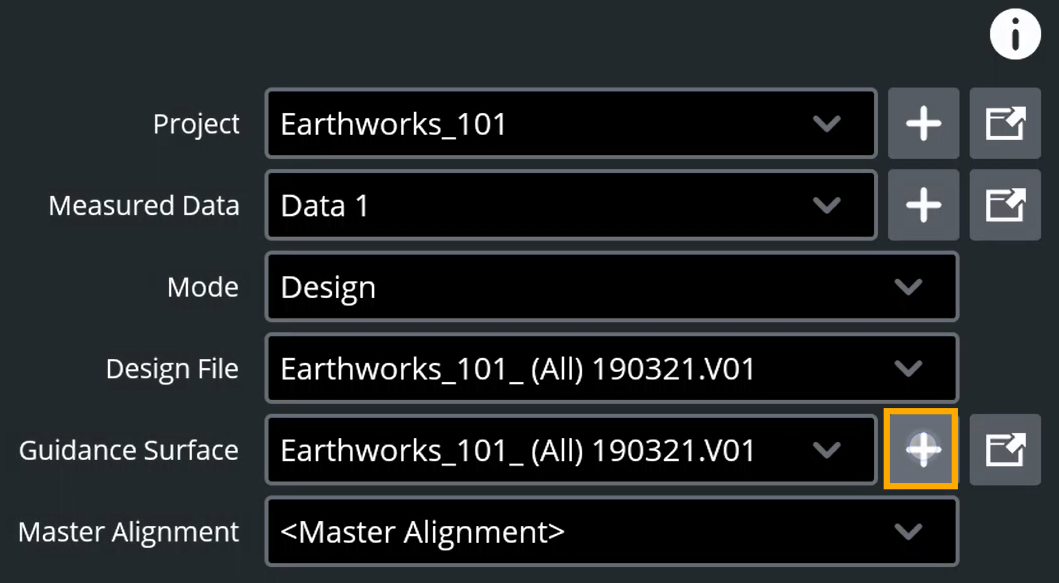
-
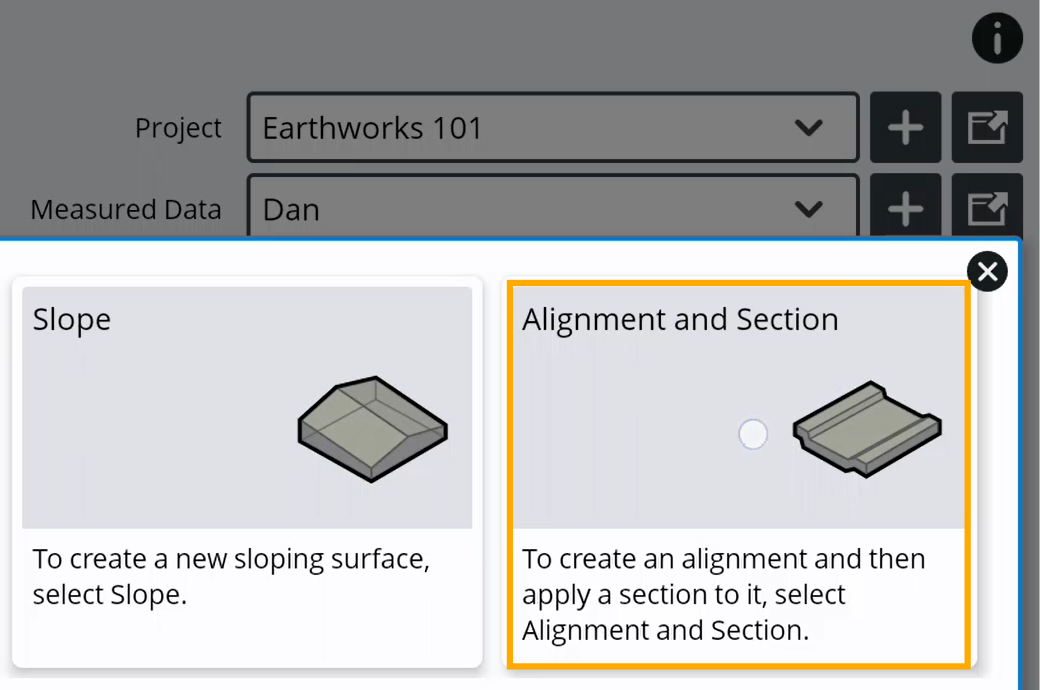
Tap the Alignment and Section tile.
-
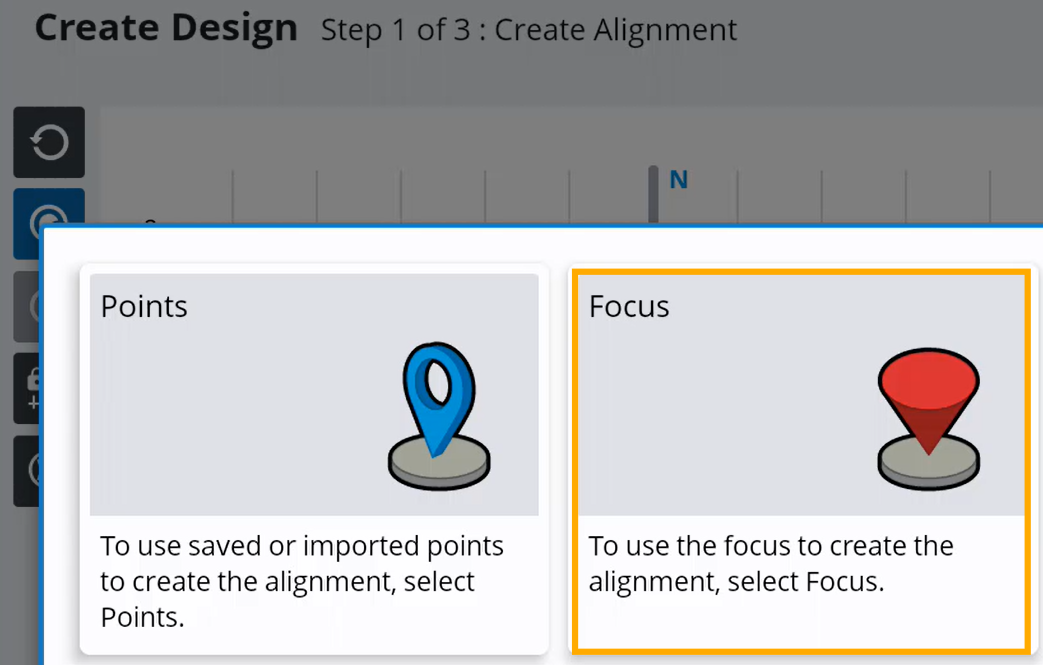
Tap the Focus tile.
-
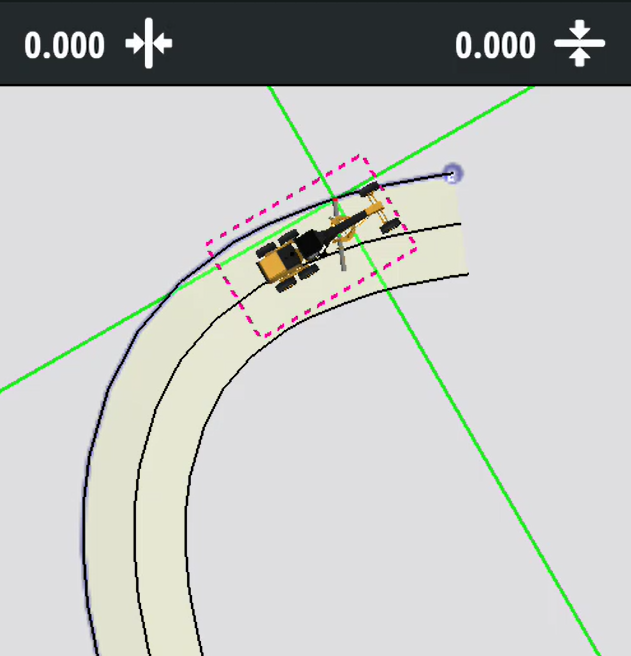
Create your alignment:
-
Tap the focus
 icon to specify which side of your blade you want to take the point on.
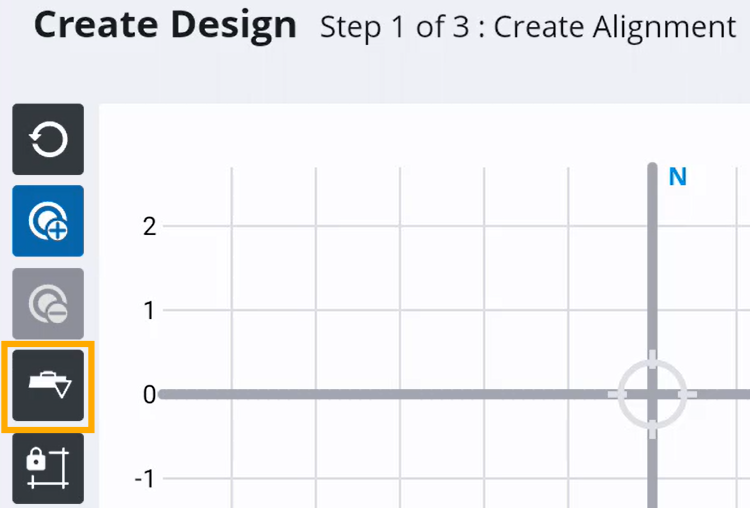
-
Tap the Add point
_20x20.png) icon.
icon.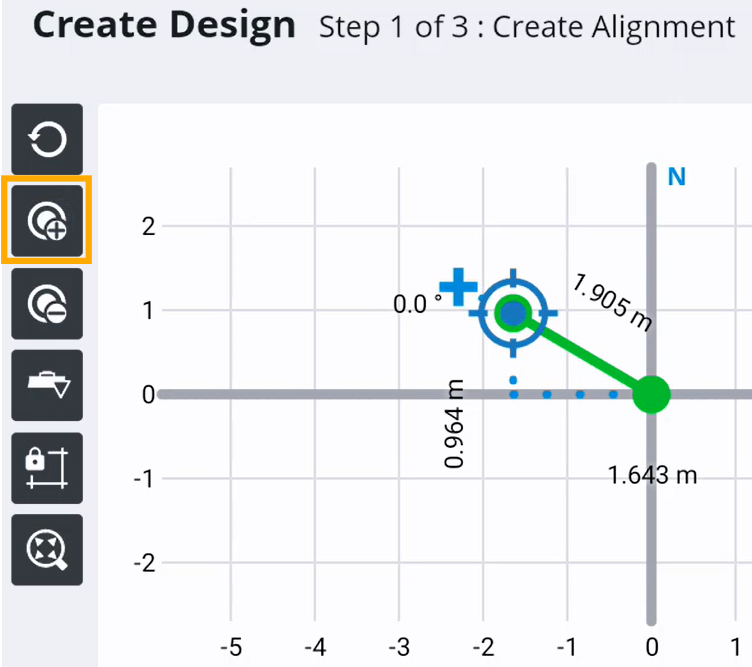
-
Drive your machine to where you want to take the first point for your design.
-
Gently set your blade tip above the ground so it skims the surface.
-
Drive your machine to where you want to take the next point.
-
Tap the Add point
icon.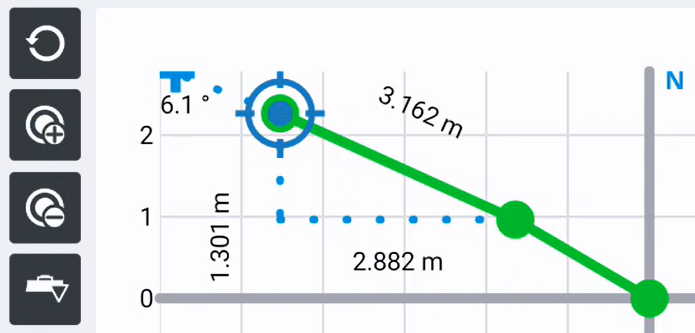
TIP – If you're building a straight road you just need a point on each end of the road.
If you're building a curved road, drive the machine in an arc with the blade tip just above the ground and take a point every few seconds.
-
When you get to where you want your road to finish and you've taken your last point, tap Next.
-
-
Create your section:
-
Tap the On Screen tile.

-
Draw the shape of the first lane for your road on the screen.
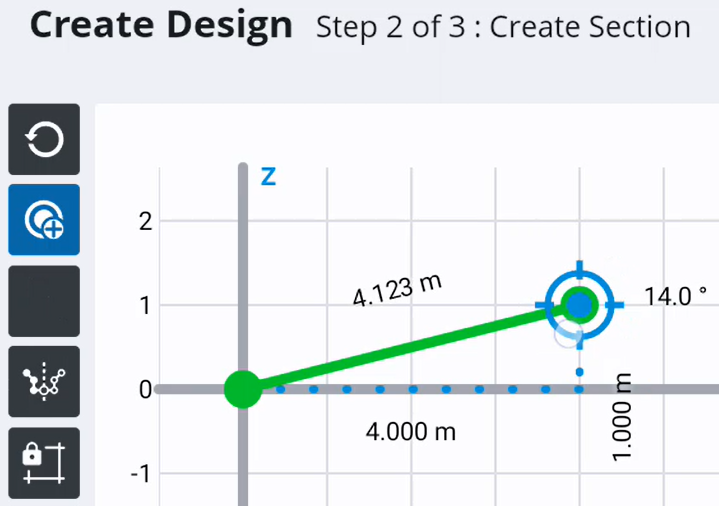
EXAMPLE – You might want your road to be 4 meters wide.
-
To mirror what you've drawn for the other lane of your road, tap the mirror
 icon > Tap Mirror from End.
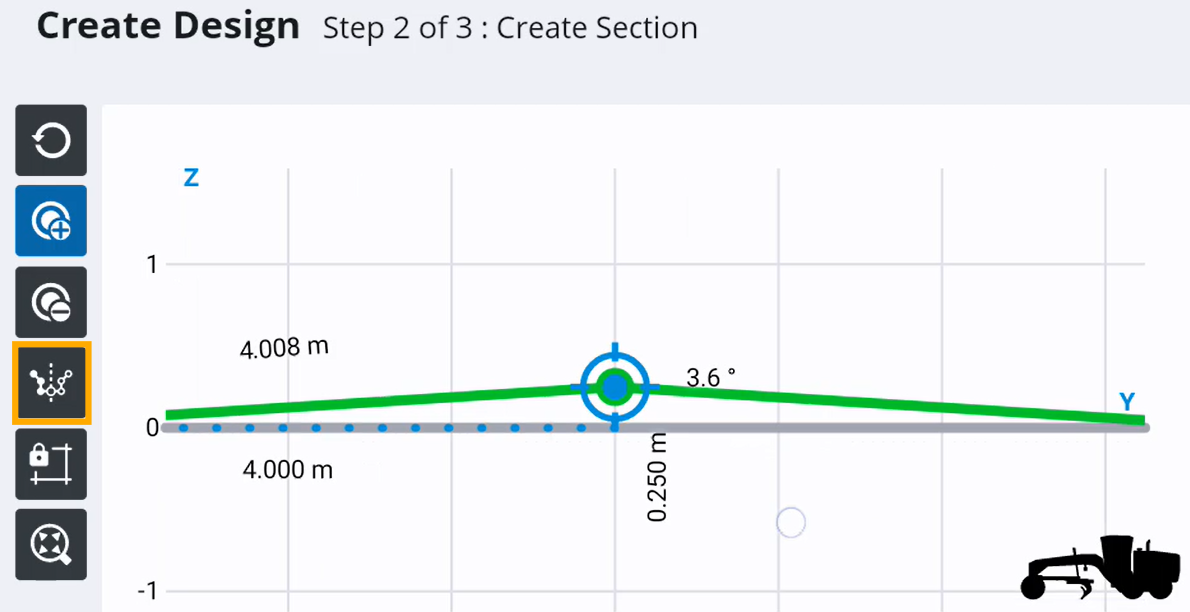
-
When you're happy with the design you've created, tap Next.
-
Enter a name for your design.
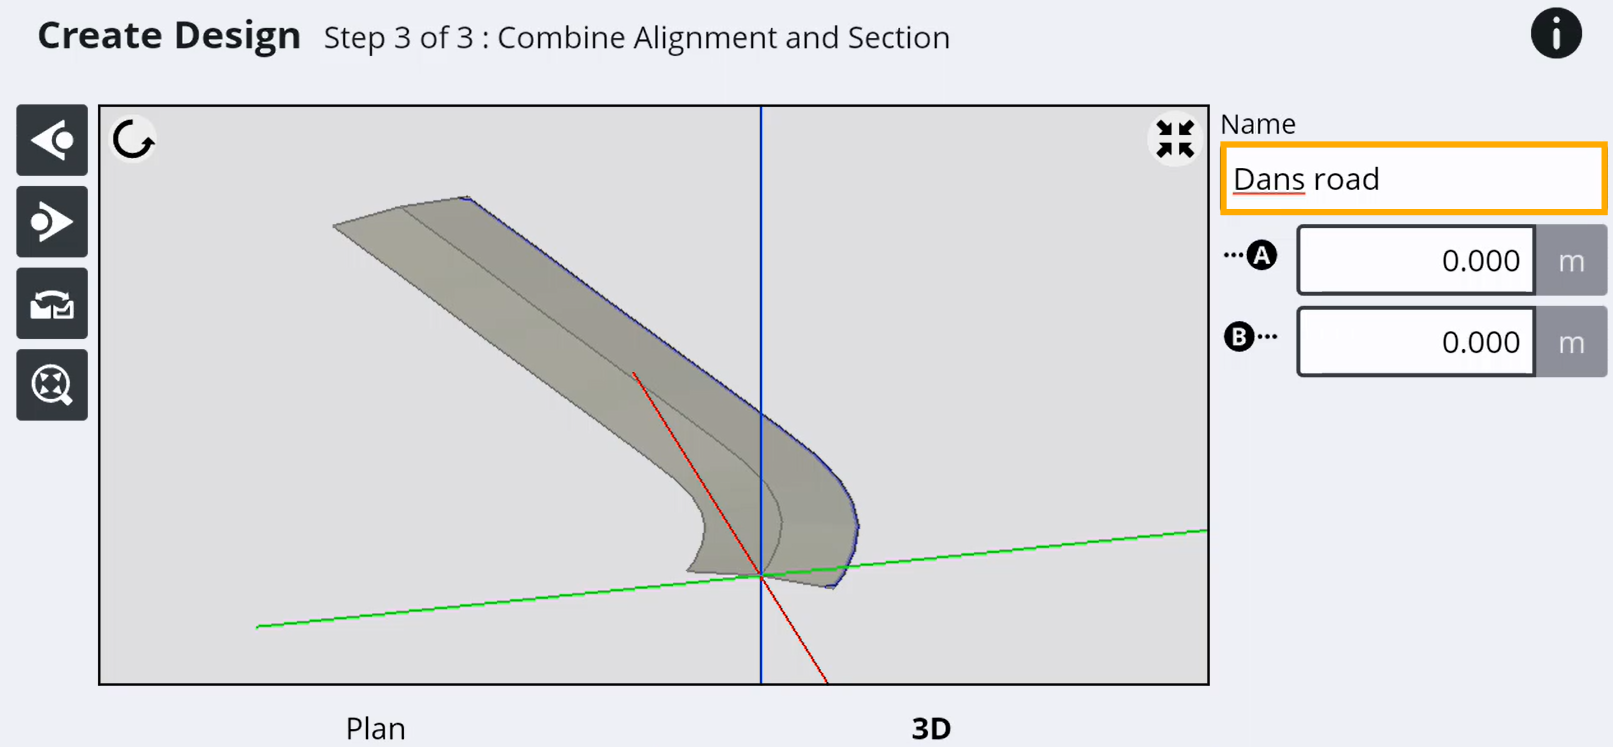
TIP – This is useful if you want to reuse it.
-
Tap Apply.
NOTE – Your design will be available from the Guidance Surface field on the Job Setup screen.
-
- Start building your road!
