Common ways to set up a base station
You can set up a base station in different ways depending on the application, coverage area, degree of permanence versus mobility, and available infrastructure. Before you set up a base station, please see Base station operation guidelines.
Setting up a base station for permanent or semi-permanent installation
For construction applications, where machine and site positioning operations using GNSS will be carried out over a long time (weeks, months, or years), ensure that you carefully choose the base station location.
A semi-permanent or permanent base station helps to eliminate the types of error that can result from repeated daily setups, and ensures that you always use the GNSS antenna at the exact original location. The requirement for a permanent base station setup increases as more receivers that use the base station as a source of corrections, increases the cost of any base station downtime.
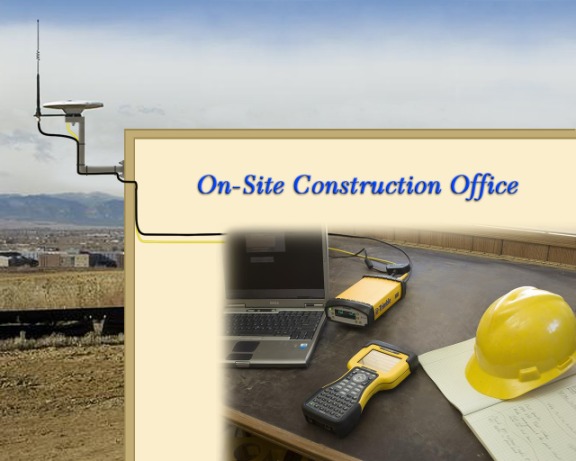
On the largest jobsites, and on those that remain operational for the longest time, a permanent or semi-permanent installation is a popular solution. A receiver is typically used as the base station, located in a site office or trailer where it is easy to access (to check or configure), and where it is secure from theft and the weather. The GNSS and radio antennas are normally mounted on a permanent structure on the roof of the building, where they are high and clear from obstructions and where the radio antenna can provide the maximum range of operation.
Trimble recommends that you use the Trimble Zephyr 3 Base antenna. This antenna has a large ground plane that reduces multipath, providing the best GNSS performance at the base location. The antennas are connected to the receiver by high quality RF cables.
The receiver is connected to a permanent power supply (mains or generator power). The internal battery of the receiver is always being charged, and acts as an uninterruptible power supply if there is a power failure. In some cases, the receiver may also be connected by an Ethernet cable to the Internet (either through the radio or a router), so that it can be monitored and configured from a remote location, and can warn an administrator by email or text message if there is a change to the configuration or status. In these situations, the receiver can transmit corrections to a remote radio or receiver over the Internet, for rebroadcast requirements, without using repeaters.
The following figure shows a receiver permanent installation:
Setting up a base station for daily site use: T-Bar
For construction applications where a daily setup and takedown of equipment is required for security reasons, Trimble recommends that you use a T-Bar setup.
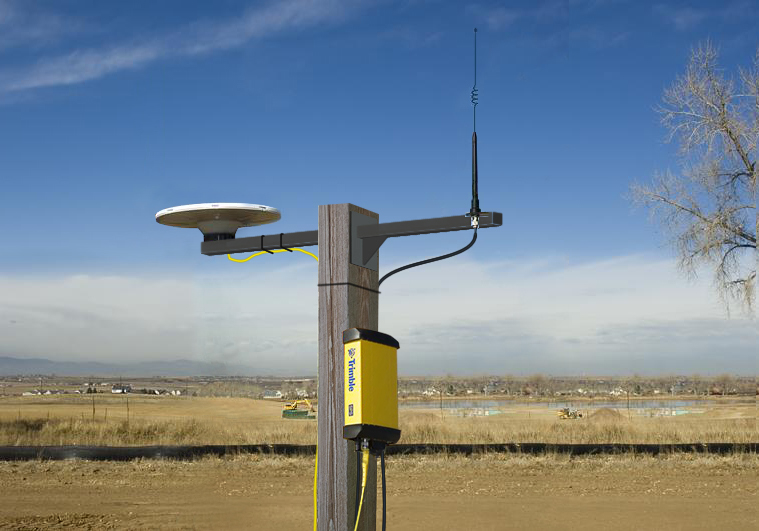
The T-Bar consists of a post mounted in concrete (so it cannot move), which has a solid metal T-Bar mounted to it to provide lateral and vertical separation between the GNSS antenna and radio antenna. The T piece of the T-Bar has a vertical rod at each end. Each end terminates in a 5/8"×11 thread to which the antennas can be mounted. Trimble recommends that one end is clearly marked GNSS and the other end is clearly marked Radio so that at each daily setup, the GNSS and radio antennas are mounted at the same location. Switching antennas by mistake introduces a position error in all resulting measurements. You can buy the parts you need to make a T-Bar from any reputable hardware store. Make certain that the T-Bar cannot rotate after construction. Rotation of the T-Bar can introduce a position error into all subsequent measurements.
On the upright post, mount either a bracket (to which the GNSS receiver can be mounted), or a well-ventilated lockbox (in which the GNSS receiver itself can be secured).
Each day, mount the GNSS antenna on the GNSS end of the T-Bar and the radio antenna on the radio end of the T-Bar. Connect the antennas to the receiver using the appropriate cables. The receiver uses its own integrated battery, or an external 12 V battery through the 12 V crocodile clips cable that are provided with the receiver. If you choose to use AC power, remember that the heat generated by the charging process and the radio transmitter increases the need for good ventilation around the receiver.
Advantages
Use of a T-Bar setup ensures that the base station is set up with exactly the same position and height every day. This helps eliminate the errors typically associated with daily tripod setup. For example, wrong antenna height, base not set up over the point, base set up in the wrong location.
The following figure shows a system set up on a T-bar showing an external radio antenna to gain longer range. GPS antenna is on the left, radio antenna on the right:
Setting up a mobile base station: Tripod and fixed height tripod
If you are repeatedly moving between jobsites, or if you are visiting a jobsite for the first time before a T-Bar or similar setup can be established, Trimble recommends that you use either a tripod and tribrach setup, or a fixed height tripod.
The fixed height tripod is quicker and easier to set up over a control point. The fixed height tripod also allows you to re-establish the antenna height exactly so that the receiver can be set up faster without using the Siteworks
Take great care to ensure that the GNSS antenna is set up accurately over the control point, and that the GNSS antenna height is measured accurately, in the right way (vertical or slope height) to the right location on the antenna (base of antenna or to a specified location on the antenna) or height extension pole with measurement lever. When you start the rover receiver, it is extremely important to check in, at one or more known locations, to check for possible position or height errors. Checking in at a known location is good practice and can avoid costly errors caused by a bad setup.
Typically, the tripod and fixed height tripod methods do not give significant height clearance above the ground, and can reduce the range of operation caused by radio limitations.
Tripod and tribrach setup
In the tripod setup, the tripod is located over the control point, and the tribrach and tribrach adapter is mounted on the tripod and centered over the point.
-
Mount the GNSS antenna on the tribrach adapter.
-
Clip the receiver to the tripod.
-
Connect the GNSS antenna to the receiver using the appropriate cable.
-
If required, connect the GNSS receiver to an external 12 V power supply. Use the crocodile clip cable or the Trimble custom power pack.
The following figures show a tripod and tribrach setup:
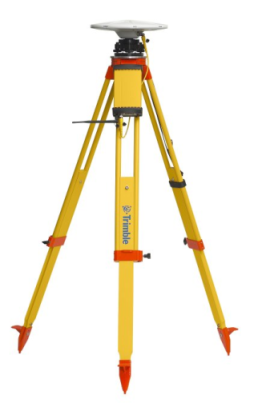
Receiver with a low-grain "rubber duck" antenna
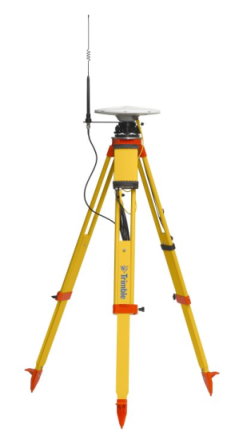
Receiver with an external high-gain antenna
Fixed height tripod setup
A fixed height tripod setup is similar to a tripod setup, but is simplified by the central leg of the tripod, which is placed directly on the control point. If the central leg is leveled accurately, the fixed height tripod is quick and easy to set up, and provides an accurate way to measure the true antenna height.
-
Set up the tripod over the control point.
-
Attach the GNSS antenna to the head of the tripod.
-
If using an external high-gain radio antenna, mount the radio antenna to the radio antenna bracket that is attached to the head of the tripod (beneath the GNSS antenna). See the figure below.
-
Hook the receiver to the center leg of the tripod, using the tripod clip.
The following figures show a fixed height tripod setup:
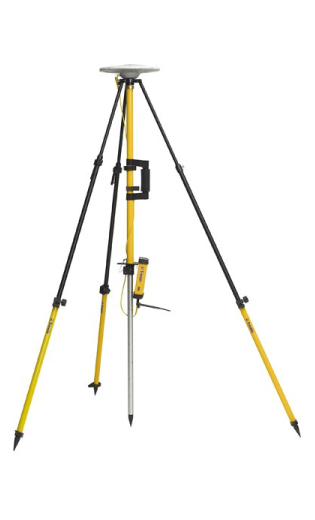
Receiver with a low-grain "rubber duck" antenna
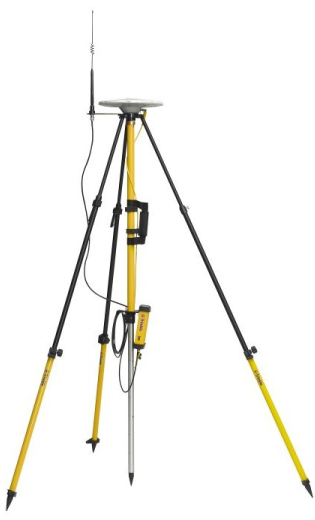
Receiver with an external high-gain antenna
Using an external radio with the receiver
An external radio can be used with the receiver. Using a high-powered UHF radio will increase the radio coverage area.
