Wi-Fi settings for the R780 / R780-2
The R780 / R780-2 receiver contains Wi-Fi. Please take the time to understand its powerful capabilities.
Before you use a receiver, ensure that the dealer has activated it. The receiver shipped from Trimble has Wi-Fi enabled. Your Trimble dealer must load the activation code before these services are available.
The receiver can be used as a Wi-Fi Access Point or a Wi-Fi Client.
Access Point mode
You use this mode when the receiver is set up as a base station. Access Point mode enables other Wi-Fi devices to communicate with the receiver without needing another Wi-Fi device. Up to five devices can simultaneously connect to the receiver. Devices connected to the receiver in Access Point mode can communicate with each other, not just the receiver. After you have connected to the receiver, you can use the web interface to review and change the settings of the receiver. This mode is useful if you are in the field, but do not have a Trimble tablet or field software.
In this mode, you can scan for the receiver from a laptop, smartphone, or other Wi-Fi enabled device, to locate the receiver Access Point:
-
Turn on the receiver in Access point mode. The Wi-Fi LED will flash.
By default, the receiver is in Access point mode. If you are not sure if it is in Access point mode, you can reset it to the factory defaults by pressing the Power button for 15 seconds.
-
From a Wi-Fi enabled device such as a laptop, connect to the receiver.
On a computer running the Windows operating system, click the Network icon in the status bar
 . The receiver will be called something like "Trimble GNSS 2201". Select it and then click Connect.
For information on how to change the wireless identification of the receiver, see SSID identification.
-
Enter the password (encryption key).
For receivers activated after 1 August 2025 or receivers upgraded to v6.43
abcdeabcde. When configuring the receiver for the first time, you should change the Wi-Fi access point password from the default password to a more secure password. -
Open a web browser on your Wi-Fi enabled device and then type
GNSSinto the address bar.The receiver web interface appears. With some devices, you may need to enter either
https://GNSSor192.168.142.1to access the web interface.On Android PDAs, Trimble recommends that you install the free Opera Mobile browser for this feature to work.
-
Log into the web interface. Select Security / Login. The default username is admin. The default password is password.
Client mode
You use this mode when the receiver is set up as a rover. In this mode, the receiver is connected to an Access Point. You can view the web interface of the receiver when your device is connected to the rover by Wi-Fi as the R780 / R780-2 is a concurrent client and Access Point. An Access Point on a site could be another R780 / R780-2 receiver or a Cisco router.
NOTE – The receiver with internal radio has an internal Wi-Fi antenna. It is in the white radome on the side of the receiver, however the antenna gain is equal in all directions so the base station radome does not need to point to the work area, and the rover radome does not need to point to the base station. In the receiver with no internal radio, then the Wi-Fi antenna is routed to the TNC connector, so when using Wi-Fi in this receiver, it is essential to use the supplied black whip antenna.
Setting up an R780 / R780-2 receiver as a Wi-Fi base station using the web interface
-
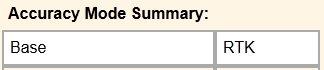
Ensure the receiver has the Accuracy mode set to Base (Precise Base mode) (select Receiver Status / Receiver Options):
-
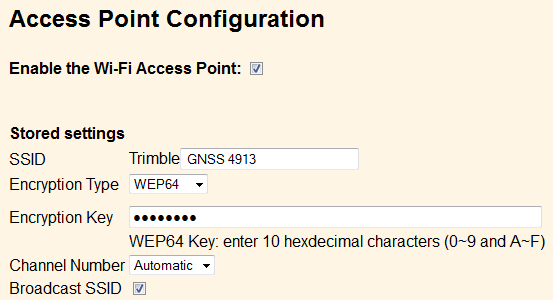
Set the receiver as the Access Point. To do this, select Wi-Fi / Access point with the following configuration:
-
Select I/O Configuration / Port Configuration.
-
Create a UDP stream out the GNSS corrections:
-
Select Type UDP from the drop-down menu and add a port number such as 2101.
-
Select CMR in the window beside the Type.
-
Select Client, Output only, UDP Mode, UDP Broadcast Transmit.
-
Select CMR+ or CMRx for the corrections.

-
-
Click OK. The following port information is displayed in the I/O Configuration page:

-
This UDP setup enables the Wi-Fi rover to receive corrections broadcast from the Wi-Fi base without the base having to specify the base IP address in each rover.
-
Turn off the receiver and then turn it on again.
Setting up an R780 / R780-2 receiver as a Wi-Fi rover receiver using the web interface
-
Turn on the R780 / R780-2 receiver. Connect your Wi-Fi capable device to the R780 / R780-2 receiver.
For receivers activated after 1 August 2025 or receivers upgraded to v6.43
abcdeabcde. When configuring the receiver for the first time, you should change the Wi-Fi access point password from the default password to a more secure password. -
To access the web interface, enter the default IP address
192.168.142.1. -
You must have a Rover mode selected.
-
Set the R780 / R780-2 receiver to accept corrections from the base station:
-
Go to the I/O Configuration page and create a UDP port with the same number as created previously on the base station.
-
Select the UDP Mode check box.
-
Select the UDP mode / UDP Broadcast Receive check box.
-
In the Client field, enter port 2101 for this example.

-
-
Set the receiver to Client mode. Select Wi-Fi / Client. The Client Configuration page appears.
-
Select the Enable the Wi-Fi Client check box.
-
Click Scan for Networks and select the Base station and enter the Access Point password and click Connect.

The receiver should now be capable of receiving corrections.
-
This step is essential to stop IP conflict.
-
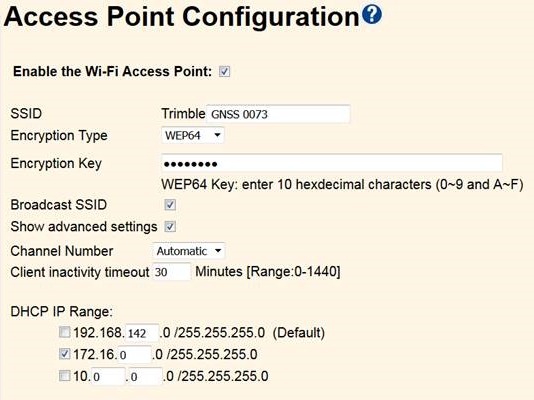
Change the default IP address for this receiver's access point from 192.168.142.1 to 172.16.0.1.
-
Select the Access Point Configuration page and select the Show advanced settings check box.
-
Select the DHCP IP Range 172.16.0.0 check box.
-
Click Save.
-
-
Save the configuration. Select Receiver Configuration / Application File. Select the Store Current File option.
-
Turn off the receiver and then turn it on again.
-
To access the web interface of the R780 / R780-2 receiver, connect your Wi-Fi capable device to the R780 / R780-2 receiver and in a web browser, enter the IP address
172.16.0.1.
