Navigate a long Mobile Mapping Run
To navigate along a mobile mapping run:
- To view the panorama captured at each mobile mapping station, do any of the following:
- Use the video controls located along the bottom of the tab to run the video clip in auto mode forward from the current station, or jump to the first or last station in the run
- Press the Ctrl key and scroll the mouse wheel to move to the next or previous station in the run.
- Use the Station drop-down list located at the bottom of the tab to select the station in the run to which you want to jump.
- In the Plan View, right-click a station position and choose a Point to jump to the station corresponding to that point (only for MX7).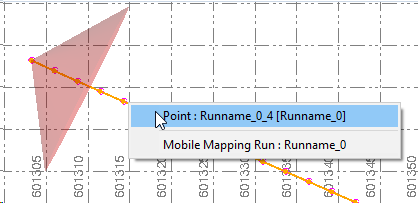
- To change the field of view from each station in the run, click in the Run View tab and scroll the mouse-wheel up or down.
The photo image changes accordingly (appearing to zoom in or zoom out) and the field-of-view indicator in the Plan View resizes as necessary.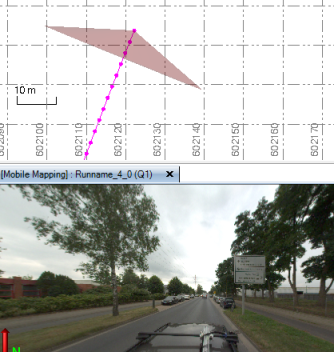
- To change the direction of the view sideways and/or up and down (that is, seamlessly view different images in the station's six-image cubicle panorama), click in the Run View tab and then press the mouse wheel and move the mouse in any direction.
Again, the change is immediately reflected in the Plan View and Run View.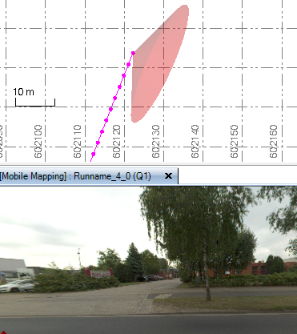
- To center the Plan View to the current station position, click the
 icon located in the lower-right corner of the Run View tab.
 - To center the Plan View to a specific station position, first use the Station drop-down list located at the bottom of the tab, select the station in the run to which you want to jump, and then click the
 icon.
icon. - To enable the automatic trajectory following in the Plan View, toggle the
 icon On, and then use the video controls located along the bottom of the tab to run the video clip in the auto mode from the current station, or jump to the first or last station in the run.
 - To disable the automatic trajectory following in the Plan View, toggle the
 icon Off.
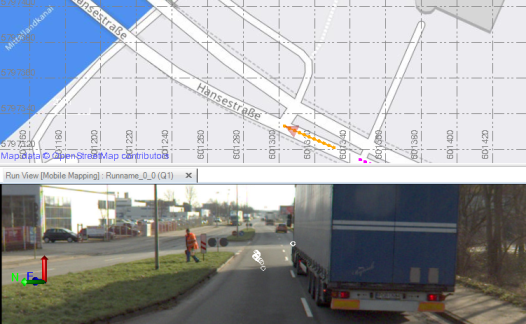
 - To display a 2D background map in the Plan View for a mobile mapping run, click the
 Toggle Background Map icon located in the lower-right corner of the Run View tab.
Note: To be able to display a 2D map in the background of the Plan View, you first must have an appropriate TBC license, i.e. a Survey GIS license and a Trimble Connect account. See the Subscription Plans page. For a license matrix by command, see the License page in the TBC Community. Also see View and manage licensed features. If you do not have a user profile for the Trimble Connect account set up in TBC, an "unable to connect" message displays stating that you must sign in or register a new Trimble Connect account. See Log In to External Services for instructions. Secondly, you need to define a coordinate system for the project, and have some data in your project (maybe just a point). Otherwise, the Toggle Background Map icon stays dimmed.