Display Mobile Mapping Run Views
The cameras of a Trimble mobile mapping system capture a set of panoramas (for the panoramic camera), and images (for the side and backward cameras) in sequence at each mobile mapping position (called Station) along a given run. These sets of panoramas (or images) can be displayed as a pure image data (video clip) or as a combination of image data and geometries (video clip, point cloud, etc.) in independent views (one per camera type) in TBC.
Note: You do not need to have a Mobile Mapping module license to display camera views.
To display the Panoramic View:
- In the Project Explorer, select a Run.
- Select Panoramic View in Mobile Mapping > View.
- Or select Panoramic View in the context menu.
- MX7: The Run View tab displays and shows the images (panorama) for the first mobile mapping station in the run. A graphical indicator shows the field-of-view and the direction of view of the panoramic camera. The Run View tab displays which camera data belongs to which camera and which run.
Notes:
- TBC will display a message prompting you to generate the cubical images if you have set the Automatically generate cache on import option to No.
- You must wait until the generation of cubical images is completed to be able to view the video clip of a related run on the Run View tab.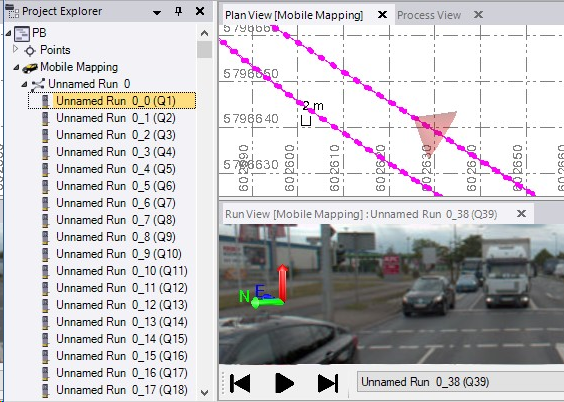
- MX9, MX50, MX60 and MX90: The Panorama View displays and shows:
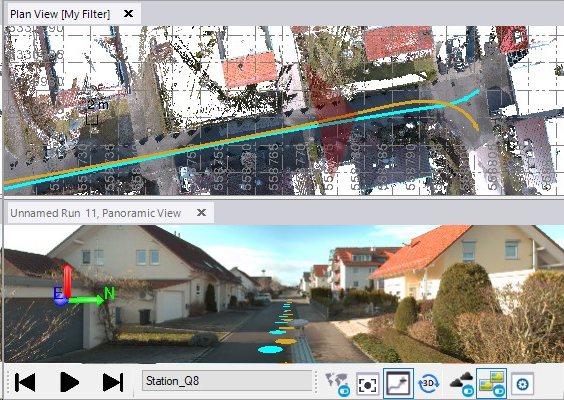
The images (panorama) for the first mobile mapping station in the run.
All 360° camera positions (called Camera Markers) of all runs. Camera Markers are colored according to the color of the run they belong to. Note that the Camera Markers are displayed in all opened graphic views.
A graphical indicator showing the field-of-view and the direction of view of the panoramic camera in the Plan View (or 3D View). The Panorama View tab displays which camera data belongs to which camera and which run.
Navigate along the selected run, by:
- Clicking on a specific camera position in a graphic view to move to that specific location in all views.
- Jumping to the next, previous, first or last camera position by choosing the related command from the pop-up menu.
- Customizing your keyboard keys to jump to a camera position with an increment (see Mobile Mapping Options).
- Choosing a specific camera and center it in the Plan View and 3D View.
Optionally, select the Sync. Camera With 3D Viewer option to synchronize the view in the 3D View to the view in the Panoramic View, and vice versa. When you rotate, move, or zoom in (or zoom out) in a view, the orientation, position, zoom level, field of view of the panoramic camera are synchronized in both views.
If a scan has been extracted from the raw data (see the Generate Scans feature) for the selected run, you can display or hide the scan in overlay over the displayed panoramas and/or images in each view by clicking Toggle Point Clouds.
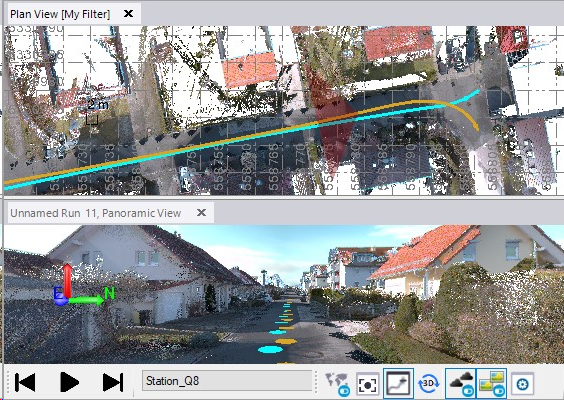
Note: If the selected run has been processed and registered previously, please update the extracted scans with the new computed trajectory to avoid a mismatch between scans and images when displaying camera views.
Optionally, click Toggle Referenced Images to hide (or display) the projected images in a specific view (here, it is in the Panoramic View) or in all views by unchecking (or checking) the related option(s) in the Filter Manager.
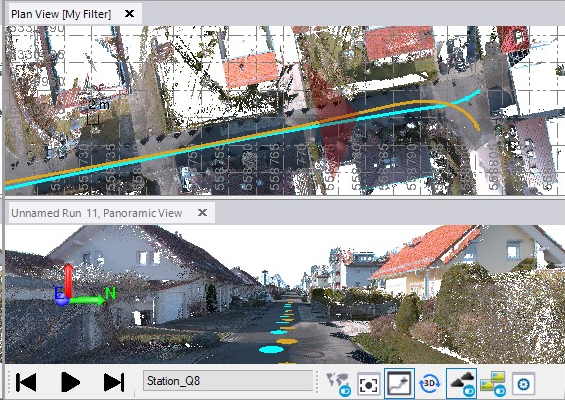
- MX7: The Run View tab displays and shows the images (panorama) for the first mobile mapping station in the run. A graphical indicator shows the field-of-view and the direction of view of the panoramic camera. The Run View tab displays which camera data belongs to which camera and which run.
To display the side views:
- In the Project Explorer, select a Run.
- Select Side Views in Mobile Mapping > View.
- Or select Side Views in the context menu.
The Front Left View and Front Right View tabs display and show the images captured by the left and right cameras for the first station in the run. Two graphical indicators show the field-of-views and the direction of views of the left and right cameras. Each view displays which camera data belongs to which camera and which run.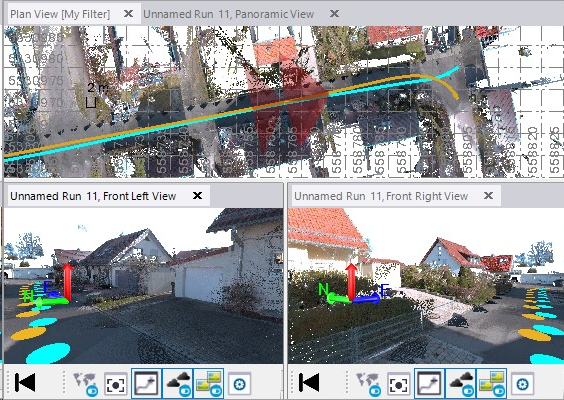
In each side view, you can rotate and zoom in (or out).Notes:
- The Front Left View and Front Right View tabs show the Camera Markers only if the Panoramic View is opened.
- The Side Views command is not available or grayed out when selecting a run coming from an MX7 or MX50/MX60.
To display the backward view:
- In the Project Explorer, select a Run.
- Select Backward Camera View in Mobile Mapping > View.
- Or select Backward View in the context menu.
The Backward View tab displays and shows the image captured by the backward camera for the first station in the run. A graphical indicator shows the field-of-view and the direction of view of the backward camera. The Backward View tab displays which camera data belongs to which camera and which run.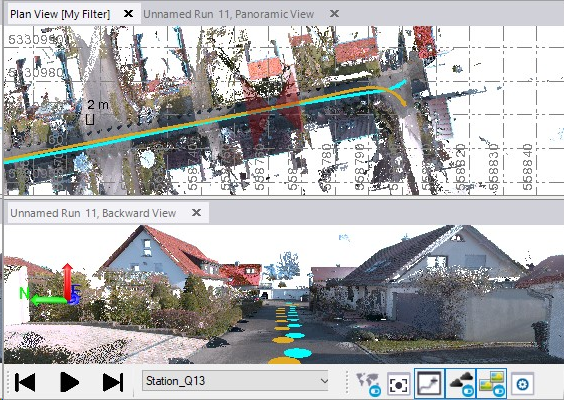
Notes:
- The Backward View tab shows the Camera Markers only if the Panoramic View is opened.
- The Backward View command is not available or grayed out when selecting a run coming from an MX7 or MX50.
Notes:
- The four cameras are all synchronized. Moving from one mobile mapping station to another mobile mapping station in one view will move in all views.
- Navigating through the images is faster. Images are displayed in low-resolution while navigating and in high-resolution when the navigation stops.
