Export Mobile Mapping Panoramic Images and Point Cloud to Solv3D
The Export to Solv3D feature lets you convert the data to be used in the Solv3D software, i.e. panoramic images, and laser point clouds.
To export panoramic images and point cloud to Solv3D:
- Select a run from the Project Explorer. The selected run must have their scans being processed first.
- Select Export in Home > Data Exchange to display the Export command pane.
- Click the Mobile Mapping tab.
A list of available exporters displays.
- Select Export to Solv3D in the list.
- Select a run (or a set of runs) from the Project Explorer (or from the Plan View).
By default, the name in the File Name field is the name of the VCE project. The default location is in the project folder.
- Optionally, in the File Name field, enter a different file name and/or file path.
- In the Export timestamps drop down list, select Yes (or No) to export (or not) the timestamp information for laser point clouds. Solv3D does not need the Timestamps information. Trimble recommends turning this option to No.
- Optionally, set the Fill image files with GPS attributes option to Yes to export the panoramic image files with the GPS attributes (latitude, longitude and altitude, and timestamp).
- Optionally, blur the images (see Blur Exported Images).
- Click Export to export the data.
The export generates a folder named according to the mission name and two sub-folders called Lasers and Panorama.
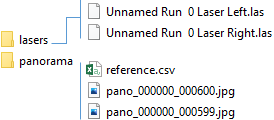
The LAS folder contains a couple of 1.4 LAS format files, one couple per run in case of a single scanner system and two when a double laser system is used (left and right).
The Panorama folder contains a set of panoramic image files. Each panoramic image is named Pano and has a size of 8192 x 4096 pixels for MX9, MX50 and MX60 Core and 12288 x 9144 pixels for MX90, MX60 Premium and Pro. Besides the panoramic image files, a panoramic image file for which contains Roll, Pitch and Yaw information and X, Y, Z as well.
