Divide an Area
Use the Divide Area command to divide the area in a linestring-based polygonal feature into subareas based on any of the following criteria:
- A specified number of equal-sized subareas
- One or more subareas of a specified size
- One or more subareas at a specified distance from a baseline (which defaults to the selected edge of the polygon, but can be customized)
Prerequisites:
- See the Subscription Plans page. For a license matrix by command, see the License page in the TBC Community. Also see View and manage licensed features.
- polygon
To divide an enclosed area:
- Select Divide Area in CAD > Edit to display the Divide Area command pane.
- Click in the Area to be divided field and then, in the Plan View, click the polygonal feature whose area you want to sub-divide.
Note the following:
- The polygon's vertices must all be 2D or all at the same height.
- The selected linework must be made up of closed linestrings. (Note that COGO linestrings, parcels, boundaries, rectangles, circles, and polylines are not supported.)
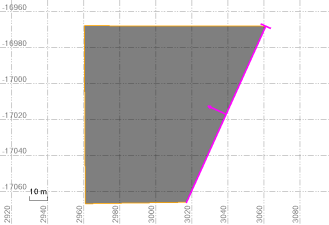
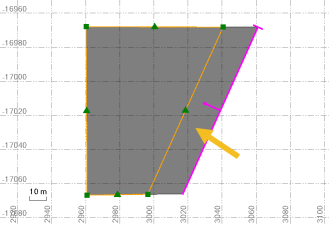
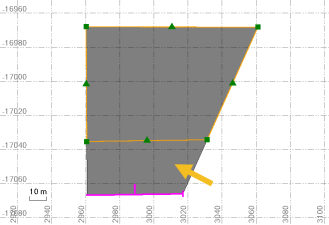
The side of the polygon you click determines the location and direction of the default baseline that will be used as a guide for dividing the area. In the following example, the right side of the polygon was selected so the the baseline aligns with it. The small arrow points inward toward the polygon area indicating the direction the division will take place. The origin of the baseline is indicated by a short perpendicular line (at the top of th baseline in this example).
- To move the baseline to a different location, do either of the following:
- Click in the Area to be divided field and click a different side on the polygon.
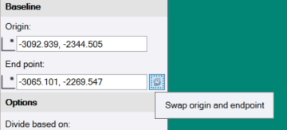
- Click the Origin and Endpoint fields as necessary and enter or select in the Plan View a new location.
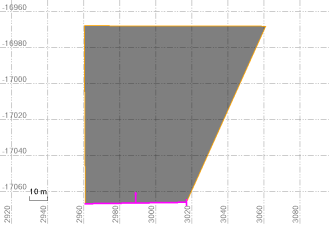
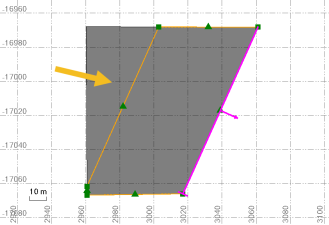
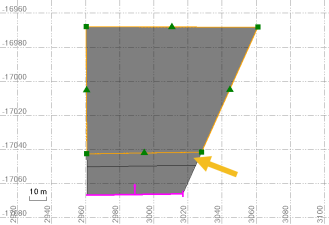
In the following example, the baseline was moved to align with the bottom side of the polygon using the snap-to-point feature. In this case, the division direction arrow is still pointing inward toward the area to be divided.
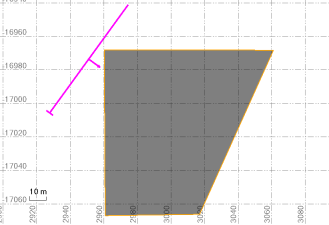
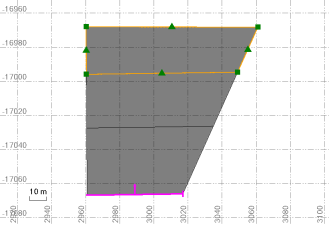
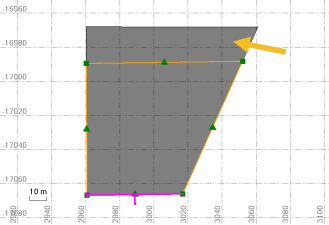
In the following example, the baseline was positioned off the polygon altogether. The division direction arrow is still pointing inward toward the area to be divided.
Note that depending on how you use the Origin and Endpoint fields to move the baseline, the division direction arrow may end up facing away from the area to be divided. This is because the division direction arrow always protrudes from the right side of the baseline.
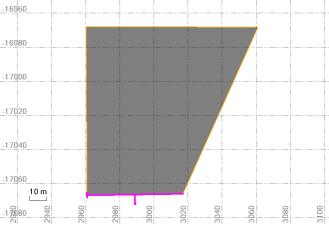
In this case, the divisions will take place in a different direction, possibly causing different results.
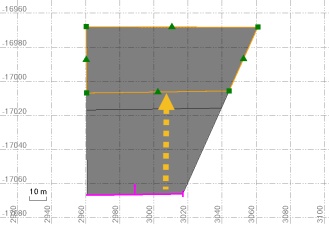
In the following example, the arrow faces in and a new subarea of a specific size was created using Mode of division > Target area option (see step 4 below).
In this next example, the baseline is reversed and the arrow points outward. Note that the new subarea was created on the opposite side of the selected area than when the arrow was facing inward.
To quickly reverse the Origin and Endpoint fields for the baseline to change the direction of the division direction arrow, click the Swap origin and endpoint button located to the right of the End point field.
- In the Mode of division drop -down list, select the criteria you want to use to divide the area in the selected 2D polygon feature.
- Number of subareas - Enter the number of subareas of equal size you want to create. Then click the Divide button.
In the following example, the area was divided into three equal sized subareas. (In this case, it does not matter the direction of the division direction arrow. The results are the same.)
- Target area - Enter the specific size of a single new subarea you want to create. Then click the Divide button.
The maximum area to be divided (based on the selected area for division) is displayed directly above the Target area field. As you create new subareas, the displayed value changes to reflect the remaining maximum area.
In the following example, the value entered was used to create a new subarea of the specified size adjacent to the baseline (as indicated by the orange arrow), resulting in a total of two subareas.
Repeat as necessary to create subsequent subareas of specified sizes based on the remaining size of the area to be divided.
In the following example, a second area size was entered (smaller than the first) to create a second new subarea, resulting in a total of three different areas.
Note that had the division direction arrow been pointed away from the area to be divided, the new subarea would have been created on the opposite side of the polygon.
- Distance from baseline - Enter the distance from the baseline at which the border for a new subarea will be created. Then click the Divide button.
The minimum/maximum allowed distance from the baseline (based on the selected area to divide) is displayed directly above the Distance from baseline field. As you create new subareas, the distance range is updated accordingly.
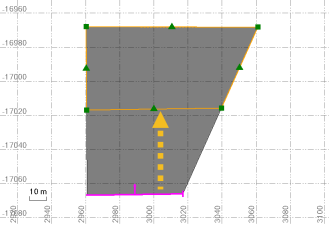
In the following example, a distance was entered that was approximately half the length of the polygon, creating the border for a new subarea at that distance, resulting in a total of two different areas.
Repeat as necessary to create subsequent subareas at farther distances from the edge of the polygon.
In the following example, a second distance was entered to create the border for a second new subarea, resulting in a total of three different areas.
Had the division direction arrow been pointed away from the area to be divided, you would have had to enter the distance using negative values to get the same results.
- Number of subareas - Enter the number of subareas of equal size you want to create. Then click the Divide button.
