GNSS receivers
To add a GNSS receiver to the project:
-
Click the Add Sensor menu item or click the Add Sensor button
 on the Sensor Listing page. The Create Sensor page appears:
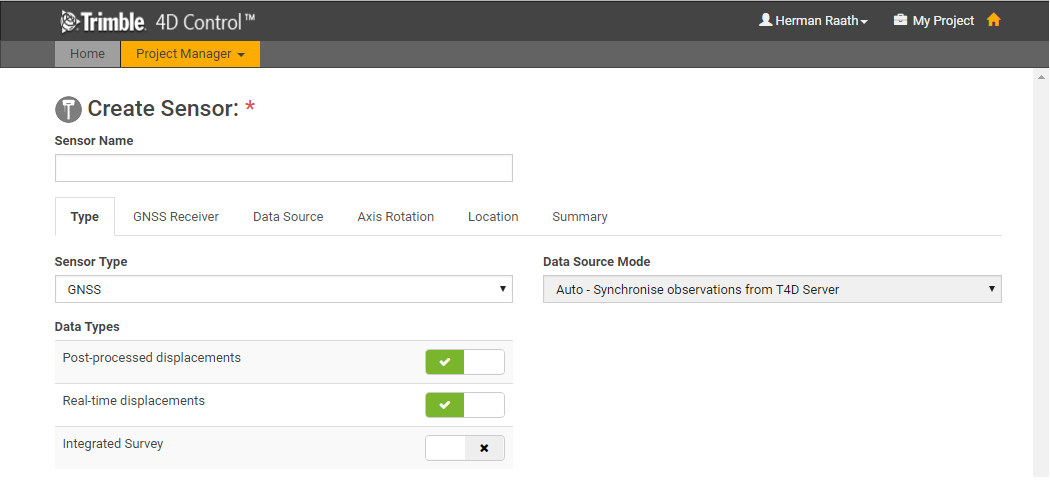
When the page first loads only the Type tab is visible. The other tabs will appear as soon as a Data Type is linked to the sensor.
-
Use the Type tab to select the sensor type and link data types from T4D server:
-
In the Sensor Type field, select GNSS.
-
In the Data Types group, click the check boxes to link the appropriate Data Types to the new sensor.
-
-
Click Next to move to the next tab or click the next tab to select it.
-
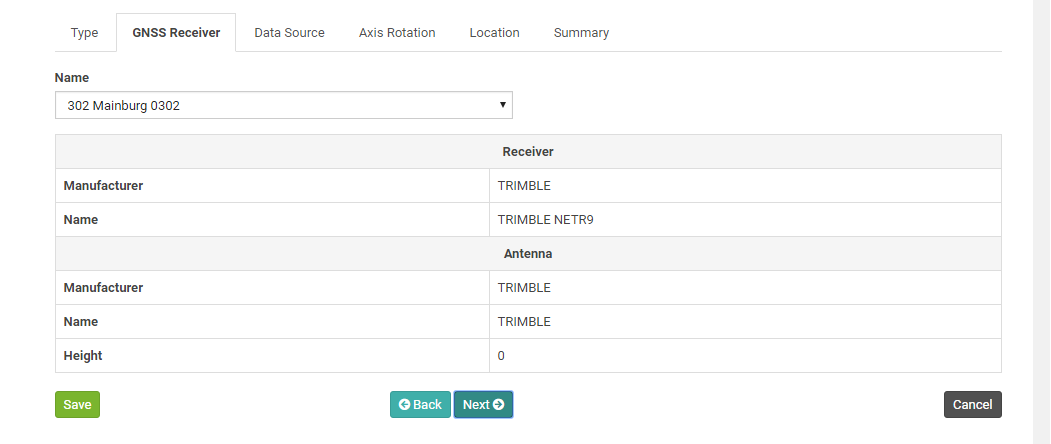
In the GNSS Receiver tab, select the GNSS receiver in T4D server to add:
-
From the Name drop-down list, select the receiver to add to the project. The Name list contains all the receivers configured in T4D Server.
-
If you have not yet entered a name for the sensor in the Sensor name field at the very top of the page, then the name defaults to the same name used for the selected GNSS Receiver in T4D Server. You can still edit the name if you wish.
-
-
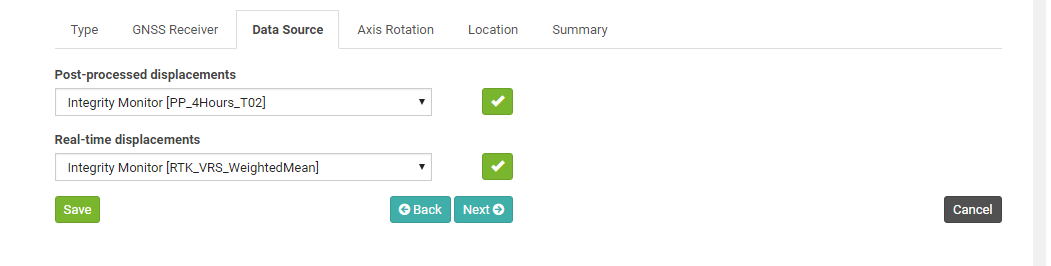
Use the Data Source tab to select the data source for the GNSS receiver.
-
For each Data Type that you have associated with the new GNSS receiver, select the data source from the drop-down list.
You must link a valid Data Source for each associated Data Type to be able to add the GNSS receiver to the project. If there are no valid options available for a particular Data Type then you must either resolve this in T4D Server, or you must unlink that Data Type on the first tab. You can add the data type later.
-
Upon selection, the Data Source will be validated. You should see a green “check” icon momentarily.
-
-
Use the Axis Rotation tab to define the axis rotation of the GNSS receiver. For more information, see Rotation angles.
-
Use the Location tab to verify the location of the GNSS receiver:
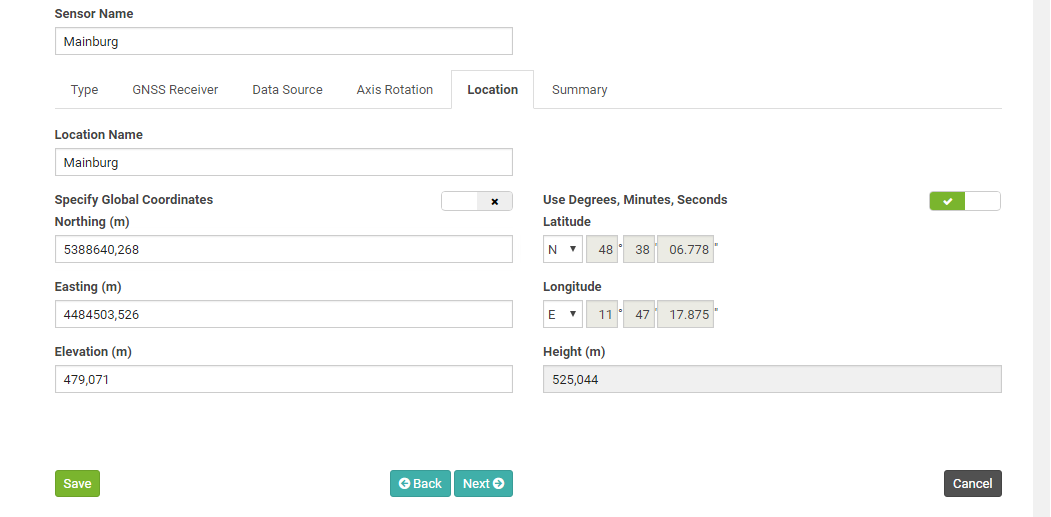
The Coordinates of the GNSS Receiver will be imported from T4D Server. In general you should not need to edit these.
-
You can change the Location Name or edit the Coordinates if required. The Grid Coordinates are shown on the left of the page. If you are not using a Local Coordinate System, then the Global Coordinates are shown on the right.
-
If you edit the Grid Coordinates then the Global Coordinates will update accordingly. Alternatively you can click the Specify Global Coordinates toggle to disable the Grid Coordinate fields and enable the Global Coordinate fields. If you edit the Global Coordinates then the Grid Coordinates will be updated automatically.
-
Global Coordinates can be entered in Degrees, Minutes and Seconds or in Decimal Degrees. Toggle the switch above the Global Coordinate fields to switch between entry modes.
-
-
Use the Summary tab to verify the sensor configuration:
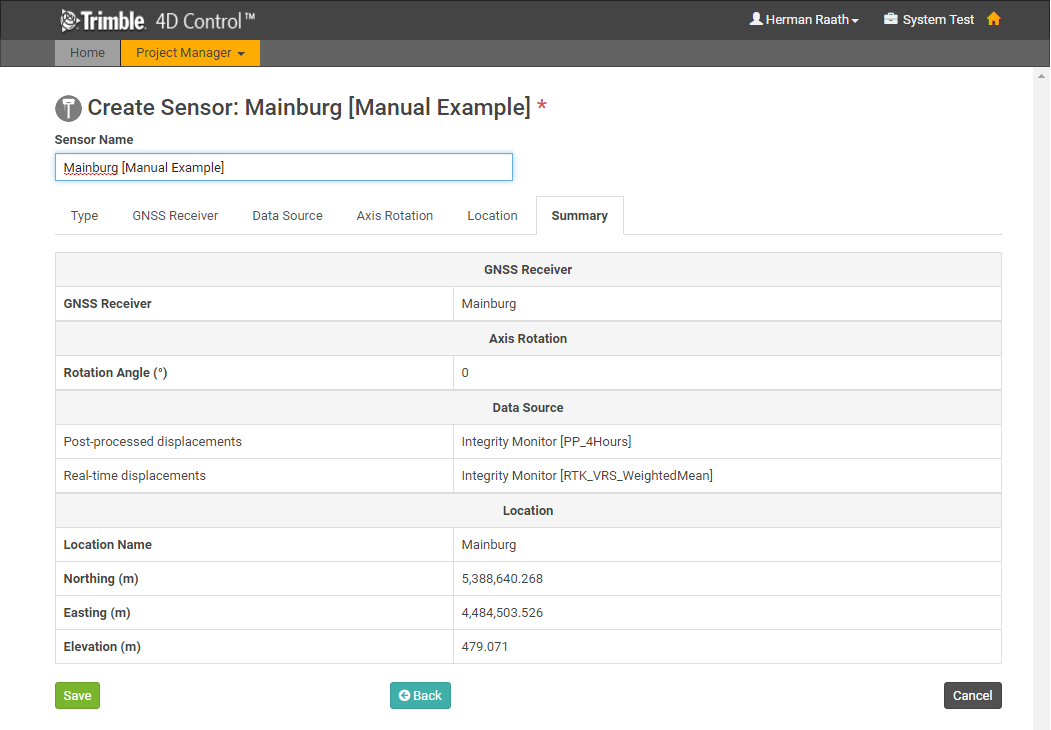
Verify that all the settings are correct and if required edit the name.
-
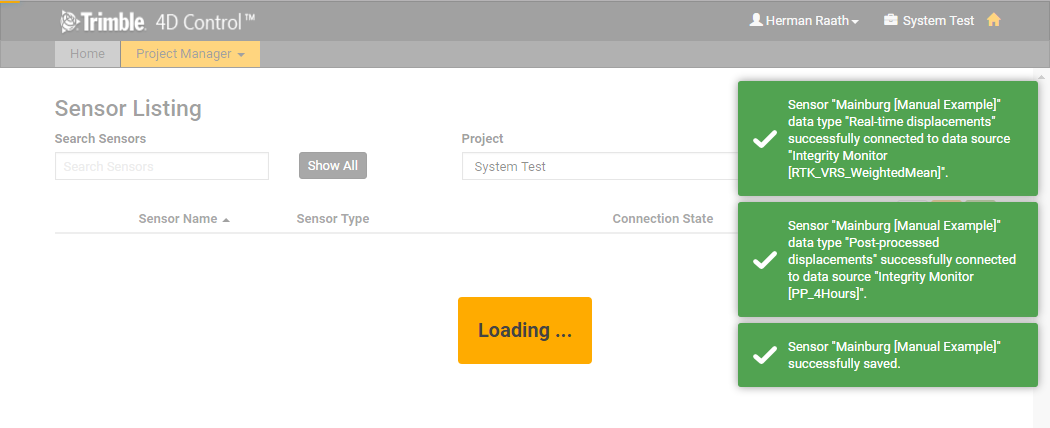
Click Save.
The GNSS receiver is added to the project and connected to all the selected data sources.