Targets (Raw Readings)
The Target (Raw Readings) or (“Target Raw”) sensor type represents the measurement made by one total station instrument for one target or prism.
The actual displacement of the prism is recorded against the Target Displacements sensor type.
This section covers the process for adding Target (Raw Readings) sensors to a project. This can be done one by one, but the preferred approach with prism data is to add sensors in bulk.
The process for adding Target (Raw Readings) Trimble Access sensors to the project is essentially the same as for Target (Raw Readings). The main difference is that you do not need to provide PPM Correction settings. Instead the instrument operator must provide a Temperature value in the Trimble Access™ software before starting the survey. The Pressure value from the Total Station will be used and these two values are applied for PPM Correction.
To add multiple sensors at a time:
-
Click the Add Multiple Sensors menu item or click the Bulk Add button
 on the Sensor Listing page. The Add Multiple Sensors page appears:
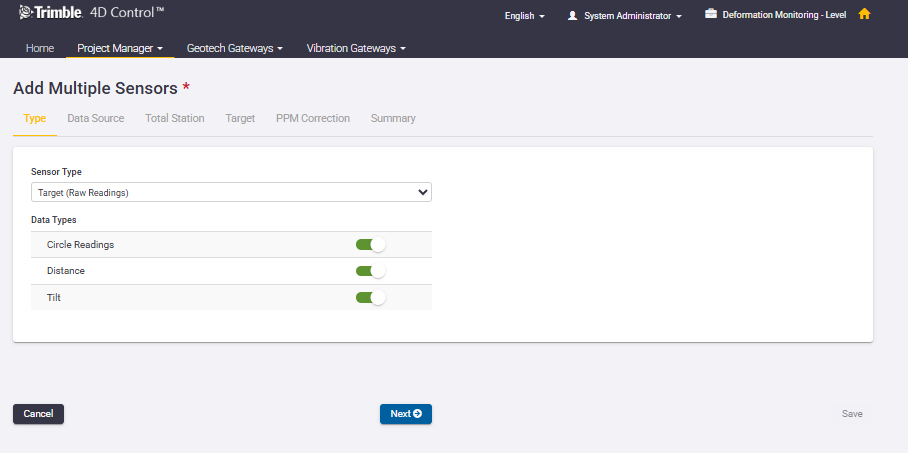
When the page first loads only the Type tab is visible. The other tabs will appear as soon as a Data Type is linked to the sensor.
-
Use the Type tab to select the sensor type and link data types from T4D server:
-
In the Sensor Type field, select Target (Raw Readings).
-
In the Data Types group, click the check boxes to link the appropriate Data Types to the new sensor.
-
-
Click Next to move to the next tab or click the next tab to select it.
-
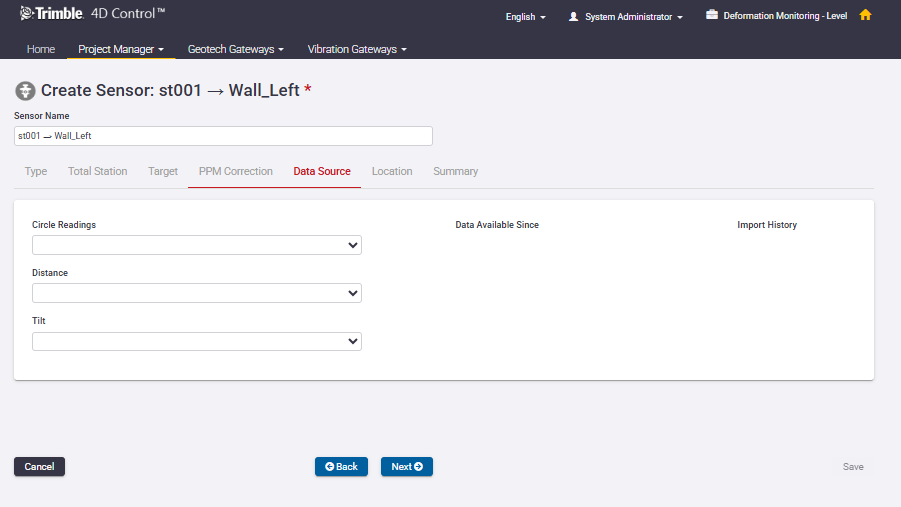
The Data Source drop-down list in the Data Source tab lists all the raw measurement modules in Trimble 4D Control Server. Select the appropriate options and then click Next.
-
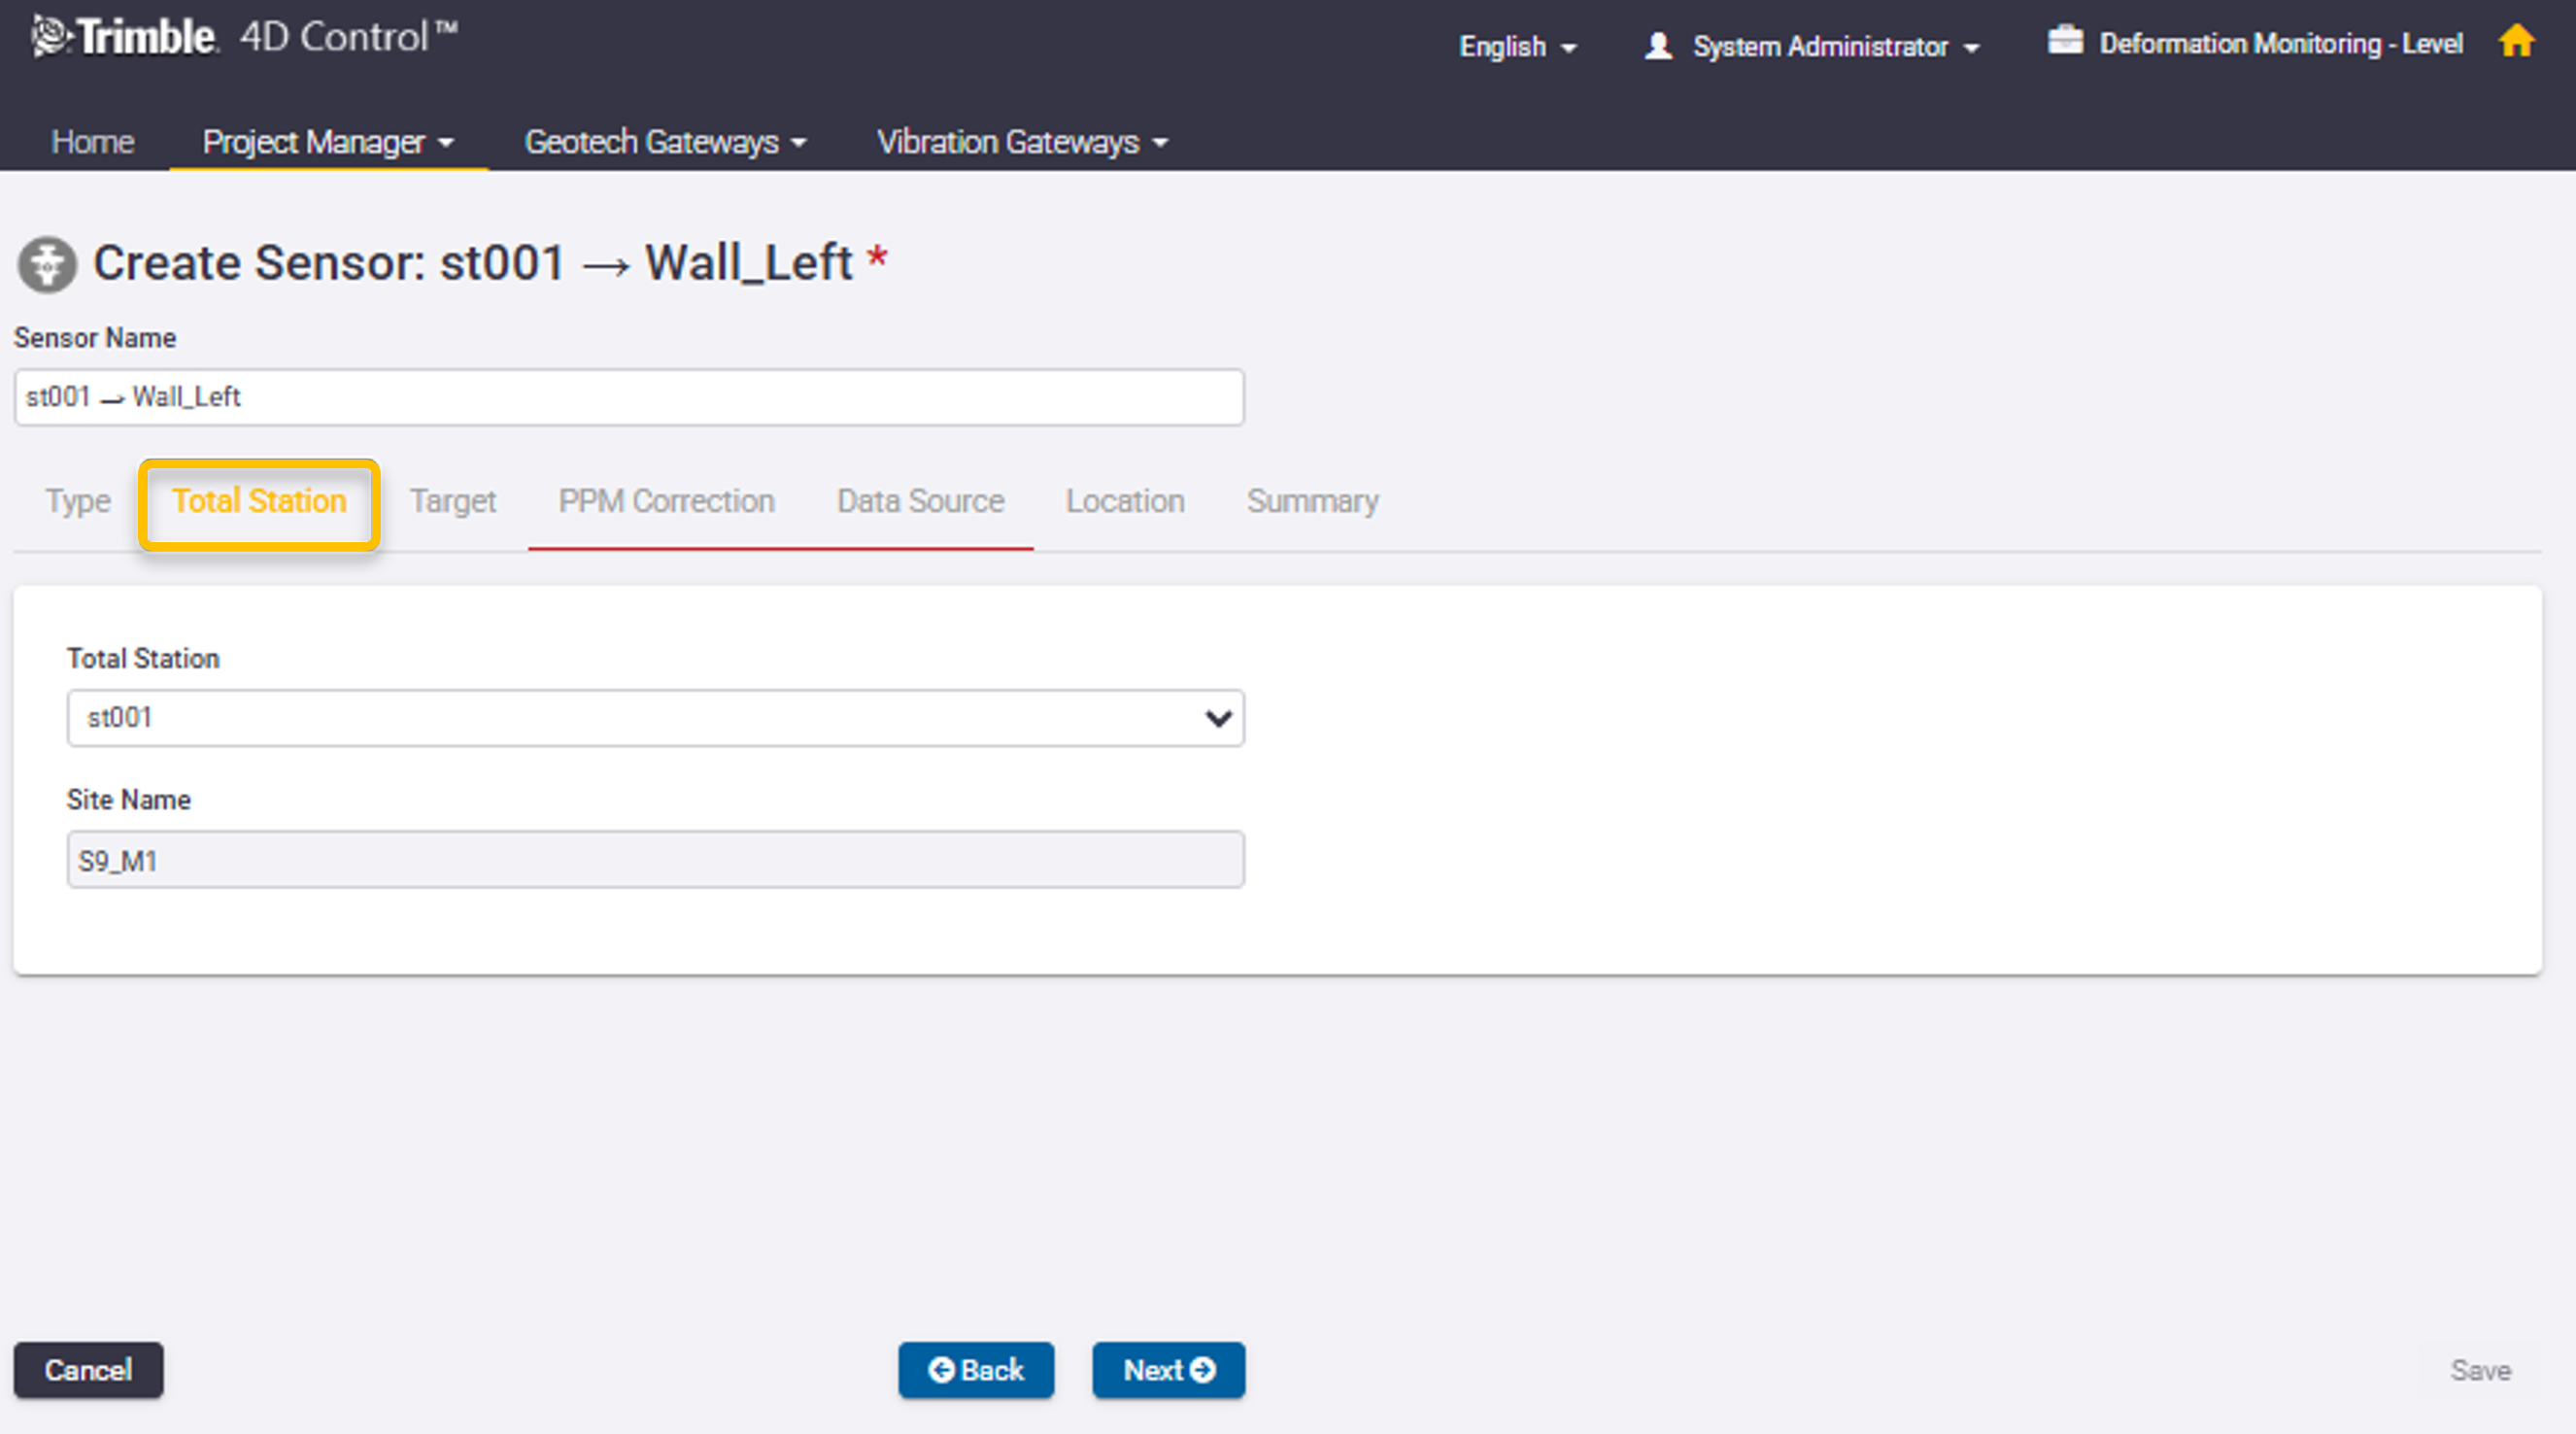
The Total Station drop-down list in the Total Station tab lists the available total stations in Trimble 4D Control Server, filtered according to the Data Source you selected. Choose one and then click Next.
-
The Target tab shows all the targets (or prisms) associated with the selected Data Source and Total Station.
-
By default, all available targets are selected and the suggested sensor name is created using “[Total Station Name] -> [Target Name]”.
-
You can select or deselect the individual targets to import. You can also edit each sensor name individually, or specify a Prefix and/or Suffix to be added to the auto-generated names.
-
In addition, you can import historic observation data (if available). For more information, see Historic data import.
-
-
Click Next to proceed to the PPM Correction tab.
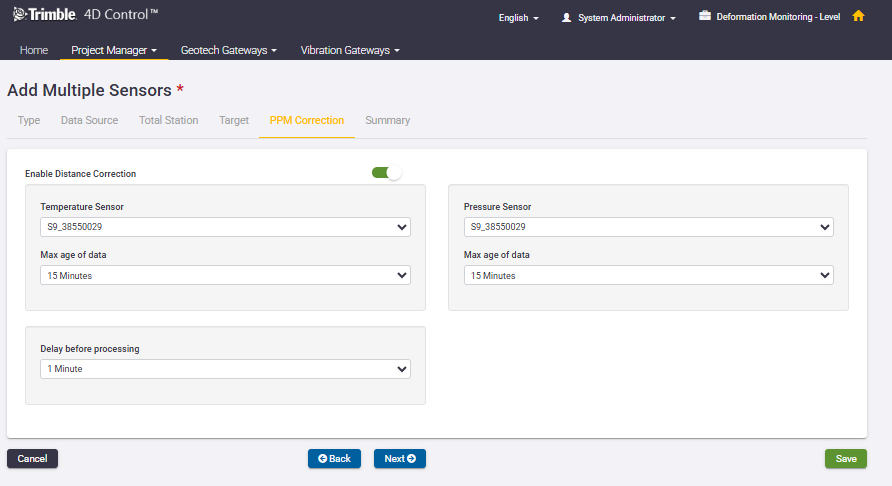
The PPM Correction tab is available if the Distance data type was selected on the Type tab. The PPM Correction tab contains configuration fields for PPM Correction. Parts Per Million (PPM) Correction can be applied to distance measurements.
Temperature and Pressure data must already be available in the project in order to enable PPM Correction. Temperature data can come either from a Papouch sensor or from a geotechnical sensor. Pressure data can come either from a total station or from a geotechnical sensor.
-
When the distance measurement data becomes available, T4D will look for the most recent observations from the specified Temperature and Pressure sensors. If the age of these observations is less than the specified Max data age, then corrections are applied.
-
Use the Delay before processing setting to delay the process. If you are concerned about the difference in data latency from the different data sources then you can consider increasing the Delay before processing value.
-
To skip PPM Correction, switch off the Enable PPM Correction toggle.
-
-
Click Next to proceed to the Summary tab.
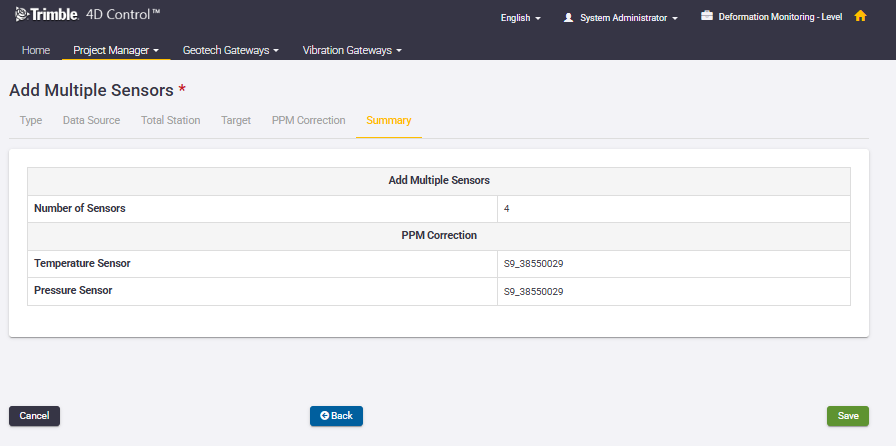
The Summary tab shows an overview of the number of targets that will be added to the project and, if available, the Temperature and Pressure data sources selected for PPM Correction.
-
Review the summary settings and then click Save.
A progress bar appears at the top of the page while the Target (Raw Readings) sensors are created and connected to the selected Data Sources.
It is important to keep your browser open and to remain on the current page until the process completes.
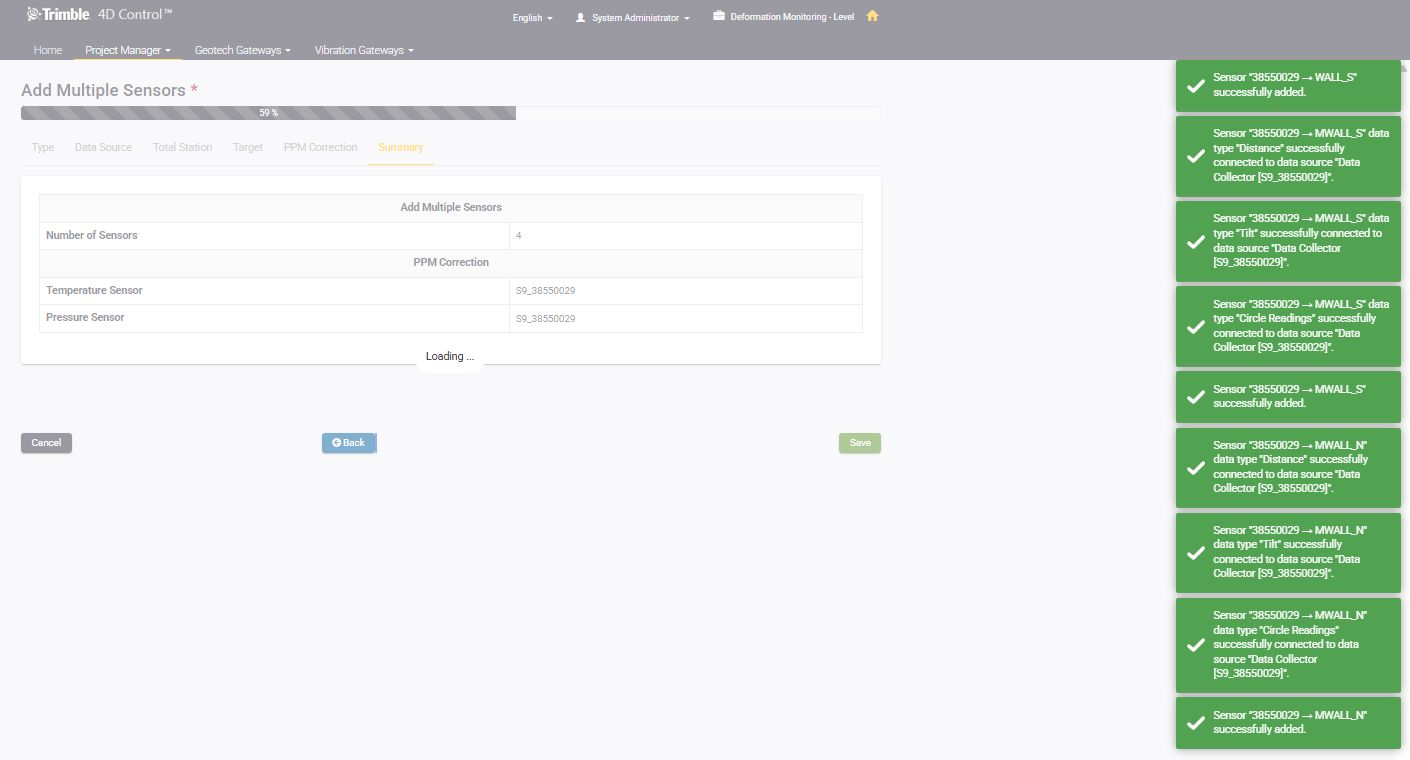
When all the sensors have been created and connected then you will be navigated back to the Sensor Listing page.
