Viewing and sharing data using the multi-pane viewer
The Trimble Connect multi-pane viewer enables you to efficiently manage and analyze large datasets, particularly mobile mapping datasets. It provides robust support for multi-pane set-ups with synchronized views, providing enhanced visualization and analysis to drive informed decision-making and innovative solutions.
Please see all the Multi-pane videos and the overview here: Trimble Connect multi-pane viewer tutorials
-
Use the 2D view to visualize trajectories, image positions, and 2D vector data against background maps, alongside specialized views such as cross-section and planar perspectives.
-
Use the 3D view to delve into point cloud data, explore paths and trajectories, and interact with panoramic views. The multi-pane viewer supports 3D model data and meshes, providing a holistic view of spatial information that is crucial for detailed analysis and decision-making.
To open the Trimble Connect multi-pane viewer
To open the Trimble Connect multi-pane viewer:
-
Ensure the Reality Capture extension is enabled. See Get set up.
-
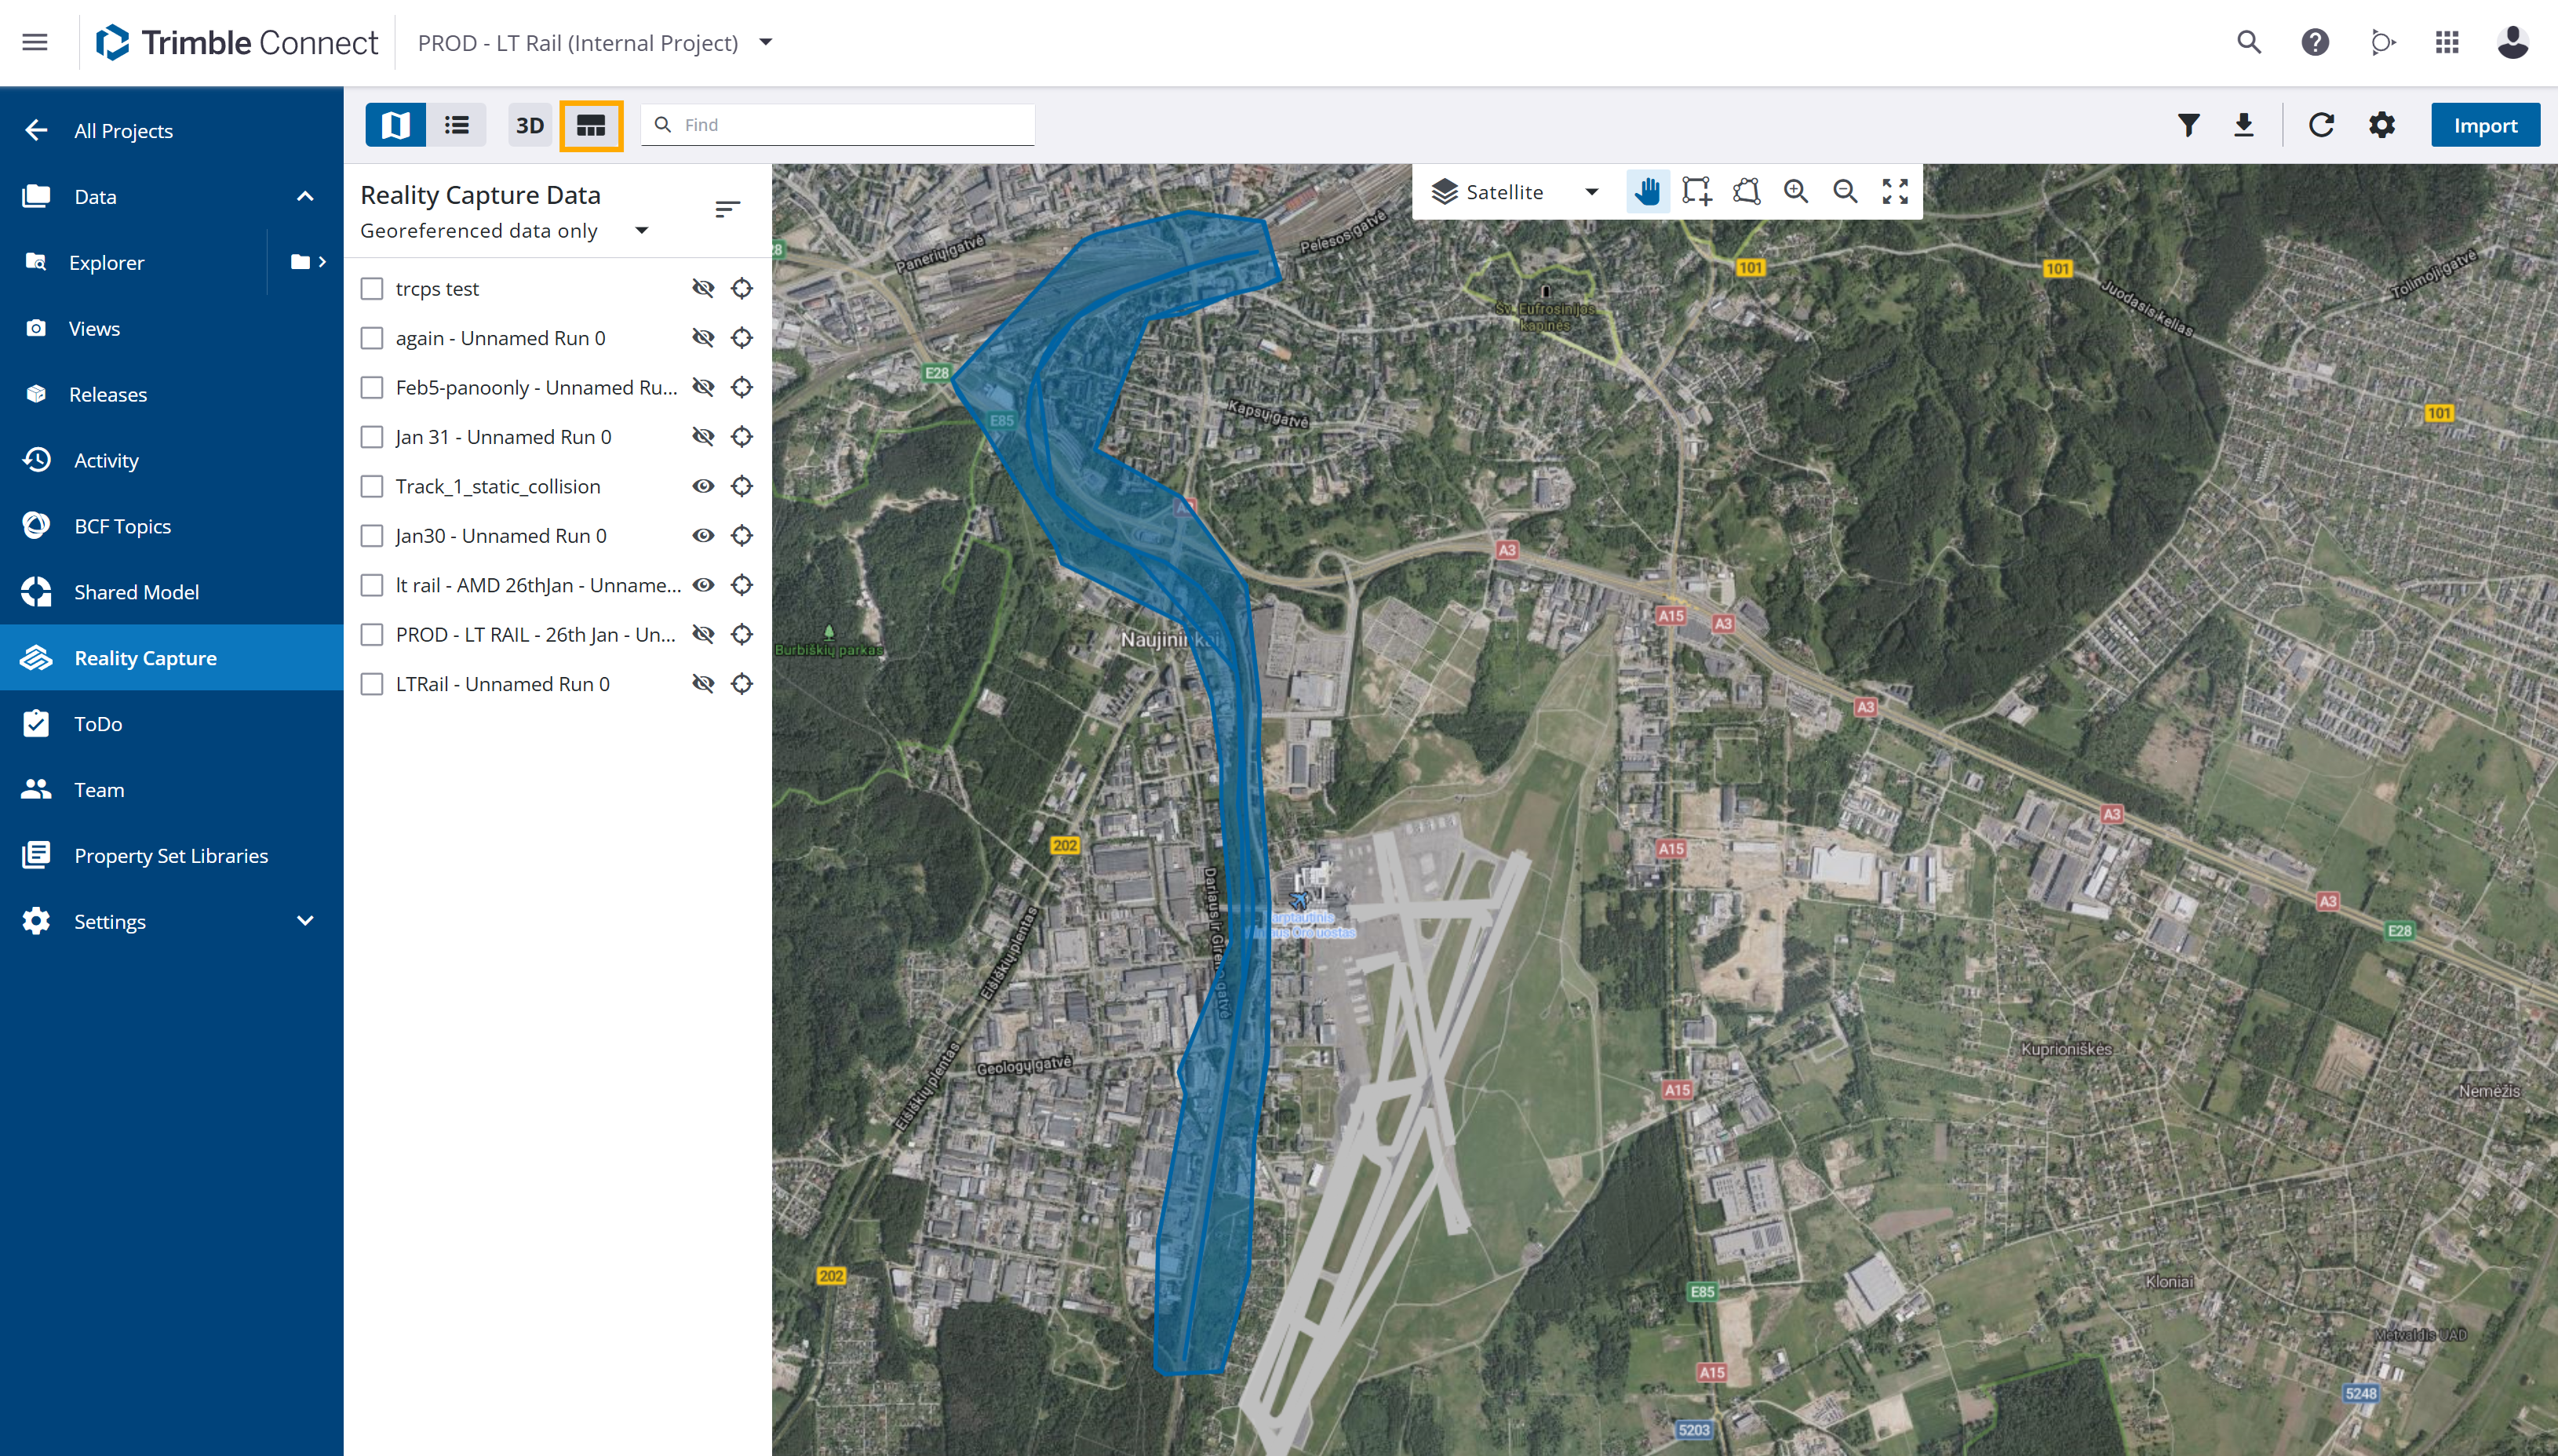
Navigate to the Trimble Connect Reality Capture tab and select the Multi-pane button in the top toolbar.

-
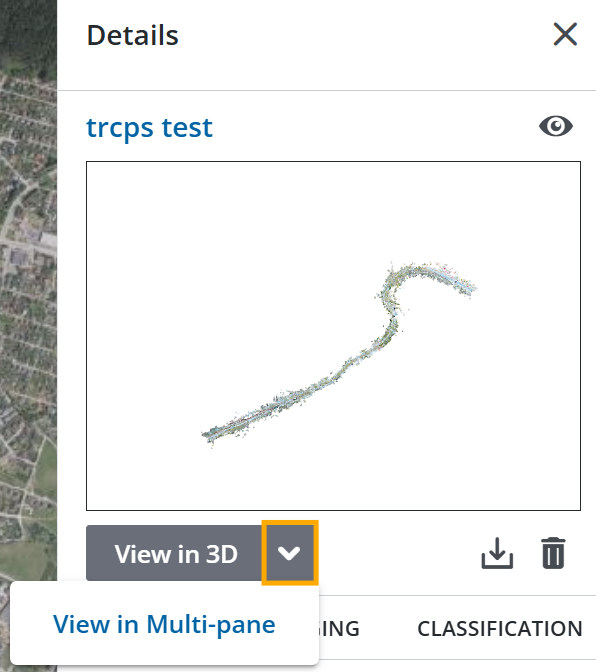
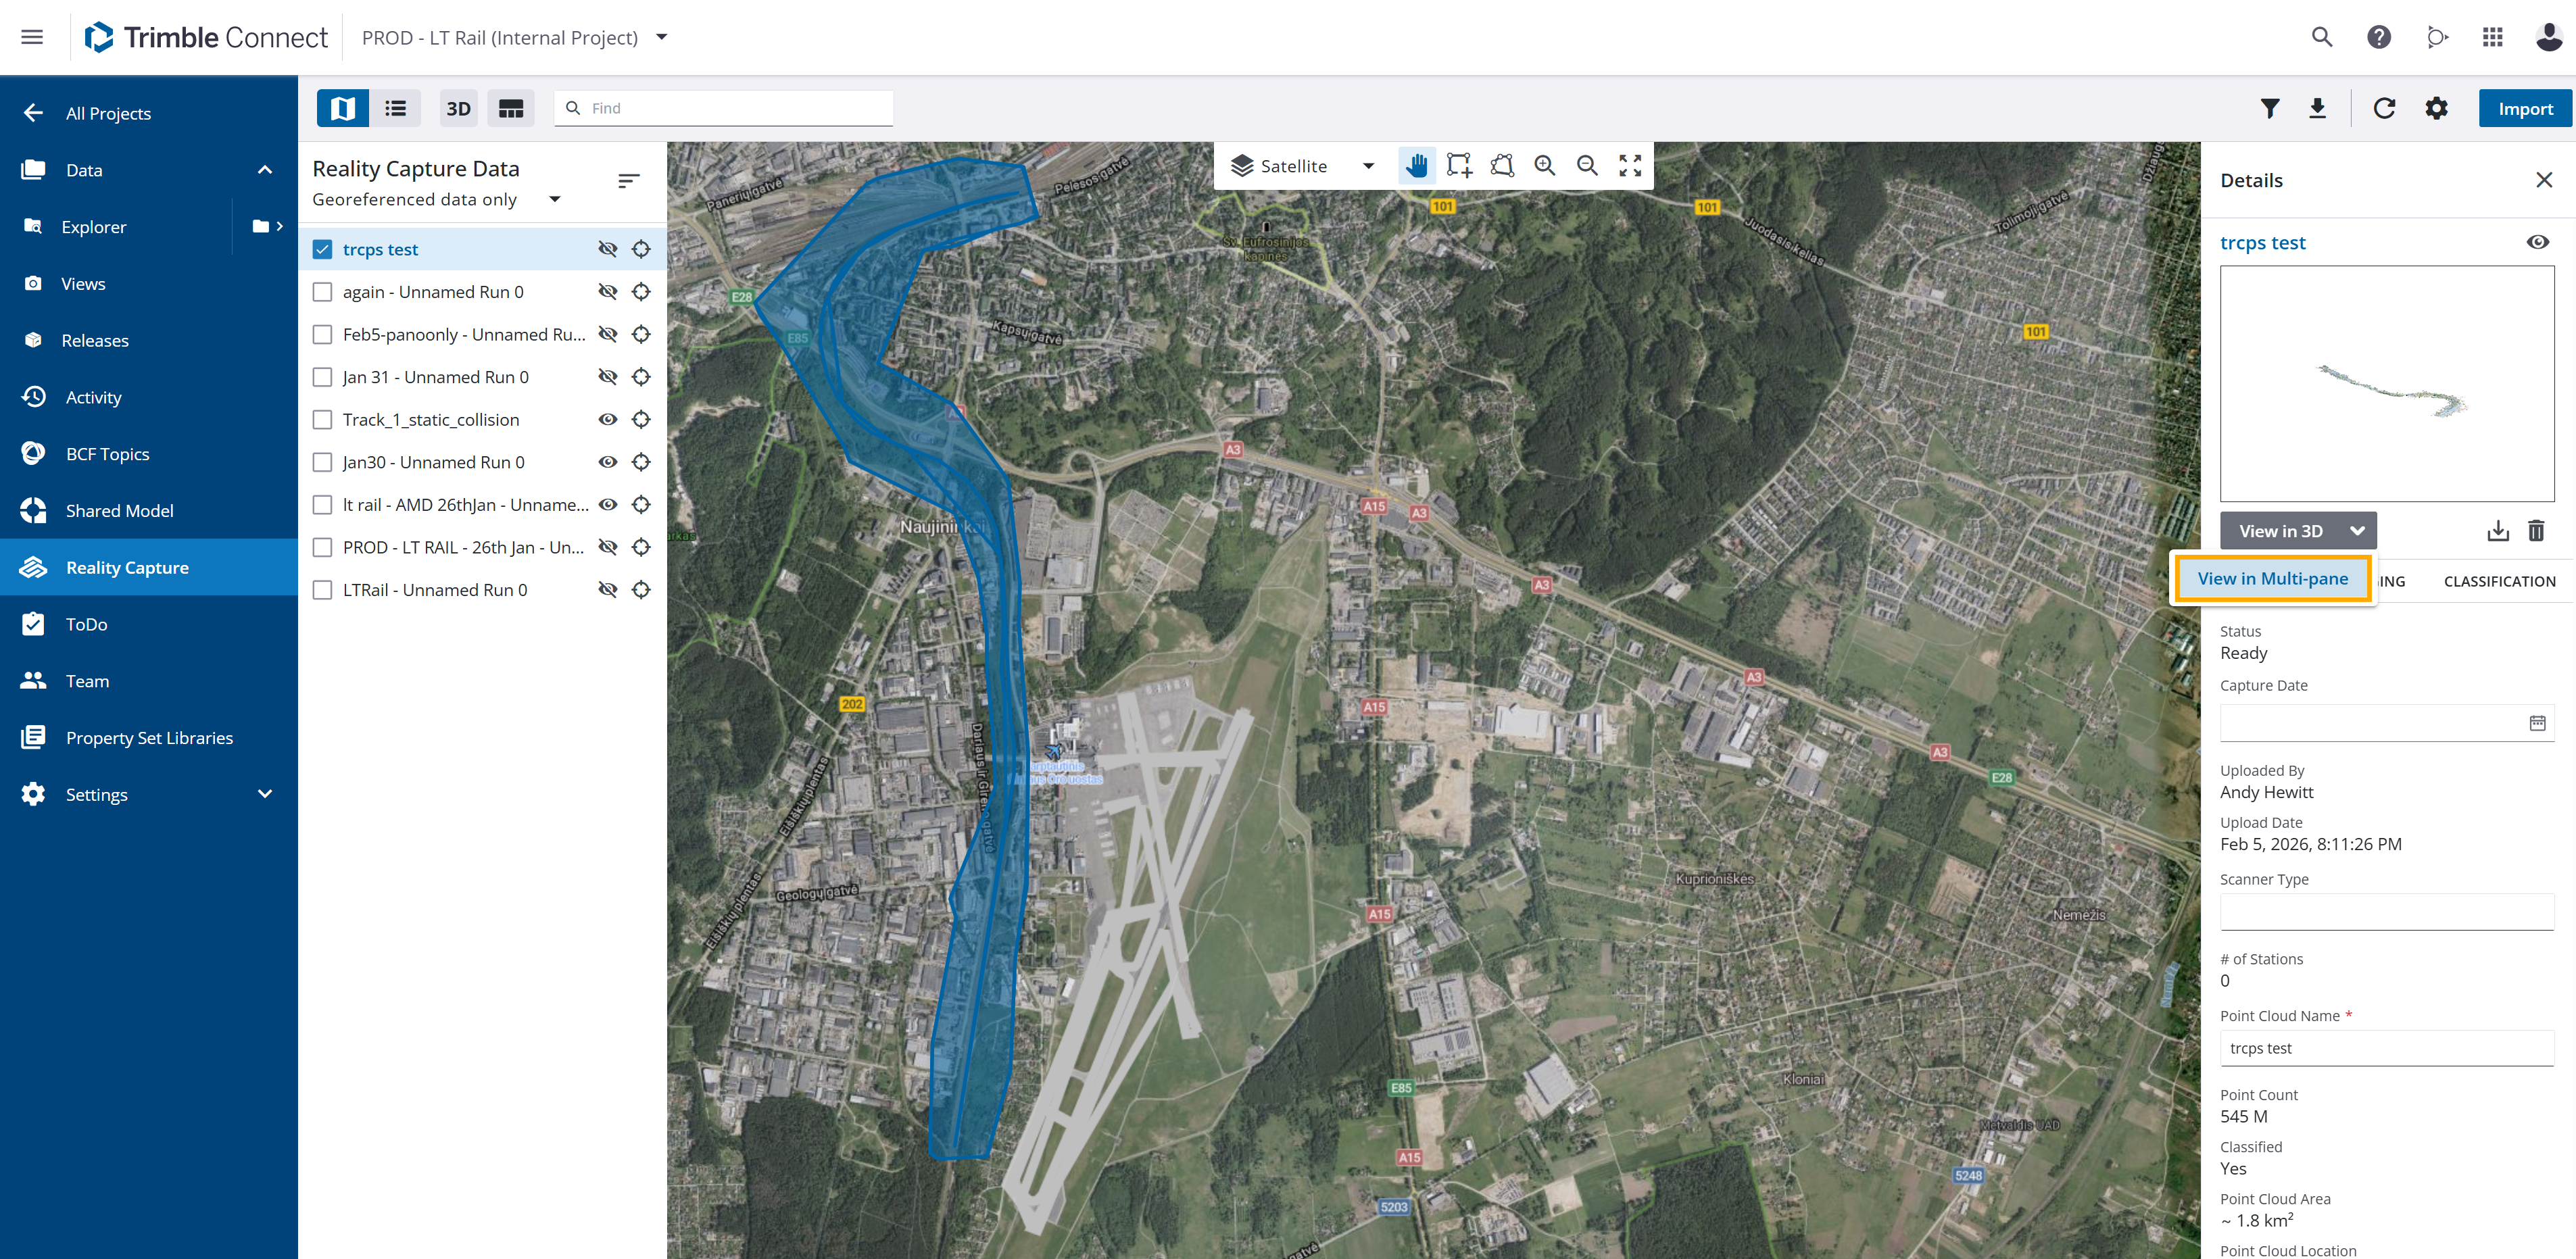
If Point Cloud data is available: Go to Trimble Connect > Reality Capture tab, select a dataset, and in the details tab that opens on the right side select the small arrow beside 'View in 3D'. Then select View in Multi-pane from the drop-down menu.
-
If Mobile Mapping data is available: Open Trimble Connect > Reality Capture, select a dataset, and in the details tab that opens to the right side choose View in Multi-pane from the drop-down menu.
-
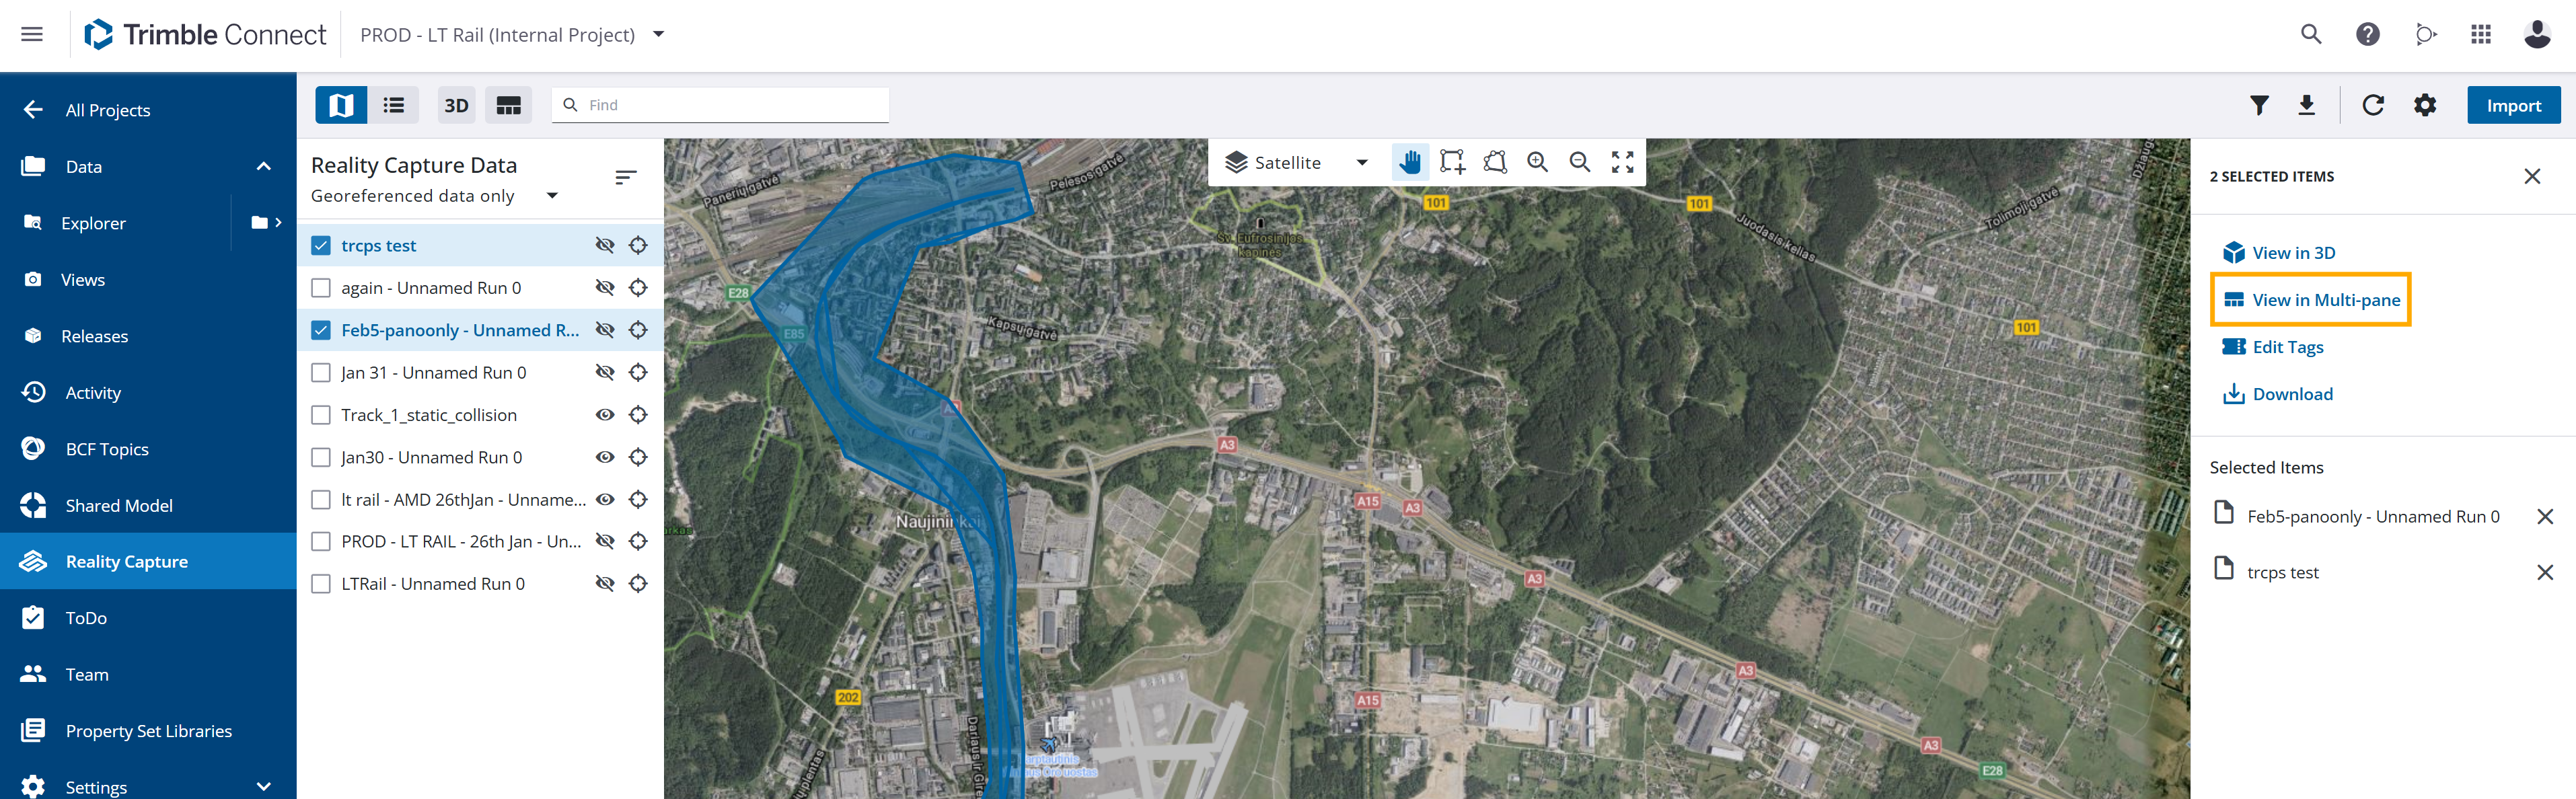
For more than one selected dataset select View in Multi-pane in the Selected items panel.
Please check the Multi-pane overview videos and tutorials here: Trimble Connect multi-pane viewer tutorials
How to Publish and View Reality Capture Data in Trimble Connect multi-pane viewer
Step 1: Publish from Trimble Business Center (TBC)
Publishing of Missions & Runs is supported starting with Trimble Business Center version 2025.21.
-
In TBC, use the Publish to TRCPS command.
-
In the Project Explorer, select the runs you wish to publish.
-
Hold Ctrl to select individual runs,
-
or Shift to select a block of runs.
-
-
Enter a name for your export, choose your Trimble Connect project, and configure camera and blurring options as needed.
-
Click Publish.
That’s it! TBC will handle the export, upload, and visualization optimization automatically. Your data will be ready to view in Trimble Connect.
Step 2: View in Trimble Connect
-
Now open the Reality Capture extension in Trimble Connect.
-
Access your published runs or point clouds in the multi-pane viewer.

