Collect
Once the Instrument Set Up has been completed, you can collect and/or lay out without performing another Instrument Set Up. See Connection for instructions on Instrument Set Up.
Use the Collect Points process to save project information such as existing utilities, foundations, anchor bolts, or any other type of project information. Use the Collect Linework process to save information such as ceiling or floor lines, inside and outside building corners, doorways, windows, utilities or any other type of linework information to help save time by creating drawings or 3D model information automatically in the field.
You can use FieldLink to:
Collect Points
- Tap Measure
 and then tap Collect. The point icon is automatically selected.
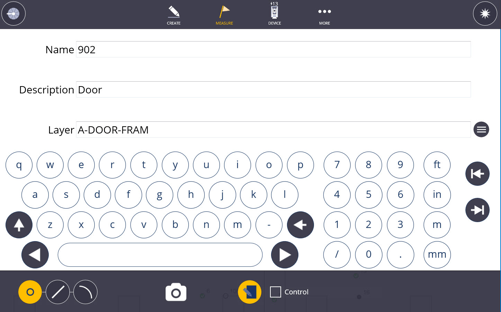
 - Tap the Input Form icon
 . Input the Point Name and Description. Place the points on a specific layer by tapping the Layer drop down menu, or type in a new layer to create a new layer name.
 - If you are measuring a control point, select the Control Point check box.
- Tap the Camera icon
 to capture and store image with the point.
 - Use the Joystick or Vision modes to aim at the item or prism.
- Place the prism rod on the point or aim the laser directly at the item to measure and tap the Shoot icon. The prism or laser position is displayed with the "
 " symbol in Map View.
 -
When ready to collect square cateye targets to be used for autostationing, make sure the control point is selected and tap Auto Collect. This is only available when using a RPT600. To manually change points to control points, see Linework.
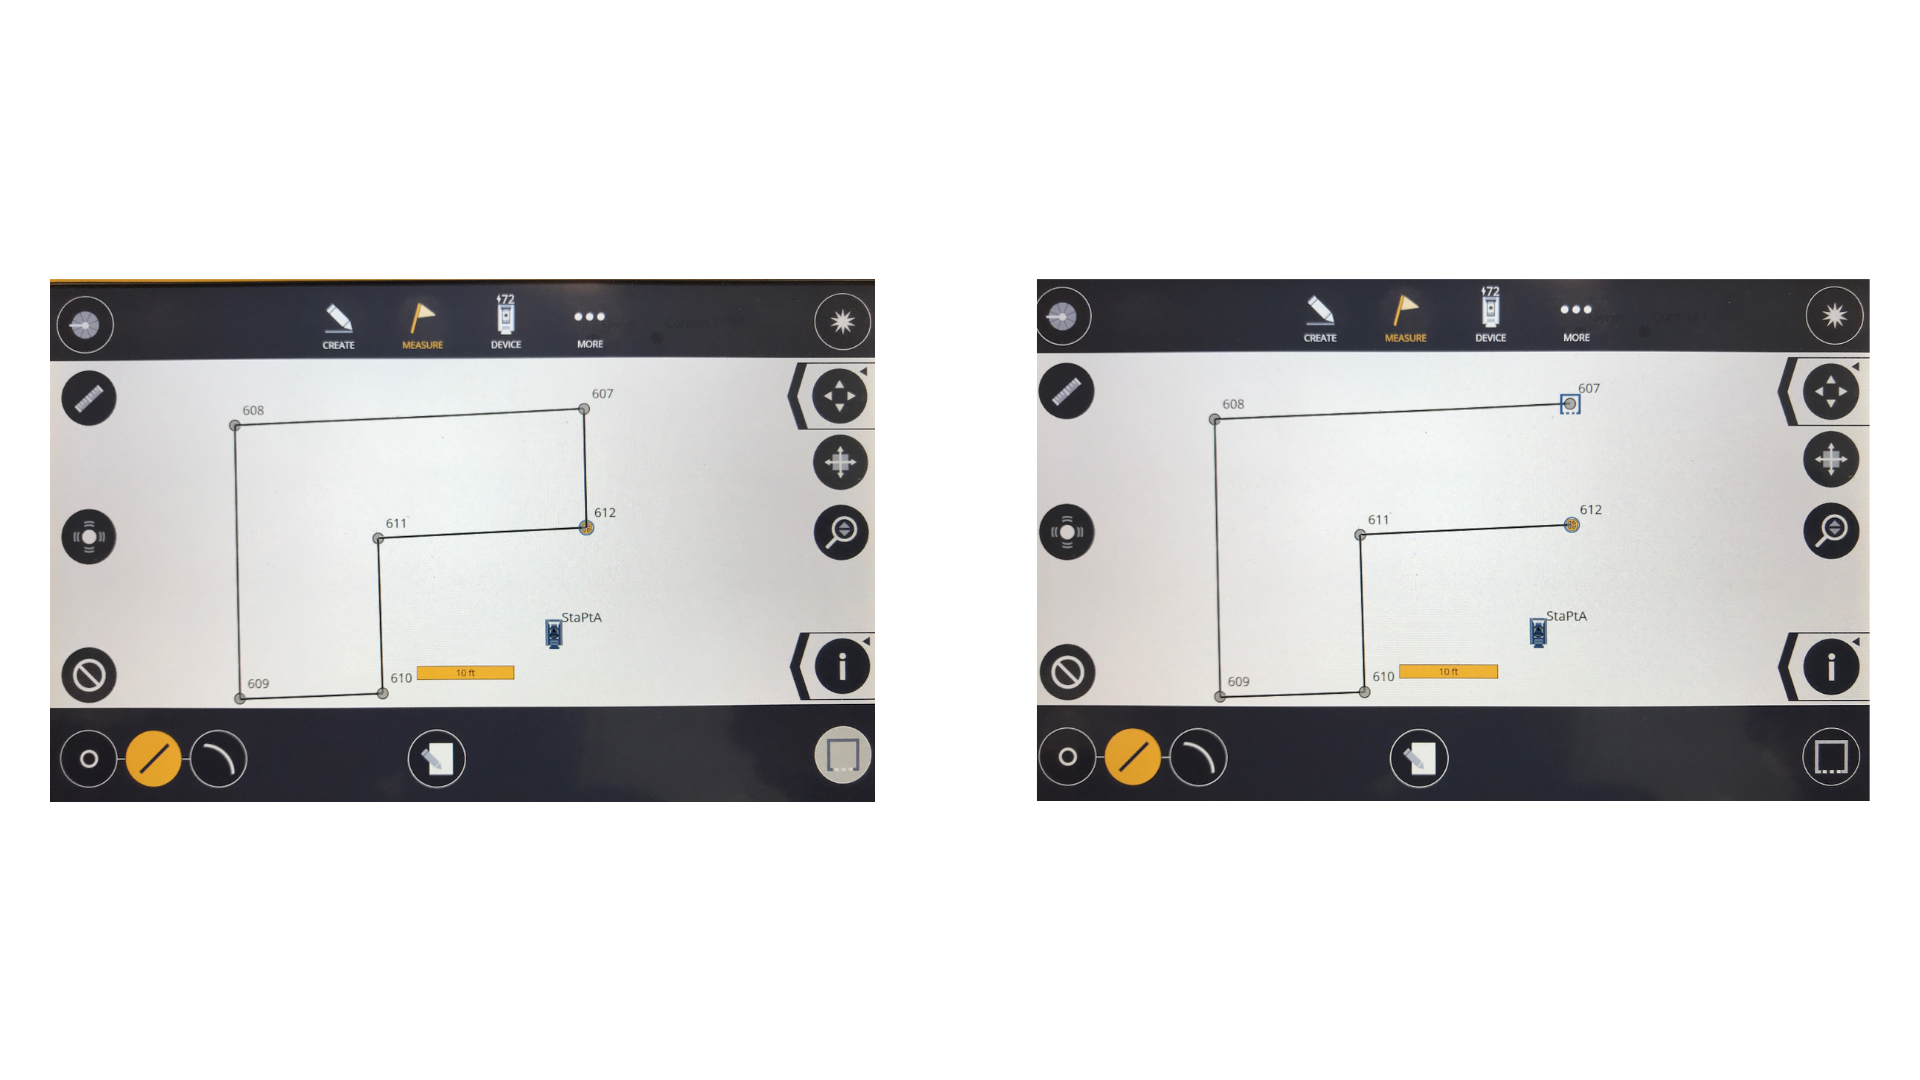
Collect Line
- Tap the Line icon to measure points and create lines between each point as you measure.
- Tap the Input Form icon . Input the Point Name and Description. Place the points on a specific layer by tapping the Layer drop down menu, or type in a new Layer to create a new layer name.
- Select the points and lines to be collected as Measured, Design, or Control. Measured points and lines are indicated with a solid dark circle and cannot be laid out without saving the point under a different name. Design points are indicated with an open circle and can be laid out again immediately. Control points are indicated with a triangle inside an open circle.
- Use the Joystick or Vision modes to aim at the item or prism.
- Place the prism rod on the point or aim the laser directly at the item to measure and tap the Shoot icon.
- Tap the Close Line
 icon on the screen to automatically create a line to close the line segments.
 - Points or lines that have been collected as Design points can be connected to other points or connected with linework using the Create Linework mode.
Collect Arc
- Tap on the Arc icon.
- Tap the Input Form icon. Input the Point Name and Description. Place the points on a specific layer by tapping the Layer drop down menu, or type in a new Layer to create a new layer name.
- Measure three points that define the arc. You will see the arc being constructed as you capture the first two points then when the final point is captured the arc is finalized and shown on the map display. The Arc Diameter and Arc Angle are indicated during collection.
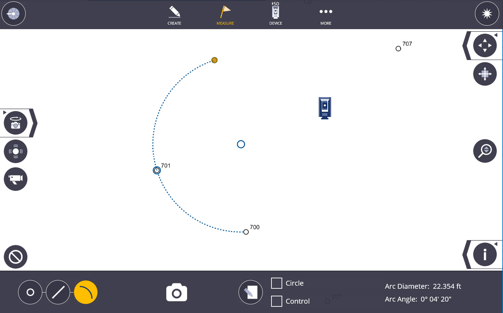
Collect Circle
- Tap on the Arc icon and then tap the Circle option box.
- Tap the Input Form icon. Input the Point Name and Description. Place the points on a specific layer by tapping the Layer drop down menu, or type in a new Layer to create a new layer name.
- Measure three points that define the arc. You will see the arc being constructed as you capture the first two points then when the final point is captured the arc is finalized and shown on the map display. The Arc Diameter and Arc Angle are indicated during collection.
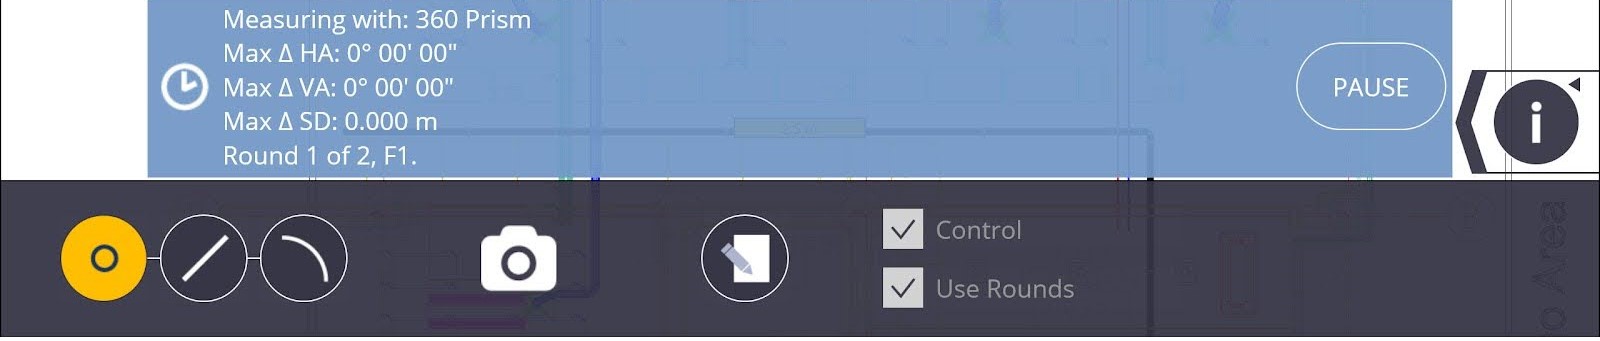
Collect Points Using Rounds (optional)
To use Rounds you must have purchased the Site Control Module.
- Tap Measure and then tap Collect. The point icon is automatically selected.
- Select the Rounds boxes and the Face Order, Number of Rounds, and Measure Mode. Also select the Control box before running the Rounds routine.
- The results of the Rounds process is shown in the bottom of the screen.