Tips and Tricks
Below are listed some tips and tricks that can help you in your daily duties.
-
 &
&  - SCANNER ERROR - CALIBRATION ERROR: A calibration error message may appear during the Initialization step before scanning.
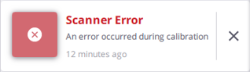
This can happen when the scanner has not been used for a long time, and dust has settled over the laser aperture area [A] and the auto-calibration system [B]. Remove dust carefully with a soft cloth.

-
& - ONE SCAN BUTTON SETTINGS: The settings for the scan Push button feature are the last used ones, or the default ones (if using the scanner for the first time). Any change in the settings in the application is immediately taken into account by the scanner for the next scan.
-
SECTOR SCAN: When you interrupt an acquisition in progress, the captured data is not discarded. It is saved on the memory card and downloaded under the software database. This data can be considered as a Sector Scan compared to a complete dataset we qualify as to a Full Scan.
-
DATA ACQUISITION CONTINUES EVEN IF THE CONNECTION IS LOST:
If the connection to the scanner has been interrupted (Wi-Fi signal lost, or USB connection issue, or the application closes, etc.) when the scanner is collecting the data.
The scanner continues collecting the data till the end.
The captured scan data, first saved on the SD card in the scanner, is automatically loaded to the application database if:
-
The controller has been reconnected to the same scanner.
-
The scanner has been turned first off and then on, and reconnected to the same scanner.
The captured scan data is not loaded to the application database if:
-
The controller has been connected to a different scanner.
-
A new project has been created or a previous project loaded in Trimble Perspective, and the controller reconnected to the same scanner.
-
-
TRANSFER DATA: To transfer the data from the tablet to an office computer, use the SD card provided with the scanner. Use an external hard drive (Read/Write Speed 500MBs, Support UASP & USB3.0) to store and transfer data.
-
RCP FILE FORMAT: Exporting to the RCP format may take several minutes per scan. To avoid this, do:
-
Export to an E57 format file from Trimble Perspective.
-
Import the E57 format file into ReCap and generate a RCP format file.
-
-
ROTATE THE MOVING SCAN IN THE MANUAL REGISTRATION: To fix the wrong IMU orientation, the software is using the same procedure as for the Auto Registration which means moving the scan and a Fast Refine is performed
-
MOVE THE MOVING SCAN IN THE MANUAL REGISTRATION: When you move the Moving Scan in 2D as close as possible to the Reference Scan to register them manually, the software will perform a Full Refine.
-
SPECIFIC REGISTRATION WORKFLOW: When the first scan is unleveled and the second scan is leveled, the software will swap the registration order, meaning that the unleveled scan (Moving Scan) will be registered to the leveled scan (Reference Scan).
-
GEOREFERENCE A PROJECT: Only the Auto matching functionality needs three pairs of annotations (or precision points) and control points. Manually you can set up matches with no restrictions.
-
REFINE A PROJECT: In some cases, you can obtain a more accurate refine result by enabling the Unlock Station Leveling During Refine option (see
 Settings > General).
-
Use the option during smaller projects (e.g. around or in a building).
-
Do not use the option on larger projects (e.g. around a bridge over a highway), long linear or heavily sloped projects.
-
-
DATA COLLECTED WITHOUT THE CONTROLLER: The data (collected by using the scan Push button for the X7 & X9 and the on-board application for the X12) is stored:
-
Only in the memory card, if you have not previously connected the controller to the scanner and performed at least one scan.
Use
 to import the data in Perspective (see Import a Scan).
 -
In the memory card and in the application database, if you have previously connected the controller to the scanner and performed at least one scan.
Use
 to synchronize the data in the memory card with the data in the application database at the next connection to the scanner (see Synchronize Data).
-
