Sample Point Cloud Regions by Intensity
Use the Sample Region by Intensity command to create a point cloud region containing only the scan points whose luminance intensity falls within a range you specify using simple-to-use slider controls that show your changes in the 3D View as you make them. Scan points whose intensity is outside the selected range display in red, while points within the range display in the selection color, making it easy to identify the features you want include. This is useful if, for example, you want to sample a point cloud region so that it contains only street line markings, which typically will fall within a unique intensity range as compared to other features within the point cloud.
Prerequisites:
See the Subscription Plans page. For a license matrix by command, see the License page in the TBC Community. Also see View and manage licensed features.
To sample point clouds by intensity:
- Select Sample Region by Intensity in Point Clouds > Regions.
- In the Sample Region by Intensity command pane, enter a name for the new point cloud region in the Region name field.
This name will be appended with a incremented number if you create additional regions without changing the name.
- Click in the Point cloud region selection field and then either select an existing point cloud region in the Project Explorer, or use the Polygon Select or Rectangle Select command to select in the 3D View the scan points you want to include in the new region.
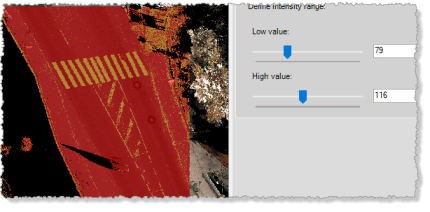
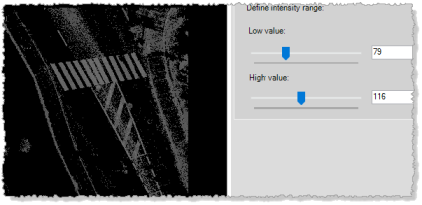
- Use the two Define Intensity Range slider controls to define the range that best shows the features you want include in the region.
Selected points display in the selection color. Unselected points display in red.
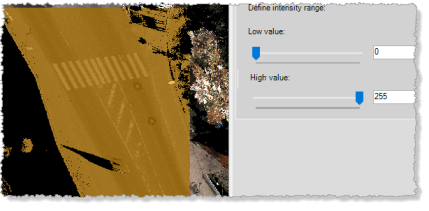
In the following example, the Sample Region by Intensity command pane is open but no region selection has been made.

After selection, all scan points within the selected region are displayed in the selection color (yellow).
After filtering, the desired features are displayed in the selection color (in this case, the line markings on the street). The other scan points are displayed in red, showing they will not be included in the region. Note that some points that are not line markings are also selected because their luminance closely matches that of the lines.
- When you are done, click the Store button to save the new filtered point cloud region in the project.
TBC automatically hides all regions in the project except the one you just created. You can use the View Filter Manager to view the other regions.
