Create an Orthomosaic from a Facade
Use the Create Orthomosaic from Facade command along with a custom-designed cutting plane to create an orthomosaic TIFF photo of a vertical facade, such as the face of a building, composed of many images captured with a UAS drone. The TIFF file, along with the companion text file containing 3D coordinates for the orthomosaic, can be imported into the current, or any, TBC project as a georeferenced image.
Prerequisites:
See the Subscription Plans page. For a license matrix by command, see the License page in the TBC Community. Also see View and manage licensed features.
To create an orthomosaic from a facade:
- Select Create Orthomosaic from Facade in Photogrammetry > Deliverables to display the Create Orthomosaic from Facade command pane.
- In the Mission drop-dow list, select the flight mission that captured the facade imagery.
- In the Output folder field, specify the folder in which you want to store the orthomosaic file and coordinates text file.
- In the Name field, enter the name for the resulting orthomosaic file and coordinates text file.
- In the Plane drop-down list, select the plane definition you want to use to create the orthomosaic, or select <New...> to create a new one. (For instructions on creating a plane definition on the facade for which you wish to create the orthomosaic, see Create and Edit Planes and Cutting Plane View.)
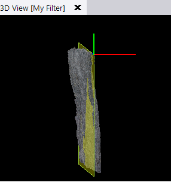
Note that the red line emanating from the selected plane must point back toward toward the facade you want to capture so the images can be found. You may need to invert the plane to ensure this is the case. Use the Invert button in the Plane Manager.
Incorrect:
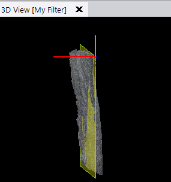
Correct:
- Using the two Corner fields, select a location or point (or enter a point ID) on the plane for each of the two opposing corners of the rectangle that defines the borders for the resulting orthomosaic.
- In the Clipping depth field, enter the clipping distance (thickness) of the rectangle/bounding box.
- In the Pixel size field, enter the pixel size (resolution) to be used for the orthoimage.
- Optionally, select the Advanced heading to change the orthomosaic file format (TIFF or TIFF with JPEG compression) and/or select a different processing folder containing temporary files created during the orthomosaic creation process.
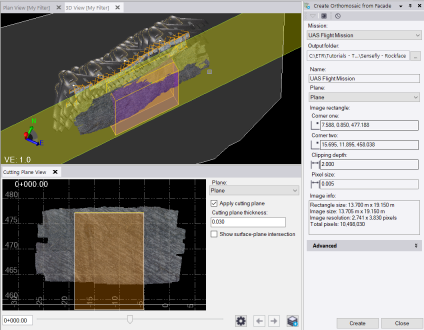
The following example shows the command set up to create an orthomosaic of a cliff face captured with a UAS drone.
- Click Create.
The Process View tab opens and displays the progress.
When the process is complete, two new files (orthomosaic and text file) are created and stored in the specified output folder, each using the name specified in the Name field.
- Optionally, on the Process View tab, click the Import button to import the new orthomosaic into the project and display it in the graphic views.
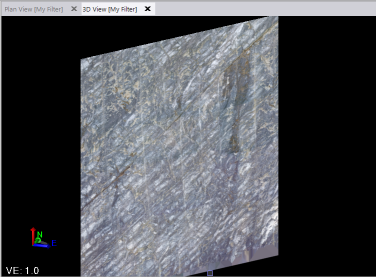
The following example shows just the imported orthomosaic created from the cliff wall in the previous example.