Upload Files (via data synchronization)
Upload files to copy them from your office computer to the data synchronization area. The synchronizer root folder is created when you synchronize field devices using WorksManager.
Note: To view or change the location of your data synchronization area, select Options in the Quick Access Toolbarand select File locations.
To upload a file:
- Open the project from which you want to export data.
- Open the Device pane by doing one of the following:
- Select Device Pane in Home > Data Exchange.
- Press
The Device pane displays.
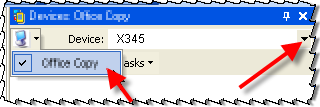
- Click the Select Device Category icon located at the top of the command pane and verify that Office Copy is checked in the drop-down list.
- Select the device to which you want to export the file.
- Select the data to export.
- Click the Export icon on the Device pane toolbar. The Export pane opens and displays a list of possible formats.
- Select the file format to export. If data has not been selected, select it.
- Verify the default file name is correct, or enter a different file name for the exported file.
- Verify the settings options.
- Click , and then close the Export pane to view the Device pane underneath.
- Click the Refresh View icon on the Device pane toolbar to see the exported file list.
Note: Before taking the field device out to the field, WorksManager must synchronize the field device to which you are exporting a file.
