Define and Edit Strata
Define the earthen material strata that exist on your job site to make the depths and thicknesses for each stratum definable when you create boring logs. The Create Boring Log command reflects the names and order of the strata that you define here. A surface is then created for each stratum when you specify the depth and thickness of the strata at each boring log location.
For more information, see the documents entitled Defining Subsurface Strata & Boring Logs and Subsurface Strata & Boring Log Data Entry in the Community.
Prerequisites:
- Takeoff surface defined as 'original ground' in its properties
- License for a module. To see which modules license this command, see Licensed Features.
To define strata:
- Ensure that you have defined the earthen materials that you need for each strata in the Material and Site Improvement Manager's Project Library.
- Ensure that you have identified the original ground surface in your project by either:
- Assigning the layers that comprise the surface to the Original category using the Categorize Takeoff Layers command.
- Right-clicking a surface, selecting Properties in the context menu, and selecting Original in the Classification list. Note that this original ground surface must be a takeoff type of surface.
- Do one of the following:
- Select Define Strata in Takeoff > Takeoff.
- Right-click a depth surface or drill hole, and select Define Strata from the context menu.
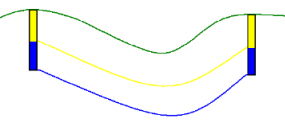
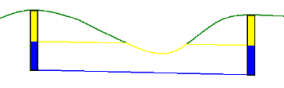
The Define Strata dialog displays. Original ground automatically appears in the row for the top stratum.
- In the Material Below Surface column, select the previously-defined, earthen material of which the original ground is composed.
- Click in the second row's Surface Name box, and type a unique identifier for the material level. This name is used for the depth surface that is created for the stratum, and appears in the Project Explorer.
- Press [Tab] to move to the Model Type list and select an option:
- Depth - Select this to define the top of the stratum as being at a constant depth below the Top strata surface.
- Elevation - Select this to define the top of the stratum as being at its true elevation (in the same manner as the original ground).
- Tab to the Material Below Surface box and select an earthen material for the second stratum.
- Tab to the next line and repeat steps 5 - 7 for each subsequent stratum on the job site.
- Click OK when you are done. A surface of zero depth is created for each stratum and appears in the Project Explorer. When you specify the thickness or depth of each strata by creating boring logs, the stratum surface appears in graphic views.
To edit strata:
- Repeat steps 3 above.
- Click in any boxes and edit strata names, model types, or materials, as needed.
- Select a row and click Move Up or Move Down to change the strata order, as needed.
- Click OK.
