Categorize Takeoff Layers
To prepare for takeoff calculations, begin by assigning the layers that your objects reside on to different categories, including:
- layers to be used in forming original and design surfaces for takeoff volumes calculations
- layers to be used in calculating quantities of site improvements
- custom layer categories that you can define in the Category Manager
- layers that you want to retain, but that are not needed for takeoff volumes or quantities
- layers that are unneeded and that you ultimately intend to delete
Tip: You can also use the Project Cleanup command to delete empty, unprotected layers.
Specifically, the default categories to which layers can be assigned are:
|
|
|
| Unknown |
This is the default category that all layers are placed in before you reassign them to other categories. When you create new layers in your project, they are automatically assigned to this category. Layers in this category are not used to form any takeoff surfaces. When you are setting up a standard layering convention, this is where source layers reside before you map them to standard layers. |
| Original |
Assign layers that will be used to create the surface representing the original ground to this category. For example, assign a layer containing topographic contour lines to Original. Note: Although the layers in this category contribute to the formation of the Original surface, an original earthen surface and a stripped surface (for example) might also be formed as a result of subsequent additions of data. These latter surfaces are closely related to the original surface, but they may be formed as a result of automated modifications made to the original surface based on information defining existing in-ground improvements and topsoil stripping areas. So, even though the Original category name suggests an association with a single surface, the layers assigned to it may contribute to the formation of additional, related surfaces. |
| Design |
Assign layers that will be used to create the surface representing the finished design to this category. For example, assign a layer containing building pad lines to Design. Note: Although the layers in this category contribute to the formation of the Design surface, a finished earthen surface and a finished mass earthwork surface (for example) might also be formed as a result of subsequent additions of data. These latter surfaces are closely related to the design surface, but they may be formed as a result of automated modifications made to the original surface, based on information defining existing in-ground improvements and topsoil replacement areas. So, even though the Design category name suggests an association with a single surface, the layers assigned to it may contribute to the formation of additional, related surfaces. |
| Utilities |
Assign layers that will be used to calculate site improvement quantities, other than those contributing to the formation of one of the surfaces to this category. For example, assign a layer containing underground pipes to Utilities. Assign site improvement types to the layers in this category by clicking the Assign Site Improvement button. |
| Other |
Assign layers that contain objects that you do not want to use in forming takeoff surfaces (but that you do not want to delete) to this category. For example, a layer containing a text block with information about the site should reside in this category. You can also assign layers that will be used to calculate site improvement quantities, other than those contributing to the formation of one of the surfaces to this category. For example, assign a layer containing underground pipes to Utilities. Assign site improvement types to the layers in this category by clicking the Assign Site Improvement button. |
| Unused |
Assign layers that you may ultimately want to delete to this category. |
|
Note: In addition to the default takeoff layer categories above, you can click the |
|
Each of these categories is represented by a different tab in the command. When you finish reassigning your layers to different categories and click Close, the Original and Design surfaces are created using the layers assigned to those categories.
Note: After you have assigned layers to takeoff categories, remember the assignments when you create new objects on those layers as they could affect your surface volume and takeoff calculations. You can rebuild your Original and Design takeoff surfaces outside of this command at any time by selecting Takeoff > Build Takeoff Surfaces or clicking the Build Takeoff Surfaces icon on the toolbar.
Note: The Original and Design surfaces created for takeoff are entirely layer-based. They are not dependent on members like surfaces you create using the Create Surface command and edit using the Add/Remove Surface Members command. For more information about member-based surfaces, see Understanding Generalized Surfaces.
Prerequisites:
- See the Subscription Plans page. For a license matrix by command, see the License page in the TBC Community. Also see View and manage licensed features.
- Layered data
Before you begin:
- 3D data that you want to use to define the Original and Design surfaces may be contained on several layers, especially when you are working from an original CAD design drawing. It is critical that you check that the surface created properly models your intention. In addition to the assignment of the site improvement, the surfaces to which they are applied must be accurate. Use the Layer Manager and the Properties pane to reorganize your 3D data for the Original and Design categories.
- Put data for area-based site improvements on their own layers.
To assign layers to categories for takeoff:
- Do one of the following:
- Select Categorize Takeoff Layers in Data Prep > Layers.
- Right-click a takeoff surface (subgrade, layer, depth, topsoil, etc.), and select Categorize Takeoff Layers from the context menu.
The Categorize Takeoff Layers command pane displays.
- There are generally two ways to assign layers to categories:
- Using only the tabs in the command:
- Click the tab for the category containing the layers you want to reassign.
Note: Generally, you will start by reassigning layers from the Other category to the Original and Design surface categories.
- Check the box for a layer to reassign in the top pane.
- In the Reassign layer list, select the category to which you want to assign the layer, and click Reassign. The layer is moved to the new category and appears on that category's tab.
- To highlight all of the layers that are assigned to the current category in graphic views, click Select in the pane.
- Using the Plan View and the tabs:
- Click the tab for the category to which you want to assign a layer.
- Pick an object in the Plan View. Its layer is added to the current category.
- When you are finished, click Close.
- Click the
 icon on the toolbar to build the Original and Design takeoff surfaces.
To create custom takeoff categories:
You can define up to three custom takeoff categories. For example, you could create a category for a surveyed surface based on an 'as-of' date between original ground and finished design dates. When you add layered data to a custom category, a corresponding surface is created when you build takeoff surfaces. These custom surfaces can also be selected in takeoff reports like the Earthwork Summary.
- Click the
 Manage Categories icon on the Categorize Layers pane's toolbar.
 - Check the Enable box and enter a name of the custom category.
- Repeat this for up to three categories, and click OK.
- Confirm the new category's tab in the Takeoff categories section.
To assign layers to categories using the View Filter Manager:
- Select View > View Filter Manager. The View Filter Manager displays.
- Click the
 icon on the toolbar at the top of the pane to enter the Zoom extents when filter changes mode.
 - Toggle the
 icon next to it to enter the Isolate Layer mode.
 - Click a layer to isolate the view to only the data that resides on that layer.
- To assign the layer to a takeoff category, right-click and select Assign to <category> from the context menu.
- When you are done assigning layers to categories, toggle the modes off.
Associating Site Improvements with Takeoff Layers
After you have categorized your layers, you will likely want to associate some of the layers to site improvements that you have defined in the Material and Site Improvement Manager using the procedures below. Doing so enables you to create various subgrade surfaces and report on their volumes in the Takeoff Report.
To assign linear- and count-based site improvements to layers:
- Check the box for a layer in a category (uncheck boxes for the other layers).
- Click the Associate with a Site Improvement button. The Layer/Site Improvement Association dialog displays.
- Select a site improvement definition in the Site improvement list. If there is a depth associated with the type, it displays in the Total material thickness box.
- If the site improvement type you need is not in the list, click the
 button. The Material and Site Improvement Manager displays.
 - Select or create a site improvement for the layer, and click Close.
- If the site improvement type you need is not in the list, click the
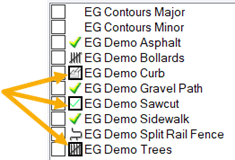
- Click OK. An icon showing the type of the associated site improvement appears next to the layer's name in the Categorize Takeoff Layers pane.
- If you want a linear-based site improvement to be available as a potential boundary for area-based site improvements, check the Contains potential site improvement boundaries box. A checkmark is added to the site improvement icon. Doing this makes the lines on the layer usable as site region boundaries in the Identify Site Regions command (see below).
To add edge boundaries to takeoff surfaces:
Use this option to automatically apply edge boundaries around the Finished Design and/or Original Ground takeoff surfaces when using the Categorize Takeoff Layers command. This function simply saves you the step of having to add an edge boundary using a different command.
- Click either the Original or Design tab.
- Select one or more layers in the list and check the Contains surface boundaries box to classify them as surface boundaries for the respective Design or Original surface.
A dark square icon appears in the layer list to indicate that the layers you selected are now also classified as surface boundary layers (similar to the green checkmark for site improvement boundary layers).
Note: Using this boundary function will overwrite any existing surface boundaries you created using other commands.
To assign area-based site improvements to site regions:
- Check the box for a layer in a category to select the layer.
- Check the Contains potential boundary lines box to make the lines on the layer usable as area boundaries in the Identify Site Regions command.
- Click OK. A checkmark appears next to the layer's name, indicating that lines on the layer will be available as potential boundaries for area-based site improvements.
When a layer is identified as a site improvement boundary in this way, all of the lines (whether open or closed) from the layer are highlighted yellow when you run the Identify Site Regions command. If you want to use the lines from a single layer, then you must uncheck the option for all other layers in the category.
- Now follow the steps in the Identify Site Regions help topic.
Note: You can also assign area-based site improvements to layers using the steps for linear- and count-based site improvements above, but using the Identify Site Regions command is recommended. See the help topic mentioned above for details.
