Drape an Image on a Surface
Use the following procedure to overlay one or more georeferenced images onto a surface to visualize how a job site's features relate to its topography. Draping an image on a surface enables you to correlate image details with surface elevations. To do this, simply add a georeferenced image to a surface as a member.
Prerequisites:
- License, See the Subscription Plans page. For a license matrix by command, see the License page in the TBC Community. Also see View and manage licensed features.
- Surface
- Georeferenced image that corresponds to the surface
To drape an image on a surface:
- Either import a georeferenced image or georeference an imported image that corresponds to the surface in your project.
- Select the image in the Project Explorer or pick it in the Plan View.
Note: To make images selectable in the Plan View, you may need to change their Selectable property in the Advanced View Filter Settings for the view.
- Add the image as a surface member using the steps in Edit a Surface by Adding and Removing Members.
- In the Properties pane for the surface, set the Shading property to By surface color for each graphic view in which you want to see the image.
- Click Close when you are done.
Scenarios:
- If the image is not coincident with the surface, it will still appear in the Plan View when you add it as a surface member, but will not be visible in the 3D View until you make the surface and image coincident.
|
|
|
|
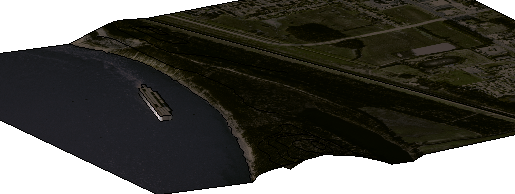
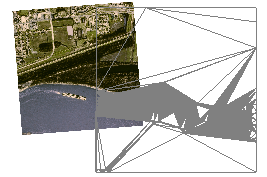
Partially coincident surface and image in the Plan View. |
Partially coincident surface and image in the 3D View. |
- When a surface has a material color, texture image, and draped image applied to it, the material overrides the color and the draped image overrides the material.
- If you have multiple images draped on a surface, you can control their display order by moving images forward or backward.
