Define Image Parameters
Optionally, tap the pull-down arrow above the Start Scan button.
The Scan Time & Images panel pops up showing the image parameters. Set the Images mode on to capture the images.
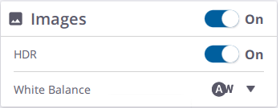
The Images icon when enabled means that the Images mode is on.

Set the HDR mode on to capture images with more color and detail in bright and dark areas. The HDR mode increases the acquisition duration. See HDR.

The HDR icon when enabled means that the Images and HDR modes are on.
After choosing a Scan Duration, and a Scan Mode, and setting the Images and HDR modes to on, the exact duration (in minutes and seconds) is updated.
![]()
| Scan Duration | Scan Mode |
Images Off
|
15 Images
(min:sec) |
15 Images + HDR (min:sec) |
30 Images (min:sec) |
30 Images + HDR (min:sec) |
|---|---|---|---|---|---|---|
| Indoor | Indoor | 01:10 | 02:10 | 04:10 | 03:10 | 07:10 |
| 2 Minutes | Standard | 01:35 | 02:35 | 04:35 | 03:35 | 07:35 |
| 4 Minutes | Standard | 03:43 | 04:43 | 06:43 | 05:43 | 09:43 |
| 7 Minutes | Standard | 06:39 | 07:39 | 09:39 | 08:39 | 12:39 |
| 4 Minutes | Sensitive | 03.33 | 04:33 | 06:33 | 05:33 | 09:33 |
| 7 Minutes | Sensitive | 06:54 | 07:54 | 09:54 | 08:54 | 12:54 |
| 15 Minutes | Sensitive | 15:40 | 16:40 | 18:40 | 17:40 | 21:40 |
![]()
CORE LT (500 kHz - 40 m) & CORE (500 kHz - 80 m):
| Scan Duration
|
Images Off
(min:sec) |
15 Images
(min:sec) |
15 Images + HDR (min:sec) |
30 Images (min:sec) |
30 Images + HDR (min:sec) |
|---|---|---|---|---|---|
| Indoor | 00:50 | 01:50 | 03:50 | 02:50 | 06:50 |
| 2 Minutes | 02:03 | 03:03 | 05:03 | 04:03 | 08:03 |
| 4 Minutes | 03:33 | 04:33 | 06:33 | 05:33 | 09:33 |
| 6 Minutes | 05:36 | 06:36 | 08:36 | 07:36 | 11:36 |
PREMIUM (1000 kHz - 150 m):
| Scan Duration
|
Scan Mode | Images Off
(min:sec) |
15 Images
(min:sec) |
15 Images + HDR (min:sec) |
30 Images (min:sec) |
30 Images + HDR (min:sec) |
|---|---|---|---|---|---|---|
| Indoor | Indoor | 00:50 | 01:50 | 03:50 | 02:50 | 06:50 |
| 2 Minutes | Standard | 02:03 | 03:03 | 05:03 | 04:03 | 08:03 |
| 4 Minutes | Standard | 03:33 | 04:33 | 06:33 | 05:33 | 09:33 |
| 6 Minutes | Standard | 05:36 | 06:36 | 08:36 | 07:36 | 11:36 |
| 2 Minutes | High Speed | 01:27 | 02:27 | 04:27 | 03:27 | 07:27 |
| 4 Minutes | High Speed | 03:15 | 04:15 | 06:15 | 05:15 | 09:15 |
| 6 Minutes | High Speed | 06:08 | 07:08 | 09:08 | 08:08 | 12:08 |
Keep the White Balance correction mode to Auto or select a preset for either indoor or outdoor shootings like Cloudy, Sunny, Fluorescent and Incandescent. See White Balance.
-
 Auto is recommended when the lighting conditions are inconsistent.
 -
 Sunny is for outdoors in bright sunlight.
 -
 Cloudy is for outdoors on overcast days.
 -
 Fluorescent is for indoors when bright fluorescent lighting is present.
 -
 Incandescent is for indoors when more natural incandescent lighting is present.
You can change the Images mode, the HDR mode, and the White Balance correction preset during the Initialization step (see Initialization), before the images are captured and during the scan.
In the  Settings > Images panel, choose the Number of Images to capture. Optionally, automatically create a Preview Panorama from the images following their acquisition.
The Scan Mode and Images panels pop up showing the parameters.
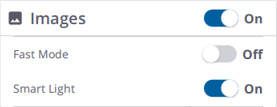
Images: Set this mode on to capture the images. After choosing a Resolution, and a Quality, the exact duration (in minutes and seconds) is updated.
The scanner always takes HDR images and the HDR algorithm determines the number of images required for the HDR exposure based on the current lighting conditions.
 Fast Mode:
-
Activate this mode for most lighting conditions to save time. It will capture 2-5 images from each position depending on the lighting conditions. The image acquisition is approximately two minutes.
-
Deactivate this mode in extremely bright or dark ambient conditions. It will capture 3-7 images from each position, increasing the image acquisition time to approximately 2 minutes 30 seconds. In extremely bright or dark ambient conditions, you may consider deactivating the Fast Mode if getting the highest quality panorama is more important than saving time.
 Smart Light: This mode should be activated to improve the color quality in poor lighting conditions and completely dark environments. It can also be activated in all lighting conditions for general overall improvements and to speed up the image acquisition time.
