Advanced Graphics Options
Use these options to control which graphics display package the program uses. In certain situations, choosing to use a different display package can improve graphics performance when you are exploring rich data sets in the Plan View and 3D View.
Note: You might need to override your graphics display package if, for example, you are accessing (via Remote Desktop or Microsoft® NetMeeting®) this program on your computer from a remote computer that uses a different graphics package.
To access these settings:
- Select Options. The Options dialog displays.
- Click Startup and Display in the left pane.
- Click the button in the Graphics Window Options group.
- Select the appropriate options in the Advanced Graphics Options dialog (see below), and click OK.
|
Advanced Graphics Options |
|
| Graphics Display Package |
Override automatic detection - Check this box if you want to manually select a graphics display package other than the one detected on your computer. Then, select from one of the available options. |
| Graphics Adapter |
Texture map size - This setting is primarily for Technical Support to use if images will not display because your operating system is reporting that the graphics card is out of memory. Contact Technical Support for assistance. Color mapping resolution - Select the color resolution to use for shading on a surface or cut/fill map. Try changing the resolution (the default is 1024 colors) if shading is not displaying correctly. |
| Framerate |
These controls allow you to specify whether the software displays 3D scenes using a frame rate (frames per second) that determines how often the scene is refreshed when you perform a pan or rotation. Use framerate - If this option is not selected, the software will refresh the scene using as much time as necessary. This can result in jerky movement as the scene "jumps" to a the new location. This is particularly noticeable when working with large models. If this option is selected, the software will refresh the scene based on the frame rate specified in the Frames per second drop-down list. Depending on the frame rate you specify, this can result in smoother movements when you pan or rotate. (Again, this is particularly noticeable when working with large models.) However, it can also result in some geometry not displaying until after the movement from one location to another is complete. For example, if you select a frame rate of 10 frames per second, the software will draw whatever it can within 1/10 of a second, then repeat as necessary. This means some geometry may not get drawn until the movement is complete (that is, it could not be drawn within the transitional frame rate of 1/10 of a second). Frames per second - Select the frame rate you want the system to use to display 3D scenes. Selecting a faster frame rate will result in smoother movement when you pan or rotate the scene. However, some geometry (for example, text labels) may not display until the movement is complete. Selecting a slower frame rate will result in less smooth transitions, but geometry is less like to disappear during the movement.` |
| Anti-Alias |
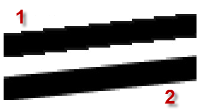
Use anti-alias - Select this option to diminish stairstep-like lines ("jaggies") that you want rendered more smoothly. Jaggies occur because the output device (monitor or printer) does not have a high enough resolution to represent a smooth line. Anti-aliasing reduces the prominence of jaggies by surrounding the stairsteps with intermediate shades of gray (for gray-scaling devices) or color (for color devices). Note that although this reduces the jagged appearance of the lines, it also makes them fuzzier.
Note: Turning on anti-aliasing will affect performance when panning and zooming. Samples per pixel - Increasing the number of samples per pixel increases the amount of anti-aliasing, resulting in smoother edges. A value of 4 specifies four samples per pixel. |
| Use smoothed shells |
Check this box to use smooth rendering for IFC shell objects. This will make them display sharper and more defined, but will take longer to render and regenerate. |
| Fast image blending |
When you zoom in very close on overlapping images in the 3D View, panning the view can be extremely slow. Select this option to specify that panning performance be greatly enhanced in these situations, but note that overlapping images with transparency will no longer blend together; the image on "top" will display. Using the Background Transparency options in the Properties pane for an imported image file can help in some cases. |
