Elevate Contours by Crossing
If your project contains zero-elevation or 2D lines that represent surface contours, you can quickly elevate them by crossing them with a line that applies elevations based on a specified starting elevation, increment direction, and contour interval.
If two or more of the contour lines already have elevations, you can also use an automatic mode that determines the settings based on the elevations of the lines that the crossing line encounters. In the Automatic mode, at least two of the crossed lines must have different elevations from which the slope direction and interval can be determined. To easily identify which lines have been elevated, set your zero-elevation data to an alternate color in the View Filter Manager and open a 3D View alongside the Plan Viewbefore using this command.
Tip: If any of the 2D lines have in-line elevation labels, use the Elevate Contours by Label command before this so that you can use the Automatic option in this command. If you still have individual lines without elevations after you elevate contours by crossing, use the Set Line Elevation command to elevate them.
Prerequisites:
- License for a module. To see which modules license this command, see Licensed Features.
- Contour lines
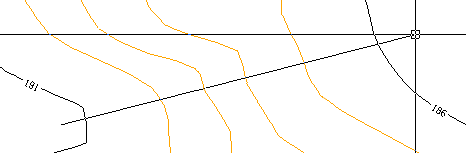
To elevate contour lines by crossing them:
- Select View Filter Manager in Views > View.
- Click the Display Options tab at the bottom of the manager, and select Display in alternate color.
- Choose a new color in the Alternate color list.
- Select View > New 3D View. Then right-click the 3D View tab and select New...Tab Group so you can see both the Plan View and 3D View at the same time.
- Select Elevate Contours by Crossing in Data Prep > Elevate.
The Elevate Contours by Crossing command pane displays.
- If some of the lines already have elevations assigned, confirm that the Automatic box is checked to have the contour interval, increment direction, and beginning elevation automatically determined. Then, proceed to step 10. Otherwise, uncheck the Automatic box.
- Specify the vertical distance between the contour lines in the Contour interval box. You can also use the
 and
and  buttons to decrement and increment values, respectively.
 - Specify whether you want the elevations to increase or decrease from the first line crossed by setting the Increment direction.
- In the Beginning elevation box, specify the elevation of the first line that you will cross with the crossing line.
For example, if the first two contour lines to be crossed show elevations of 480 and 478, specify the contour interval as2.0and set the increment direction to Down. - Click in the From box and pick a point in the Plan View for the beginning of the crossing line.
- Pick another point in the view for the end of the crossing line. This coordinate is entered into the To box and automatically becomes the From point after the elevations are applied.
- To use the same elevation method settings, but start a crossing line from a different point, click in the From box again.
- When you are done, click Close.
