Manage Stations
Do one of the following:
 Display Station Properties
For each station, there are two levels of properties. From the Stations List panel, tap a station card to select the station.
Tap  in a station card to select the station.
-
SUMMARIZED PROPERTIES: The most relevant information is displayed: station name, registration set name, label(s) (if available), images (A) (if captured), area scan(s) (B), panorama (C) (if created), and colorization (D) (if applied to the scan) as well as a quick access to the most used features (
 Register Station,
  Station View (or
  Map View), and
  Add Label).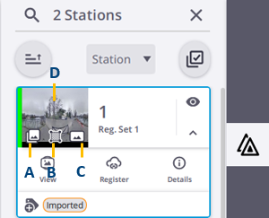
Tap:
 to display the current station, and all the related area scans.
  to display the hidden scans (full dome or area) of the current station.
  to hide the current station and all the related area scans. Hiding all displayed stations also hides all the station positions, labels, registration links and all created annotation and precision points (see Points Tool).
-
DETAILED PROPERTIES: Tap
 Details:
-
To access the hidden features (Register Station, View Images (or Retake Images) for X12 only, Export Station, Process Images, and Delete).
-
And
Details to view the properties in detail (registration status, leveling status, scanner's model (X7, X9 or X12) and configuration (Core LT, Core or Premium) for X9 only, scan duration, scan mode, etc.). 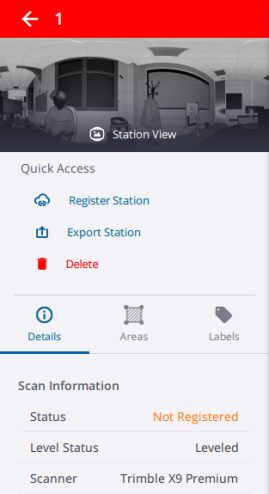
-
And
 Areas to display (or hide) all available scans (full dome scans and/or area scans). Each area scan can be viewed (either in the Map View or in the Station View) or deleted.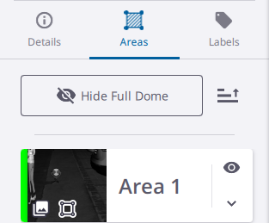
Tap to hide the current full dome scan, or to display the current full dome scan.Tap
to expand an area scan card, and choose: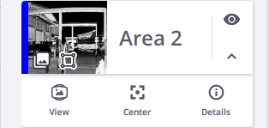 and to switch between the Station View and the Map View.
 to center the current area scan to the center of the Station View. to view the properties of the current area scan and to delete it
 -
And
 Labels to search or create new labels (see Add Labels):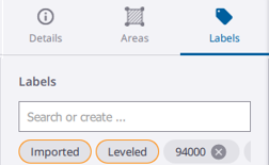
-
Filter Stations
In the Stations List panel, tap the pull-down arrow and choose:
-
STATION to filter the stations per station name, in ascending (or descending) order.
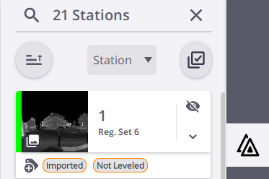
When you hide (or display) a station from this panel, you hide (or display) all the contents: scan, markers (position and label), registration link and created annotations or precision points.
-
REG. SET to filter the stations per registration set, in ascending (or descending) order. Expand a registration set to see all the stations in the set.
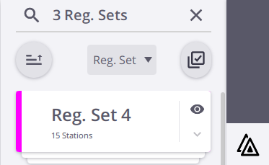
When you hide (or display) a registration set from this panel, you also hide (or display) all the contents of the set (scans, station markers (positions and labels), registration links and created annotations or precision points in the Map View and 3D View and all markers (positions and labels) and created annotations or precision points of the set in the Station View.
Find a Station
In the Map View, tap the  Marker of a station and choose
  Find Station from the pop-up menu.
-
The Stations List panel opens (if it is closed).
-
The Station Details panel closes (if it is opened).
-
The Area Scan tool closes (if it is opened).
-
The station becomes the selected (current) station in the Stations List panel.
The Find Station feature is not available when the  Multi-Selection is enabled in the Stations List panel. See Export Stations.
Delete Stations
When you delete a station from a project, Perspective deletes all the related scans (full dome and area(s)).
-
 &
&  - Project file(s) (TZF, and/or TCF, and/or TPF) from the database and/or (TZF, and/or TCF) from the ScanData folder in the memory card*.
-
 - Project file(s) (TZF, and/or TOI, and/or TPF) from the database and/or (TOS, and/or TOI) from the internal memory of the scanner*.
 -
Any associated points. If these points have been matched with control points, consider to georeference the project again.
(*) Only if the Delete from Scanner option has been chosen and the scanner connected to the controller.
Stations are named following a sequence, starting at one for the first station and incrementing in one digit for the second station, etc. When you delete Station N, the sequence is not disrupted, meaning that the next station is Station N+1.
To do one of the following:
- In the Map View, tap to display the pop-up menu and choose
 Delete.
 - In the Stations List panel, tap to display the properties of a station, and tap Delete.
- Tap to display the properties of a station, and tap Delete.
- Tap
 to open the Stations Selection tool, select one or more stations, and tap Delete.
- Tap
When you delete a station from a project, you delete its related scan, markers (position and label), registration link and created annotations (or precision points) and associated control points from any view.
You can delete all existing stations except the one being captured.
Export Stations
Stations are exported in a folder named according to the project name followed by the export format. As for the export of a project, if the station has a high quality panorama, Perspective exports the high quality panorama as a 360° image in JPEG format in a specific folder (HQ Panorama Images), and the registration information (location and orientation) of the high quality panorama in a CSV format file with the following information:
-
Name of the JPG station panoramic images.
-
Location expressed with X,Y,Z coordinates in meters (International System of Unit).
-
Orientation using the center of the image as reference and expressed as a quaternion (qx, qy, qz, qw).
Export a Set of Stations
-
Tap
to open the Stations List panel. -
(Optional), filter the stations by name(s) or by label(s):
-
Tap
 to open the Search field in the StationsList panel.
 -
Filter the stations by name.

-
Type the station names separated by commas (e.g. 1, 3, 8) and (or) station ranges separated counting from the start of the station or the selection (e.g. 5-8).
To make the station names easy to read, you can put a space before and after a comma.
-
Type
(or Enter).Filtered stations remain displayed, and you can add new ones to filter.
Tap
 to switch to the label filtering and to clear the filtering.
 -
-
Or filter the stations by label(s):

-
Enter a label name and type Enter.
-
Or select a label from the drop-down list (if any).
-
Or select a label from the list of labels (if any) for a station.
Tap
to switch to the station filtering and to clear the filtering. -
-
Tap
 to close the Search field.
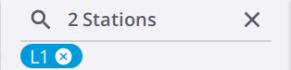
You delete a label filtering by removing it.
-
-
Select a set of stations:
-
Tap
to open the Stations Selection tool. If no filter has been applied, all stations in the project are displayed. If a filter has been applied, only the filtered stations (either by name(s) or by label(s)) are displayed. In the Reg. Set. display mode, a Reg. Set. with no filtered station(s) is not displayed.-
Tap a station card to select the station. Tap again the station card to deselect the station.
-
Tap
to select all the filtered stations. Tap again to deselect the selected stations.
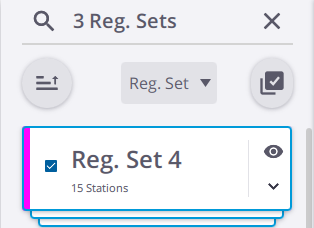
You can select a registration set and export all the stations of the set.
-
-
(Optional), tap
to delete the selected station(s).
Selecting all stations in the project to export is similar to exporting the whole project (see Export a Project). The project has to have at least two stations.
-
-
Tap
 Export:
-
(Optional), if some stations have been selected, choose Colorize Point Clouds and Create High Quality Panorama.
-
(Optional), if all stations of the project have been selected, in addition to the options above, choose Refine Project and/or Georeference.
-
(Optional), choose Export Annotations (.csv) if there are some annotations and/or precision points in the selected stations.
-
Choose:
-
Local to export the selected stations locally on your device. Tap
 to choose the export path, and
  to choose the appropriate format to export to (see Export a Project for the available formats).
 -
Cloud to ulpoad the selected stations to Trimble Reality Capture Service (see Upload to TRCPS) or to Trimble Field Data Service (see Upload to TFDS).
-
-
-
Tap
to close the Stations Selection tool.
Export a Single Station
-
Do one of the following:
-
Tap
in the Map View to display the pop-up menu. -
Tap
to open the Stations List panel:-
Expand a station card and tap
Details. -
Or tap
to open the Stations Selection tool, and select a station.
-
-
-
Tap
Export:-
(Optional), choose Colorize Point Clouds and Create High Quality Panorama.
-
(Optional), choose Export Annotations (.csv) if there are some annotations and/or precision points in the selected station.
-
Choose:
-
Local to export the selected station locally on your device. Tap
to choose the export path, and to choose the appropriate format to export to (see Export a Project for the available formats). -
Cloud to upload the selected stations to Trimble Reality Capture Service (see Upload to TRCPS) or to Trimble Field Data Service (see Upload to TFDS).
-
-
-
Tap Export.
Delete Area Scans
When you delete an area scan from a station, Perspective only deletes the area scan.
-
& - Project file(s) (TZF, and/or TCF) from the database and/or from the ScanData folder on the memory card*.
-
- Project file(s) (TOS, and/or TOI) from the database and/or from the internal memory of the scanner*.
(*) Only if the Delete from Scanner option has been chosen and the scanner connected to the controller.
Area scans are named following a sequence, starting at one for the first area scan and incrementing in one digit for the second area scan, etc. When you delete Area N, the sequence is not disrupted, meaning that the next area scan is Area N+1.
To delete an area scan:
- From the StationsList panel, display the properties of a station by tapping Details.
- Tap Areas.
- Tap to expand an area scan card and choose .
Colorize Scans
To colorize a full dome scan, tap  Process Images from the Stations List panel. See Colorize Scans.
Create Panoramas
To create a high quality panorama from a full dome scan, tap Process Images from the Stations List panel. See Create Panoramas.
